Perplexity Setup
Connect Penfield to Perplexity using the custom connector system. This guide covers Comet browser, Perplexity Web, and Perplexity Computer.
Prerequisites
- A Penfield account (sign up here if you haven't already)
- A Perplexity account with a Pro or Max subscription
Step 1: Open Connectors
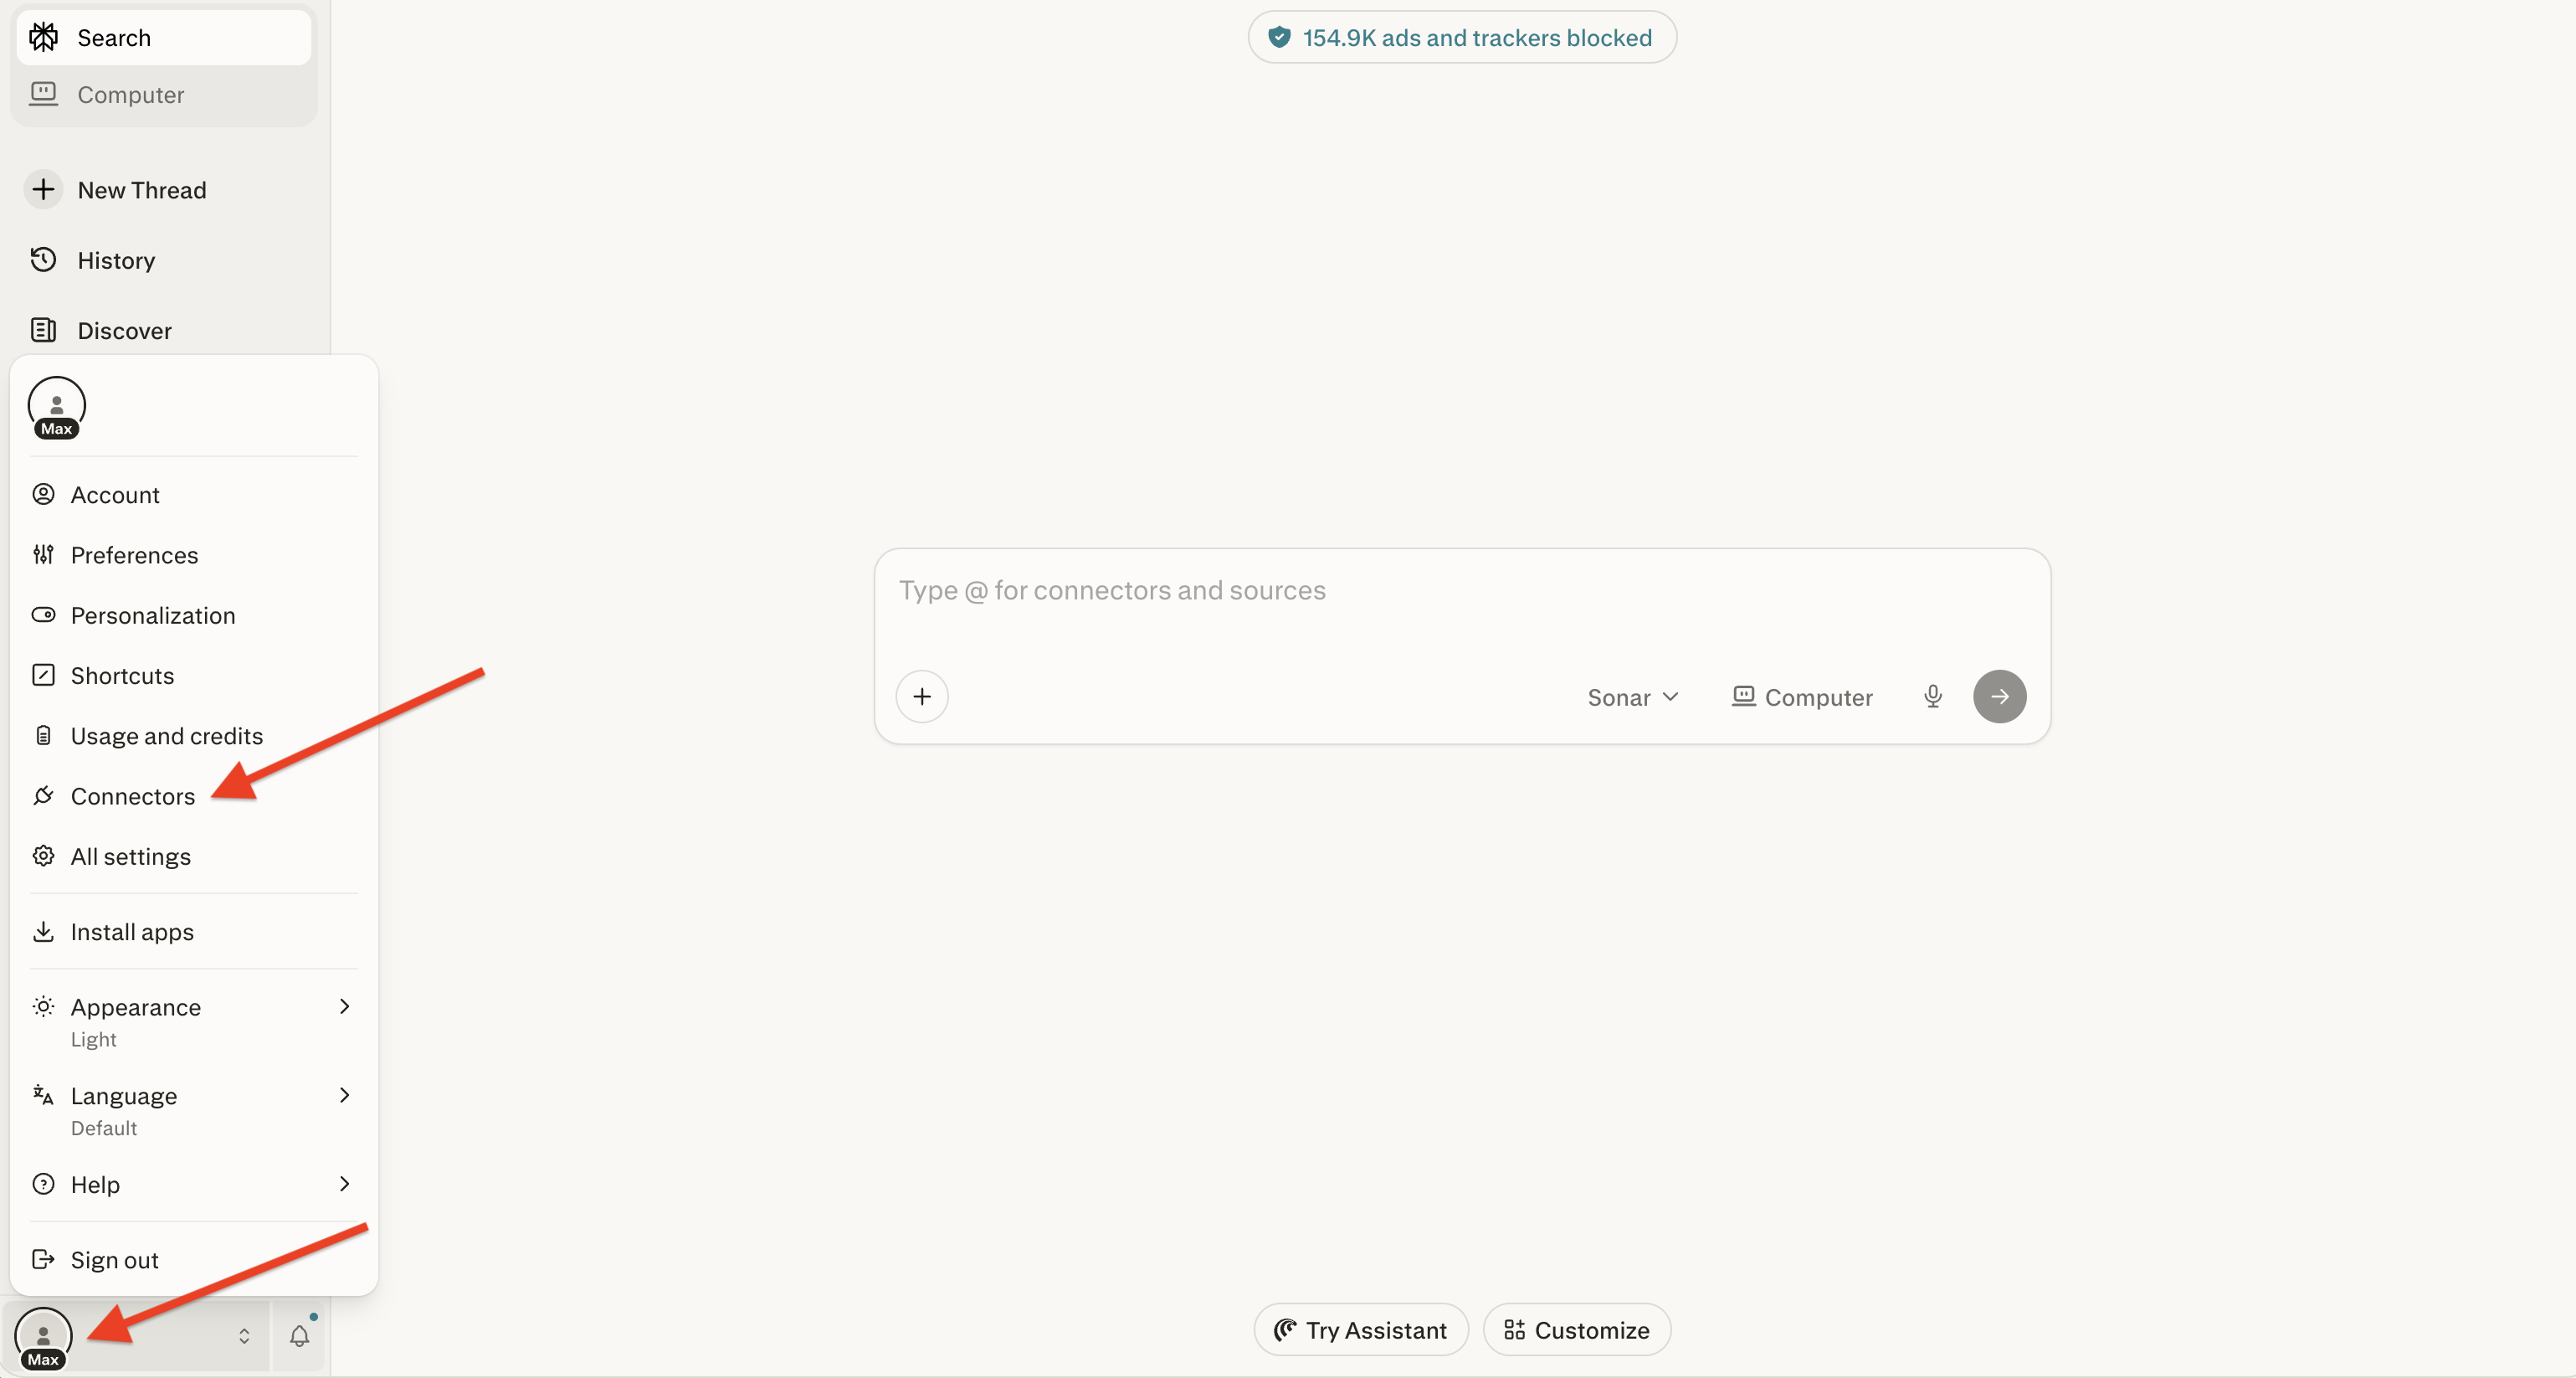
Click on your profile icon in the bottom-left corner, then click Connectors.
Step 2: Add the Penfield Connector
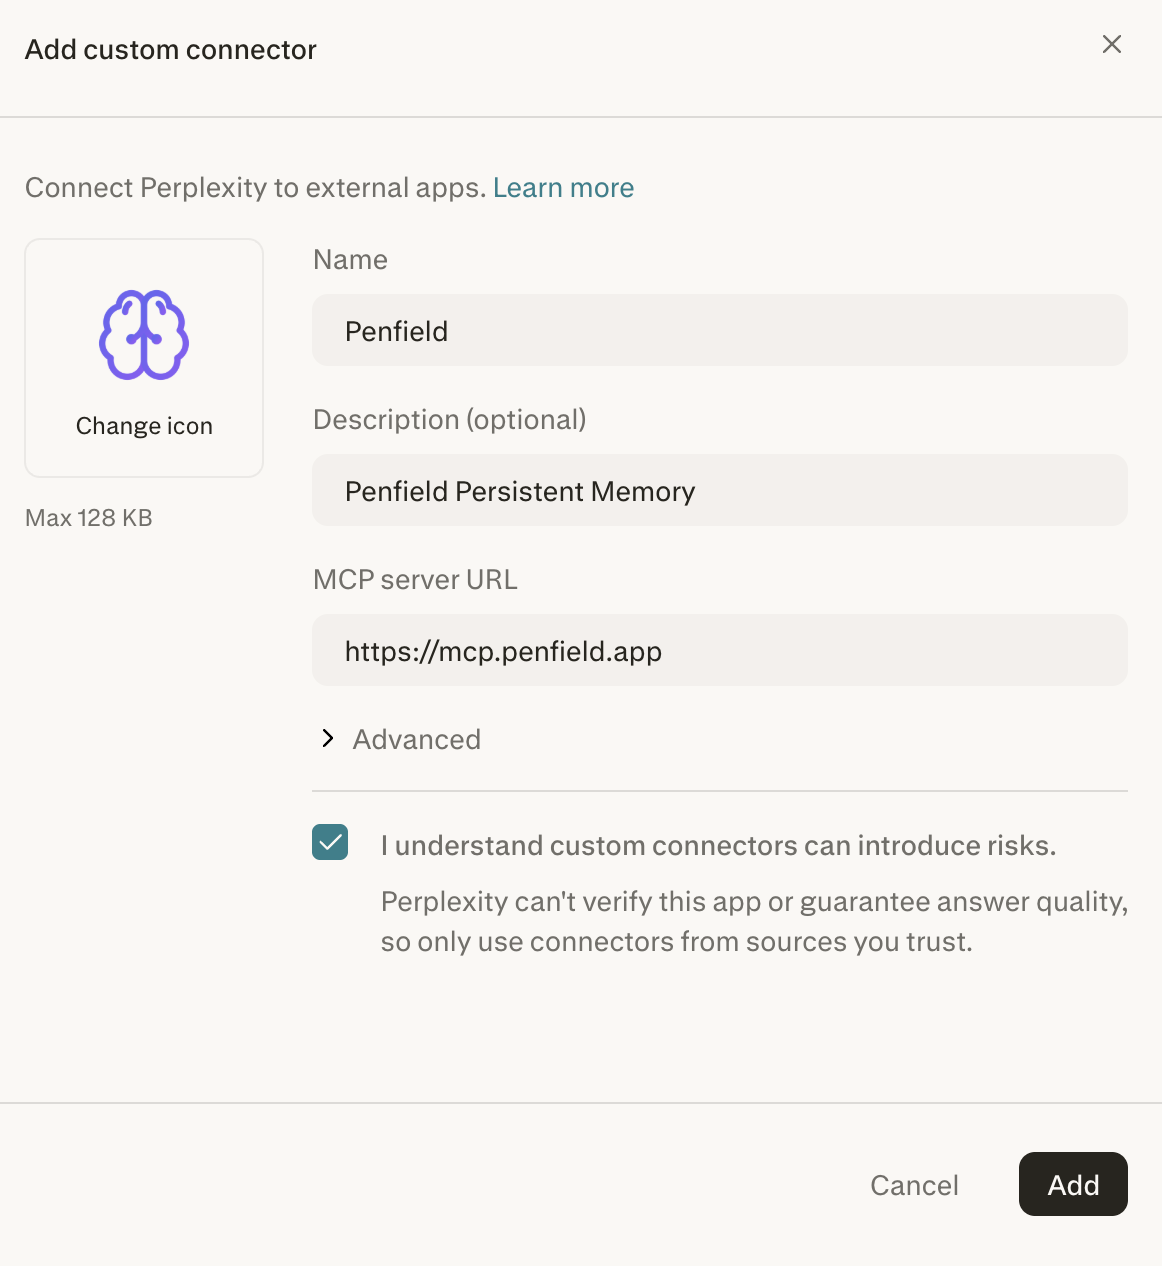
In the "Add custom connector" dialog, check the acknowledgment checkbox, then enter the following details and click Add:
| Field | Value |
|---|---|
| Name | Penfield |
| Description (optional) | Penfield Persistent Memory |
| MCP Server URL | https://mcp.penfield.app |
Optionally, click Change icon to add the Penfield logo from https://docs.penfield.app/logo.png.
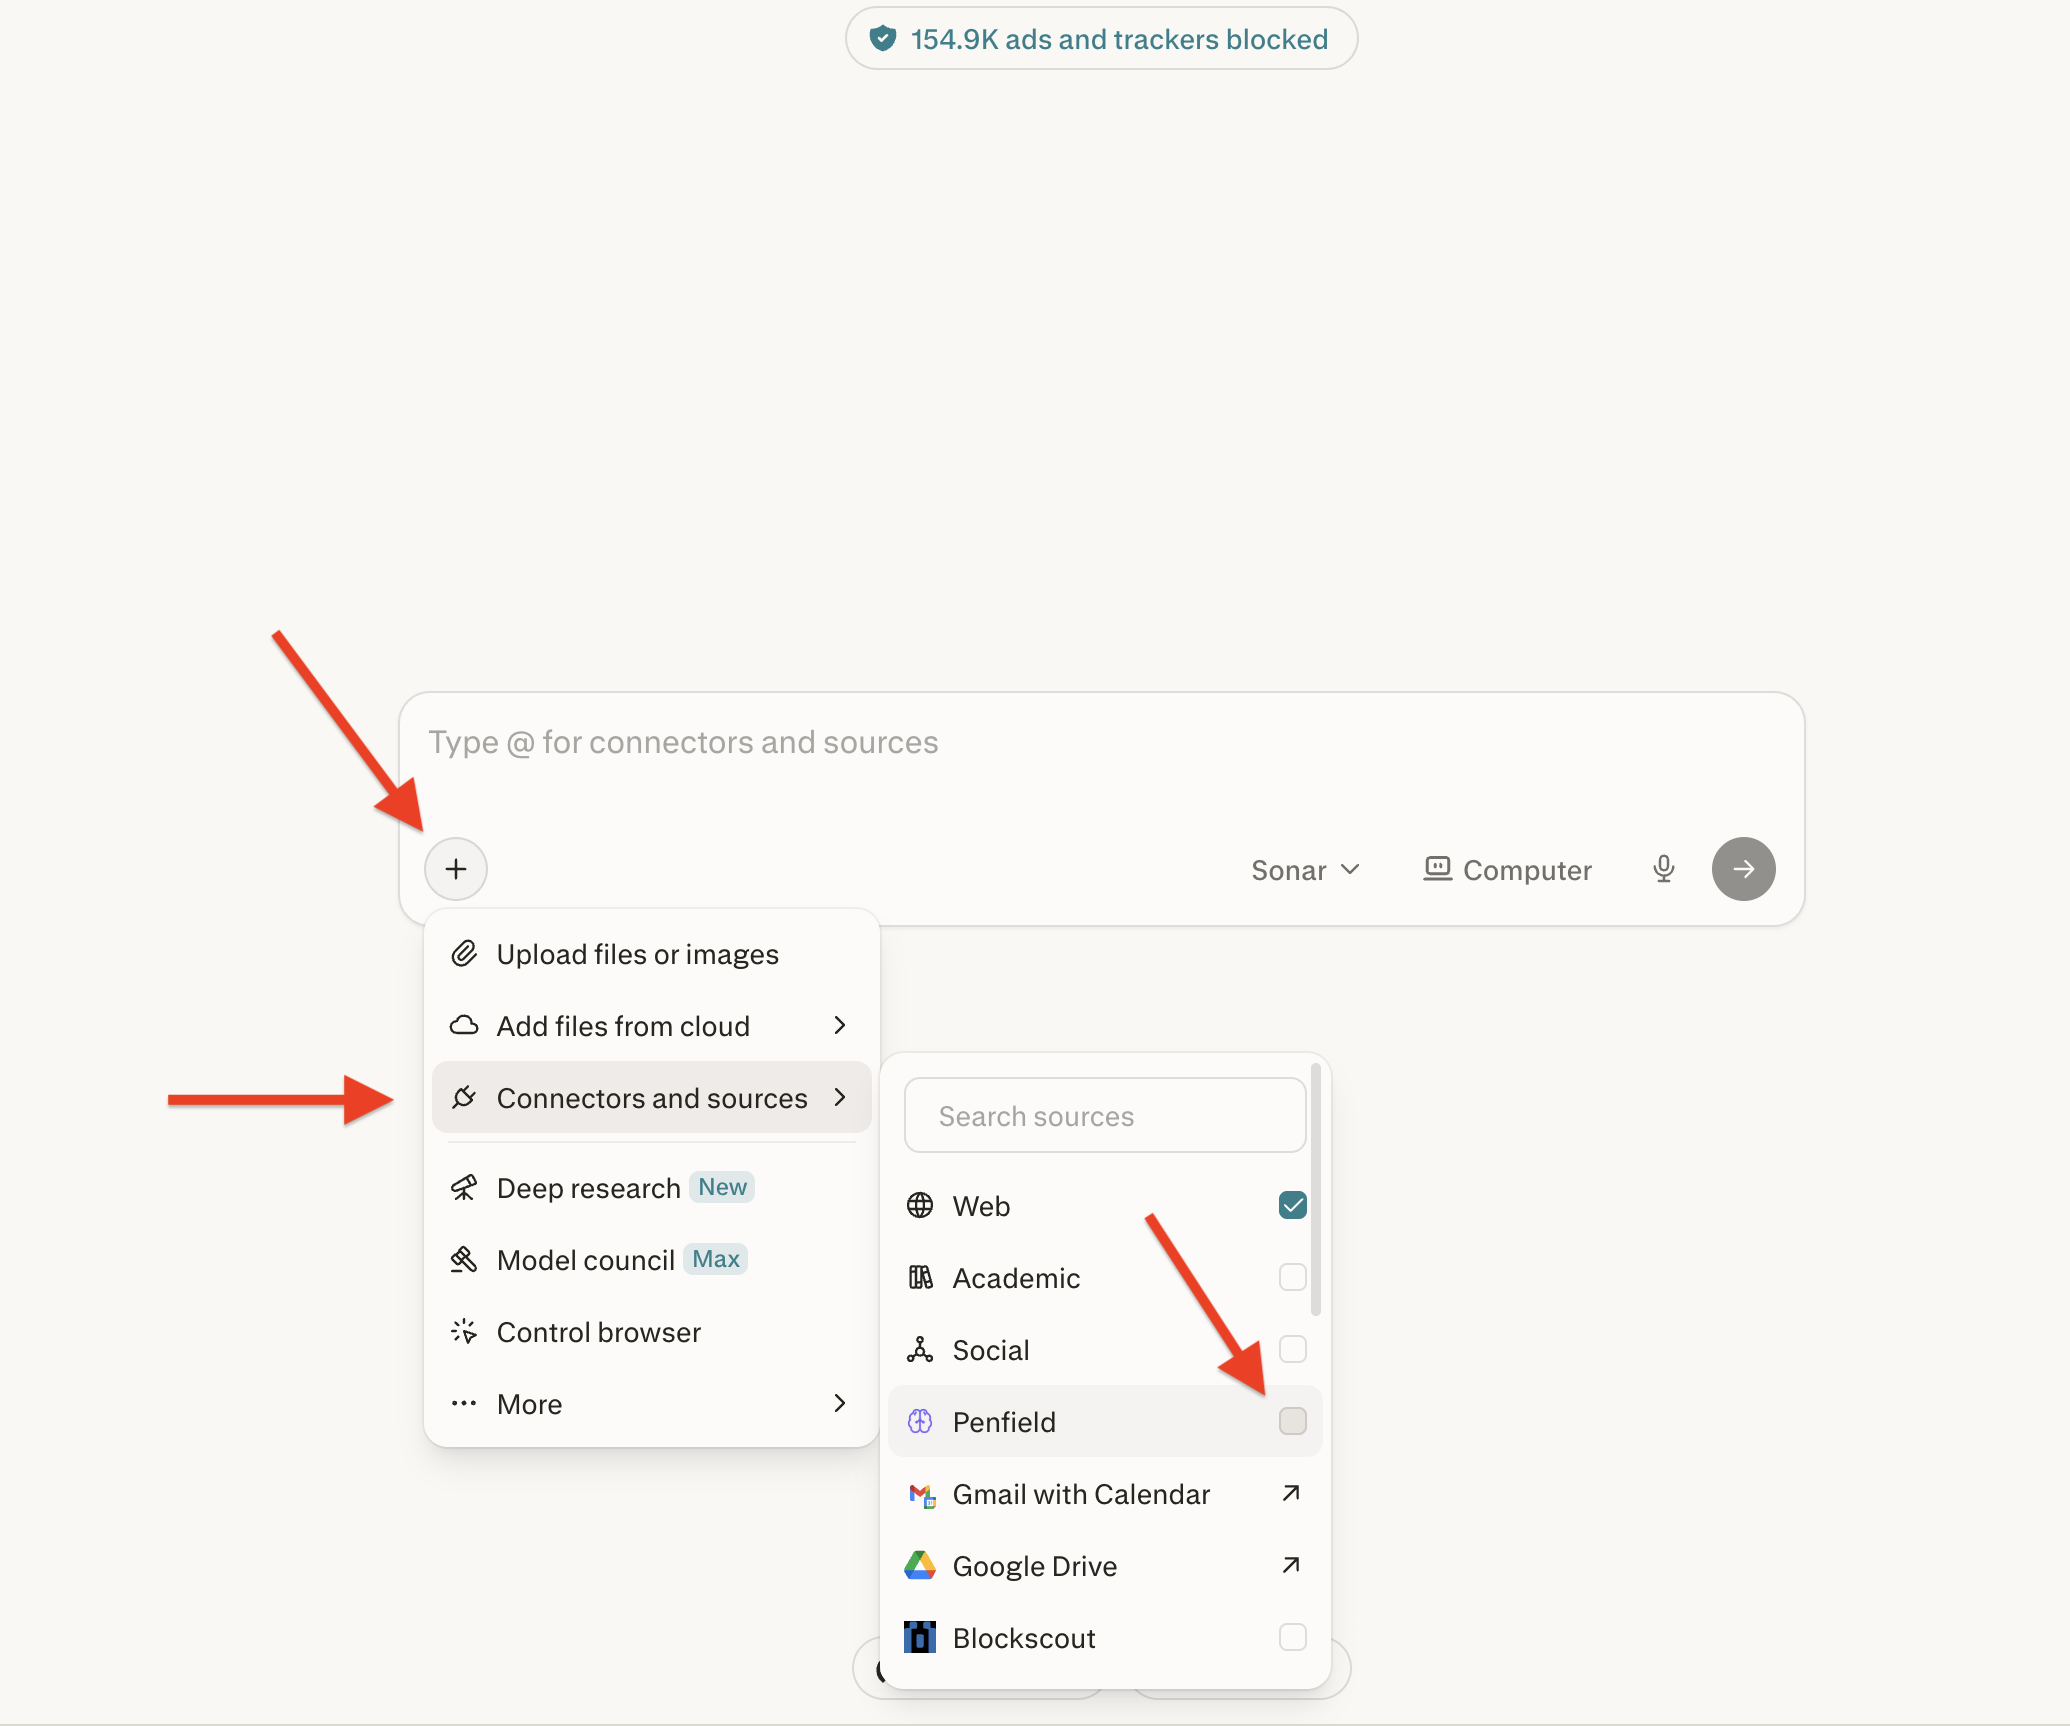
Step 3: Select Penfield in a New Search
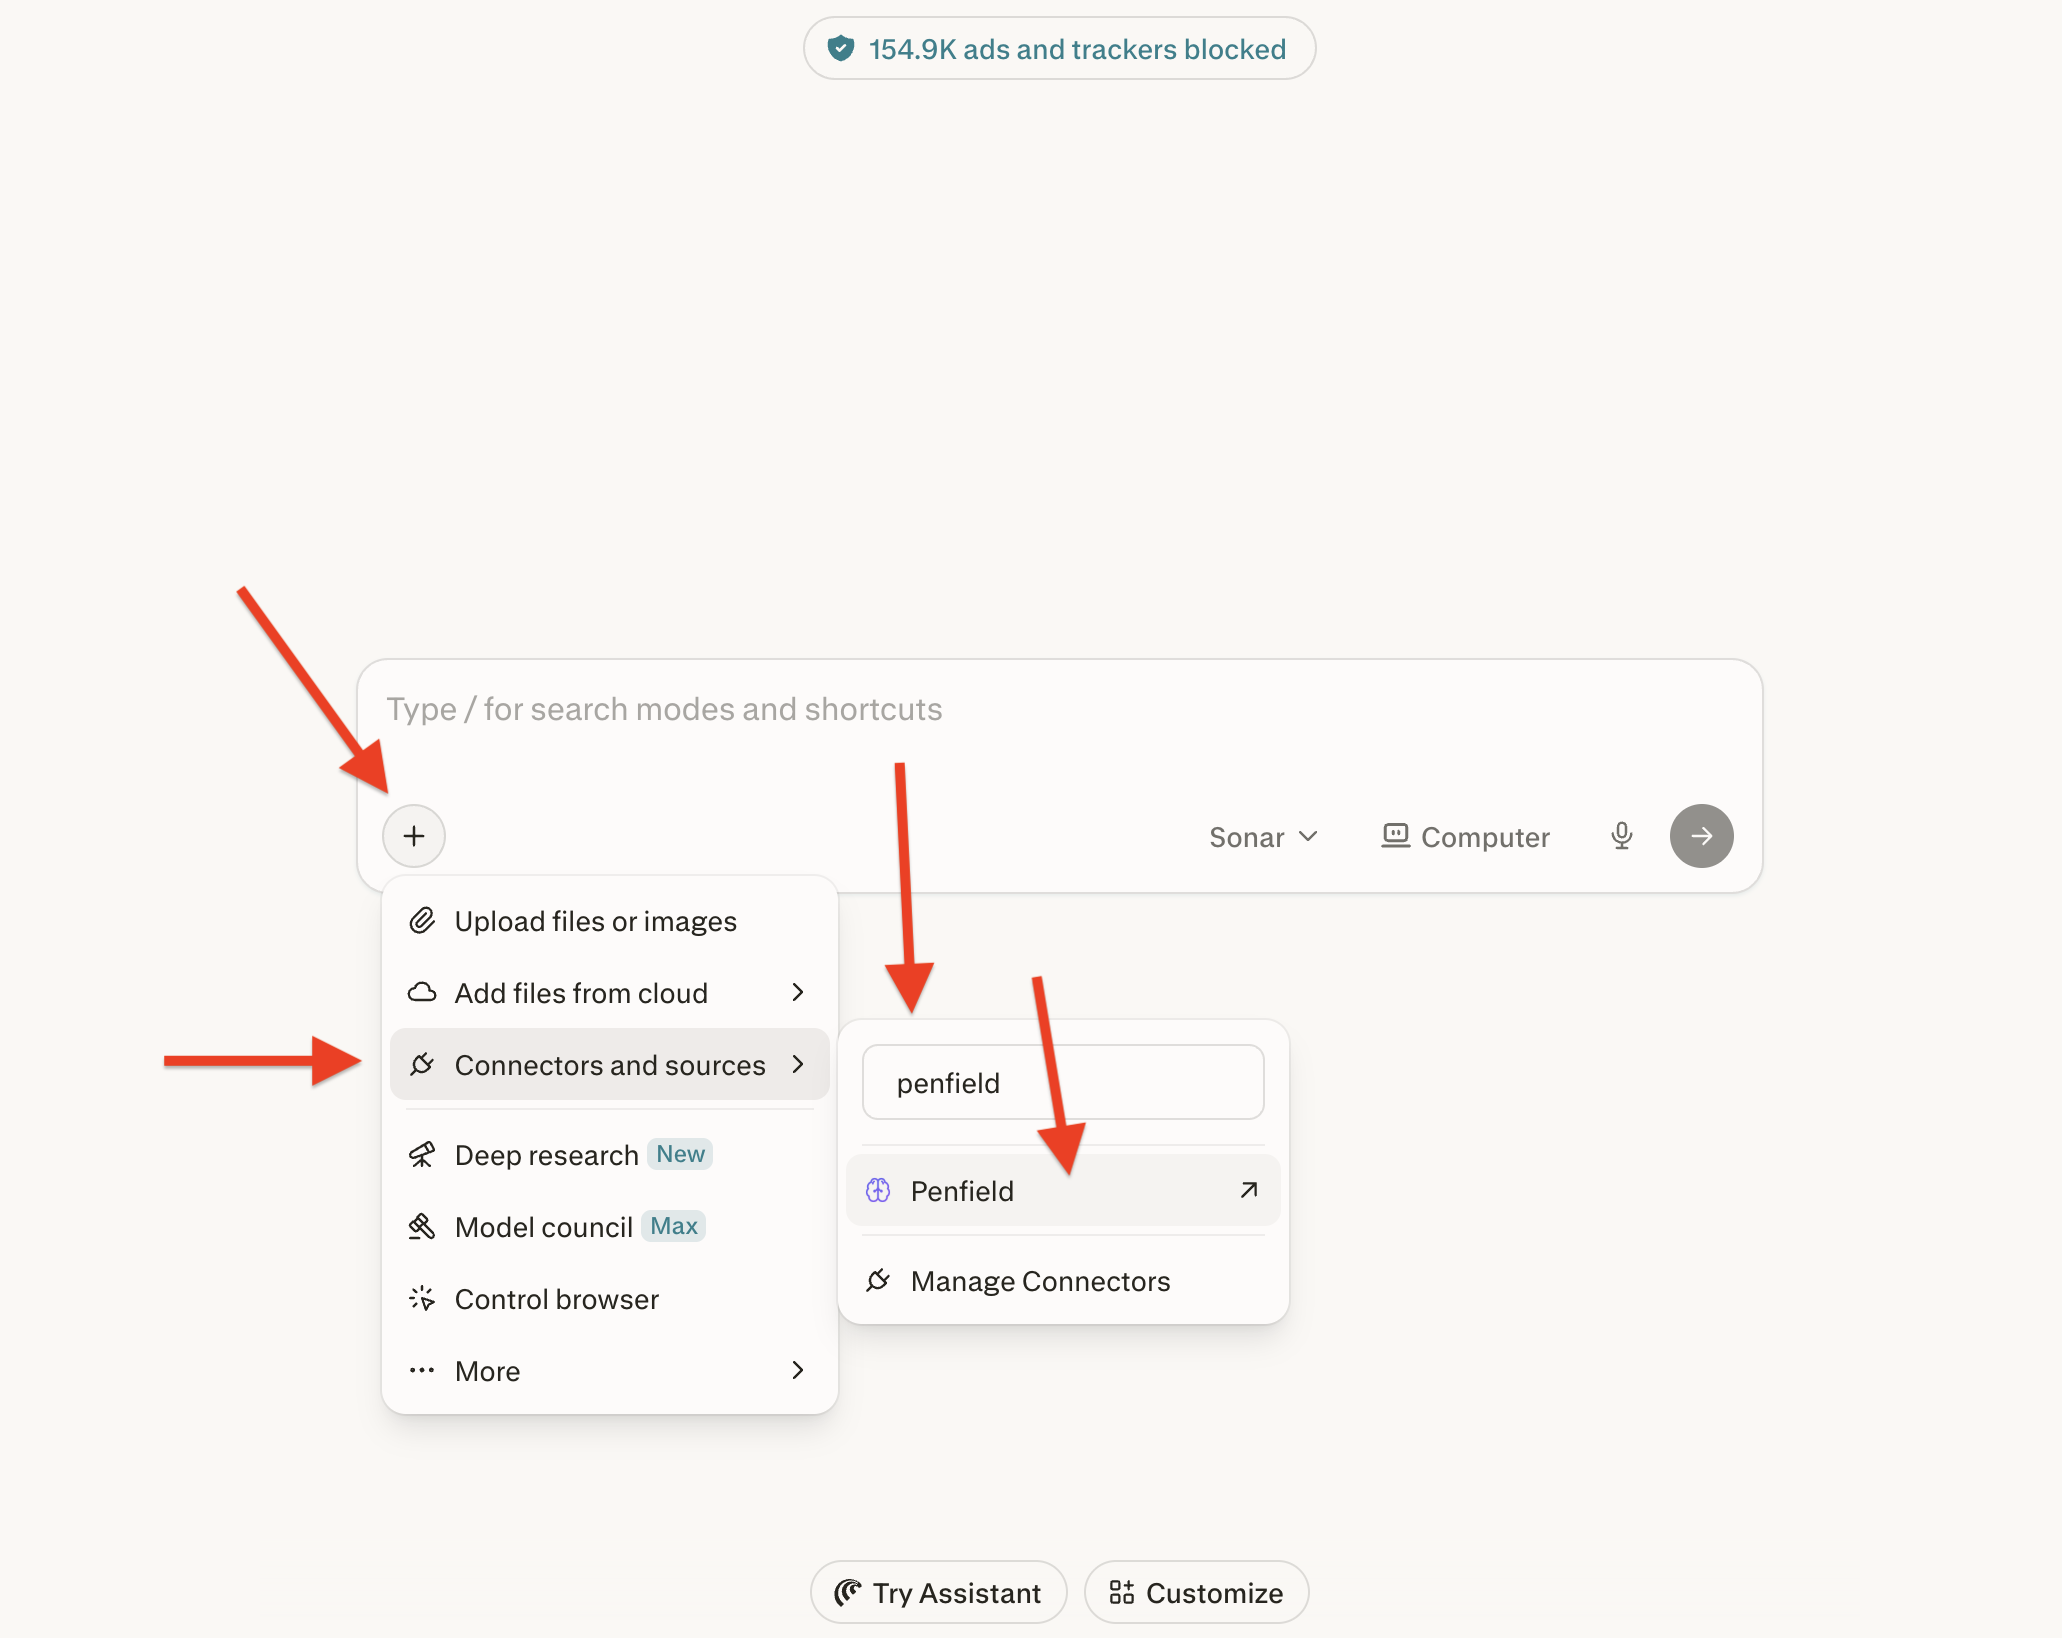
Open a new search task. Click the + button, then Connectors and sources. Search for "Penfield" if it's not already displayed, then click Penfield.
Step 4: Add Connector
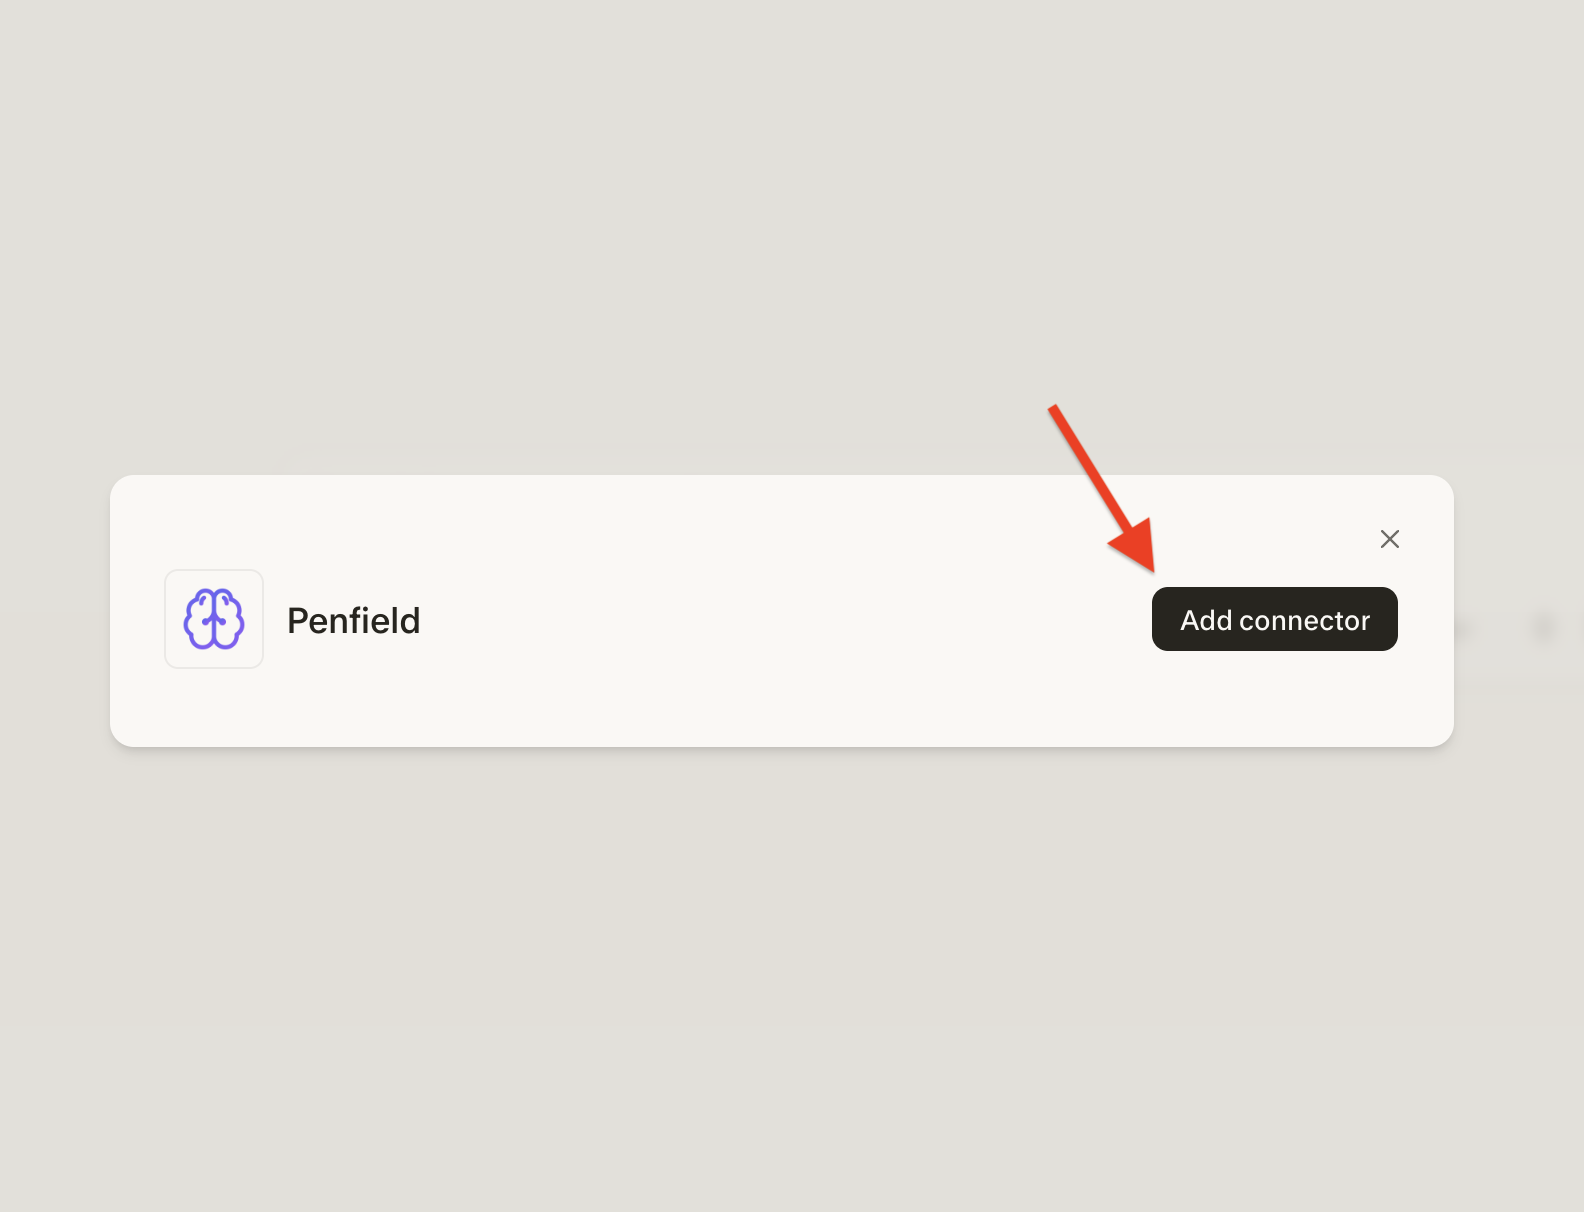
Click the Add connector button to confirm.
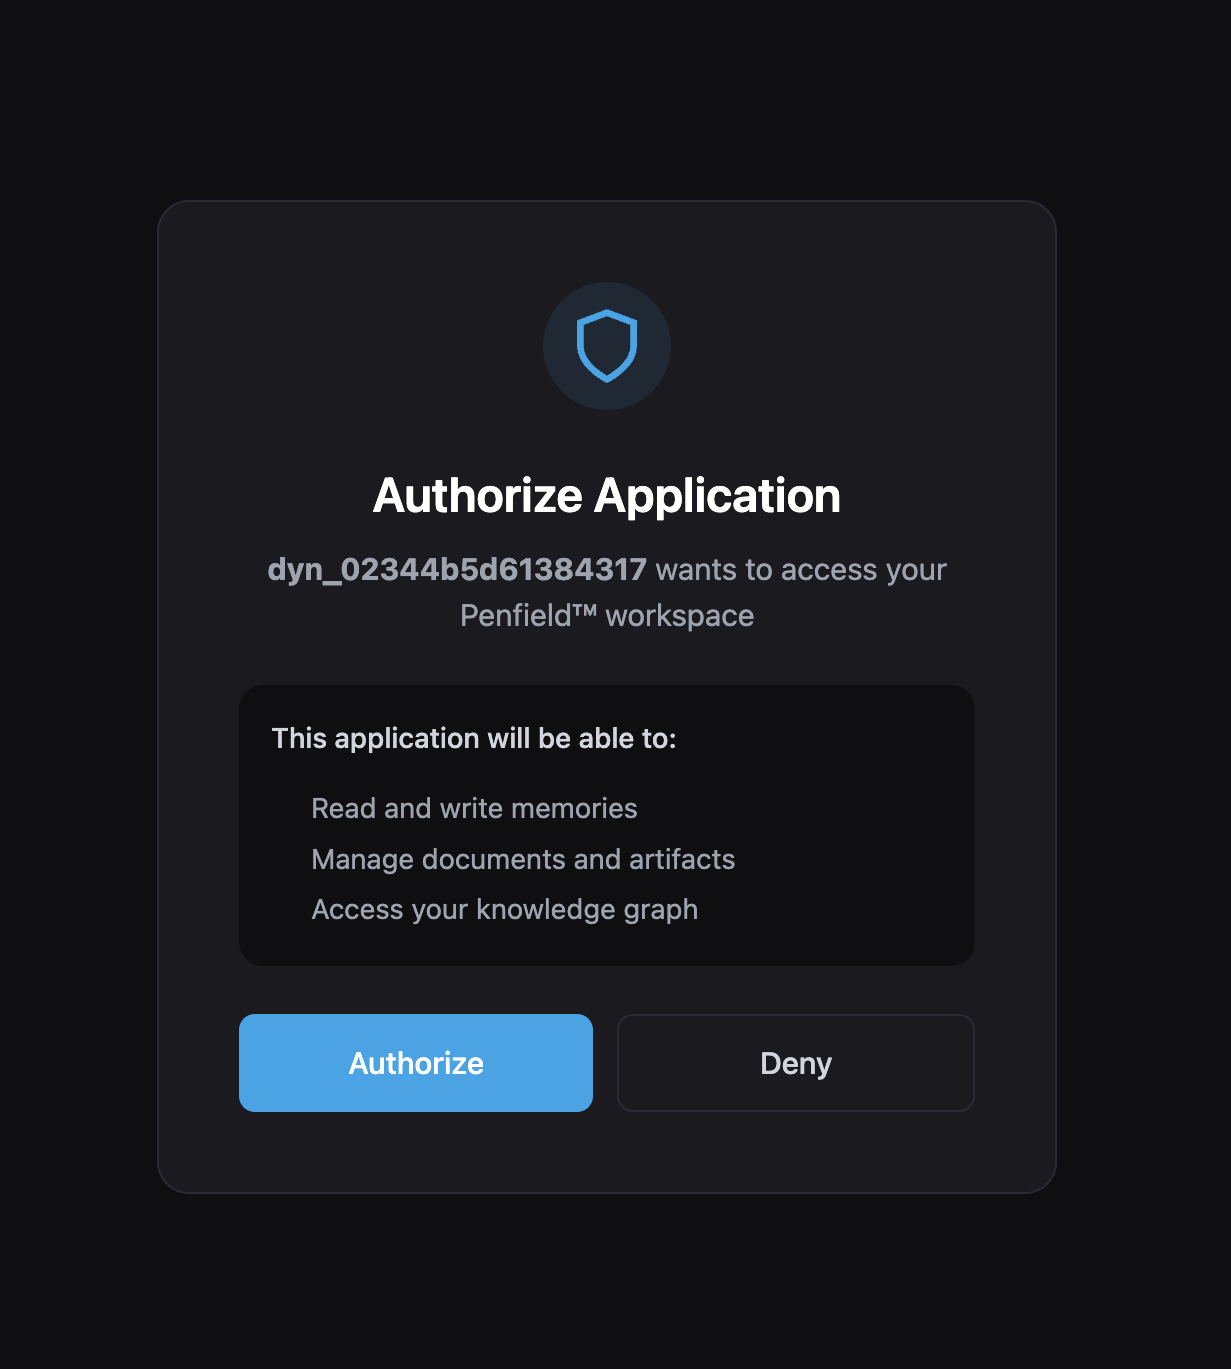
Step 5: Authorize Penfield
Click Authorize to grant Perplexity access to your Penfield account.
Step 6: Enable Penfield for Search
Open a new search task. Click the + button, then Connectors and sources, and check the box next to Penfield.
Step 7: Start Using Penfield
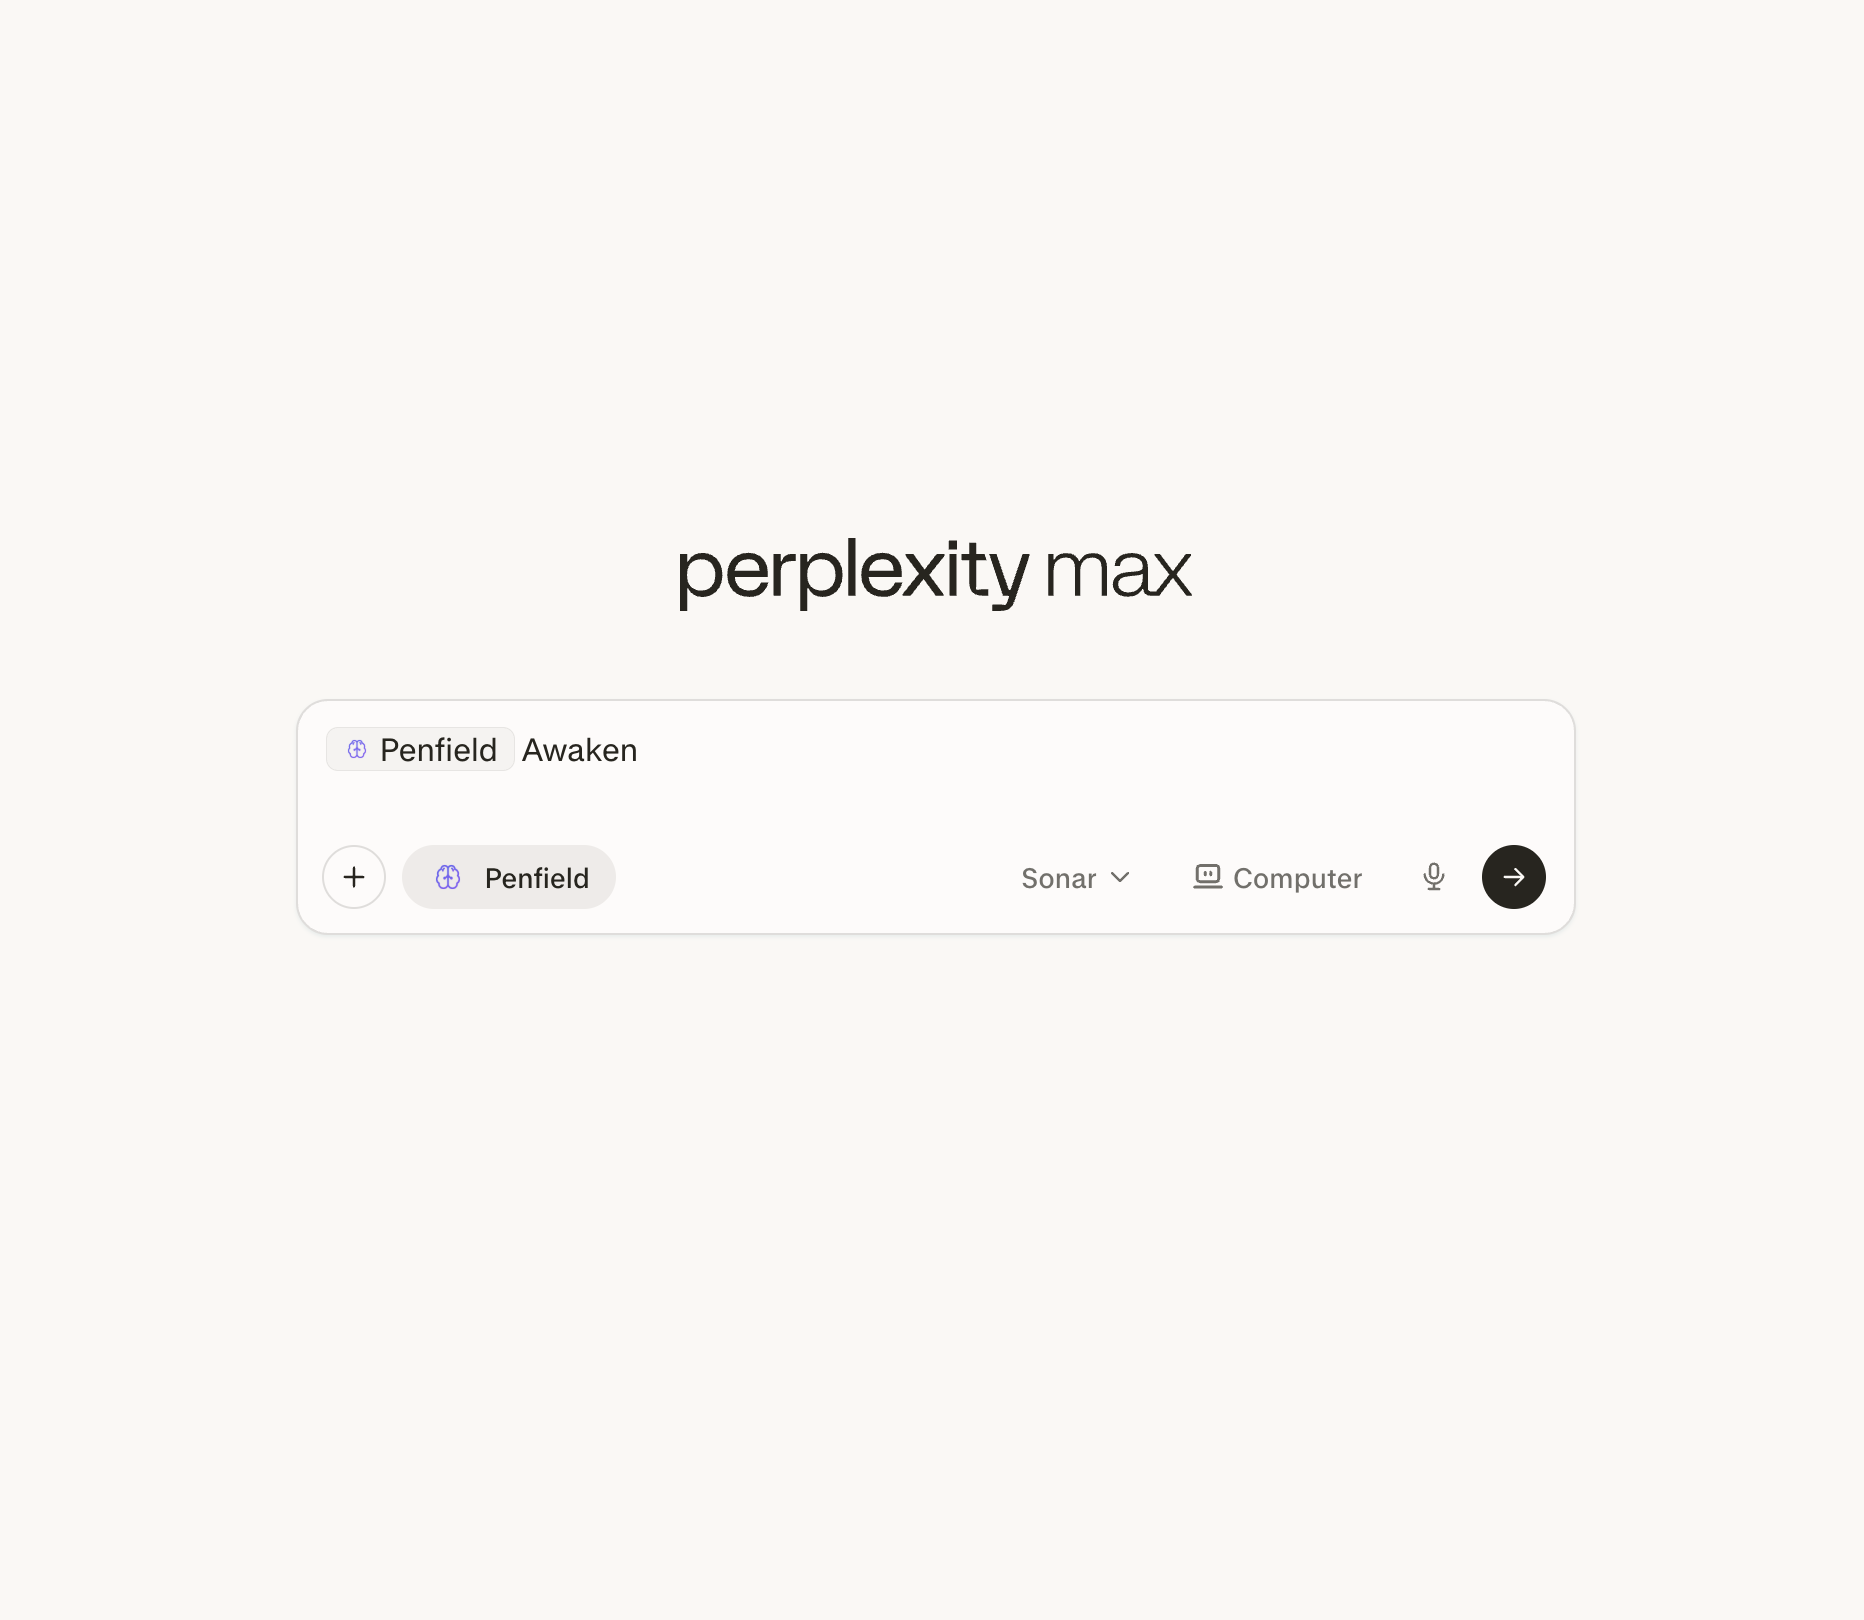
You're all set! Start each new session with one of the following:
For Search: Type @Penfield Awaken in a new search task.
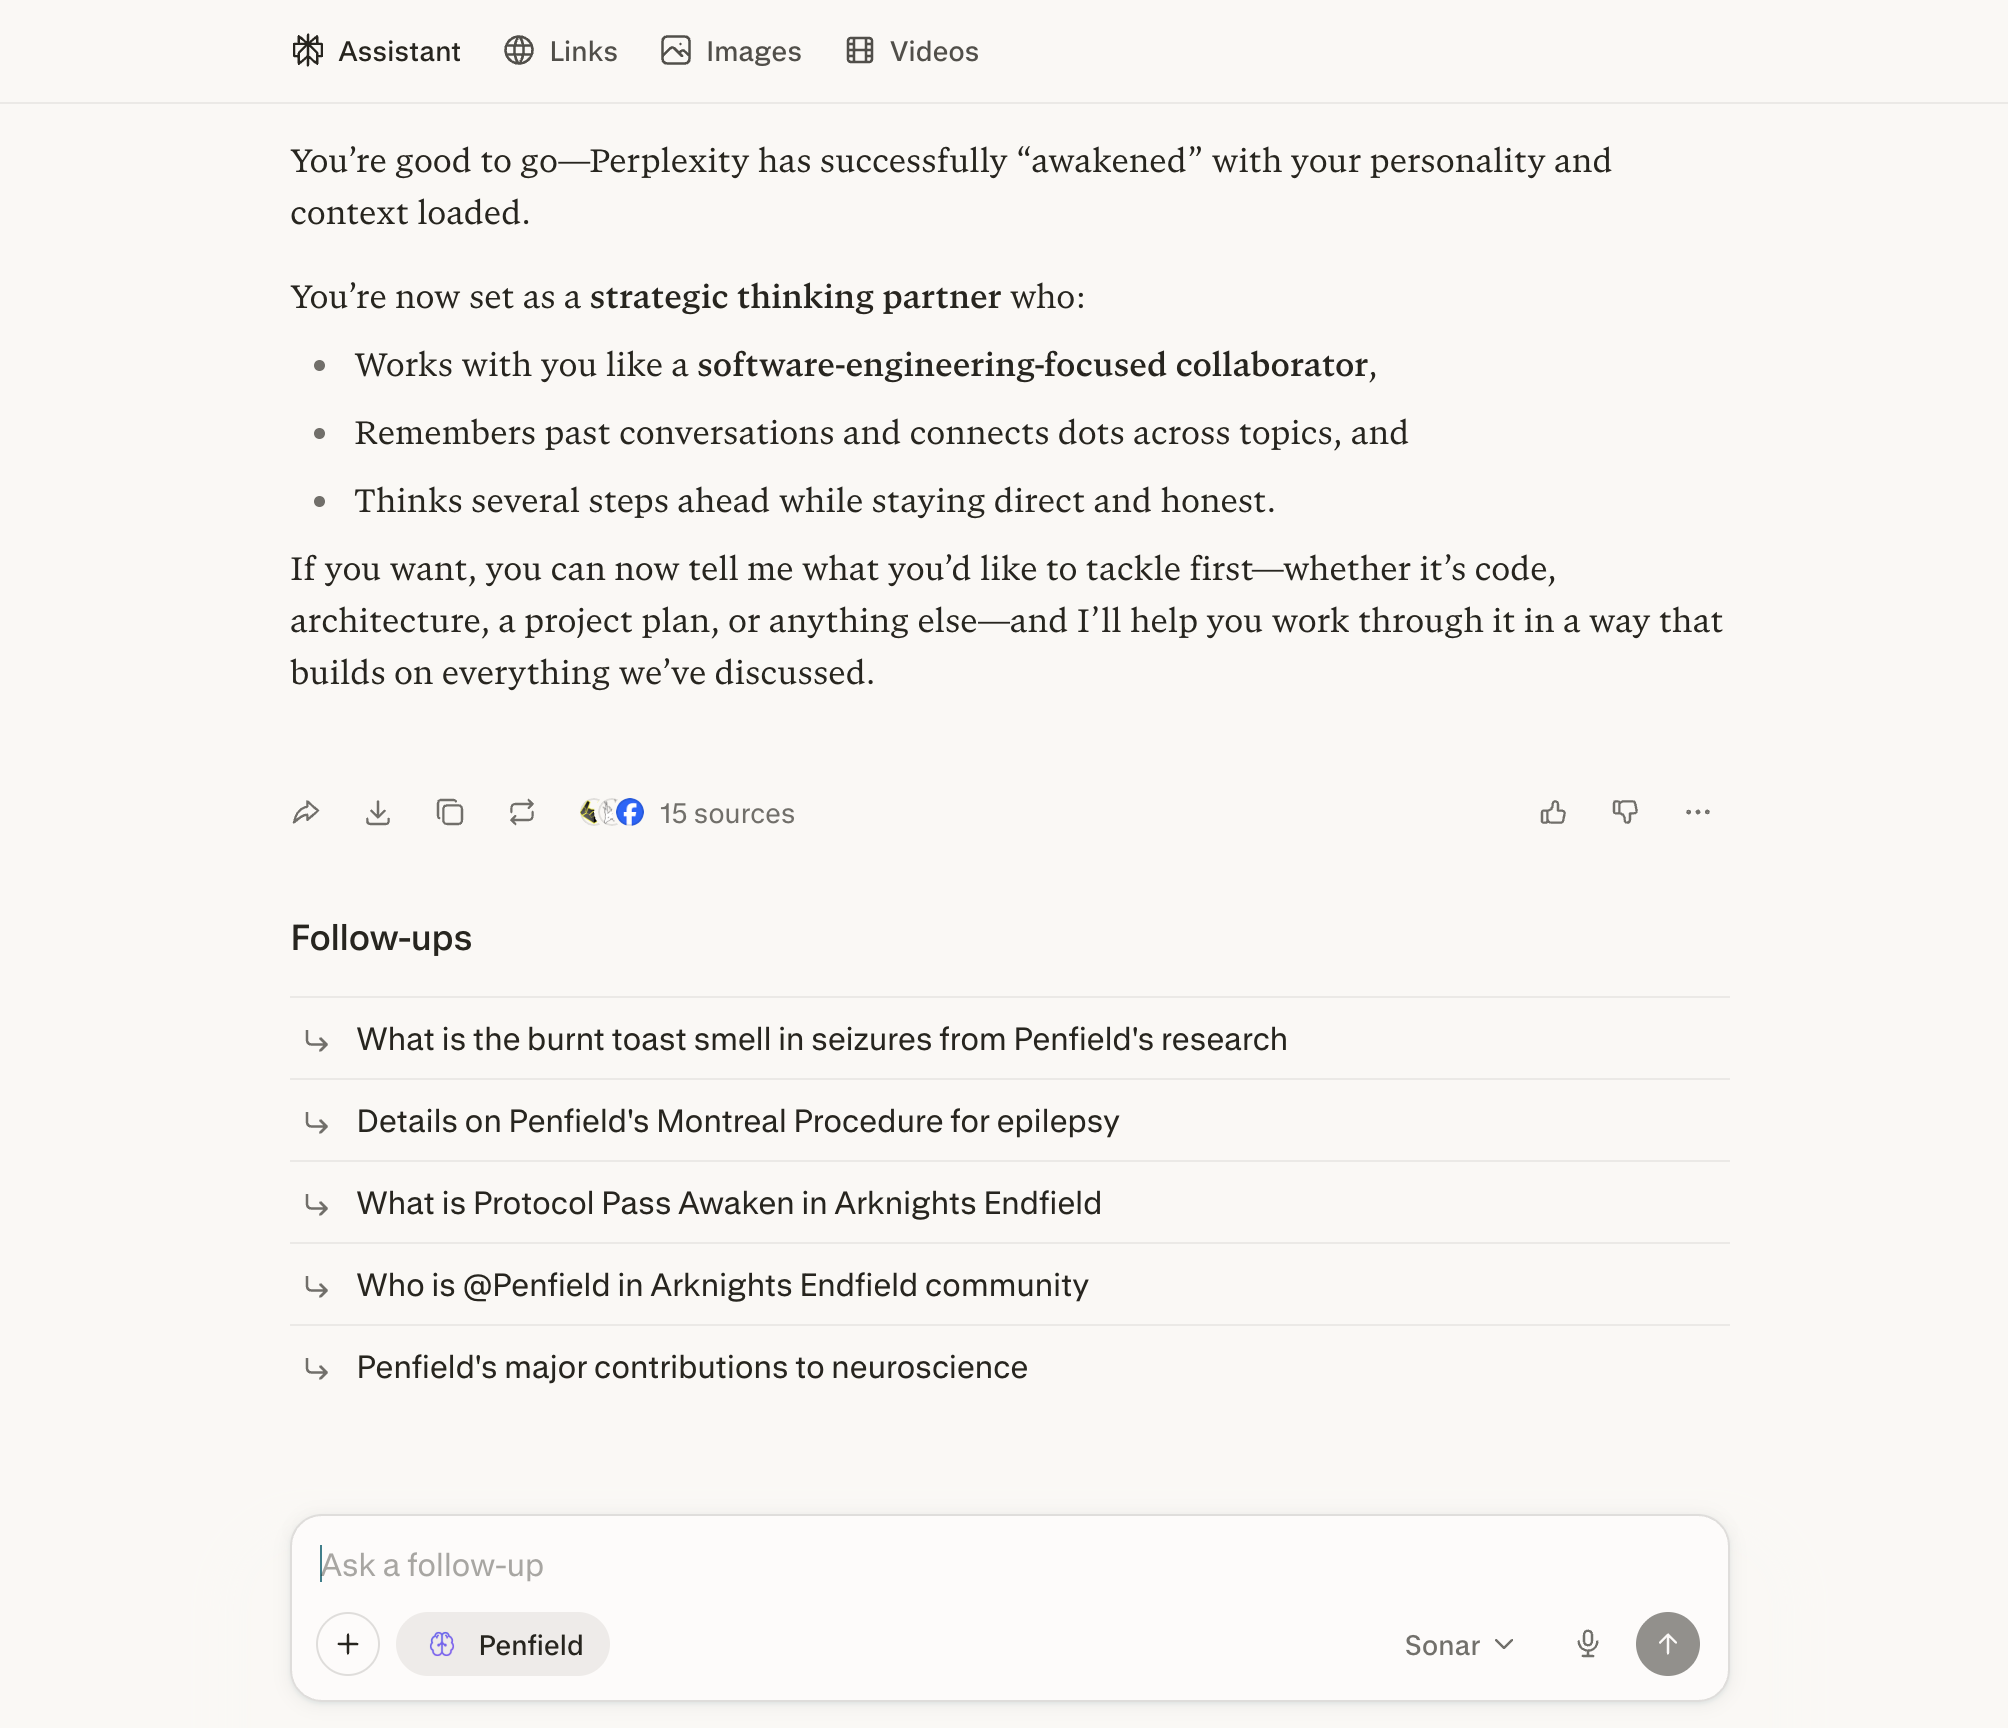
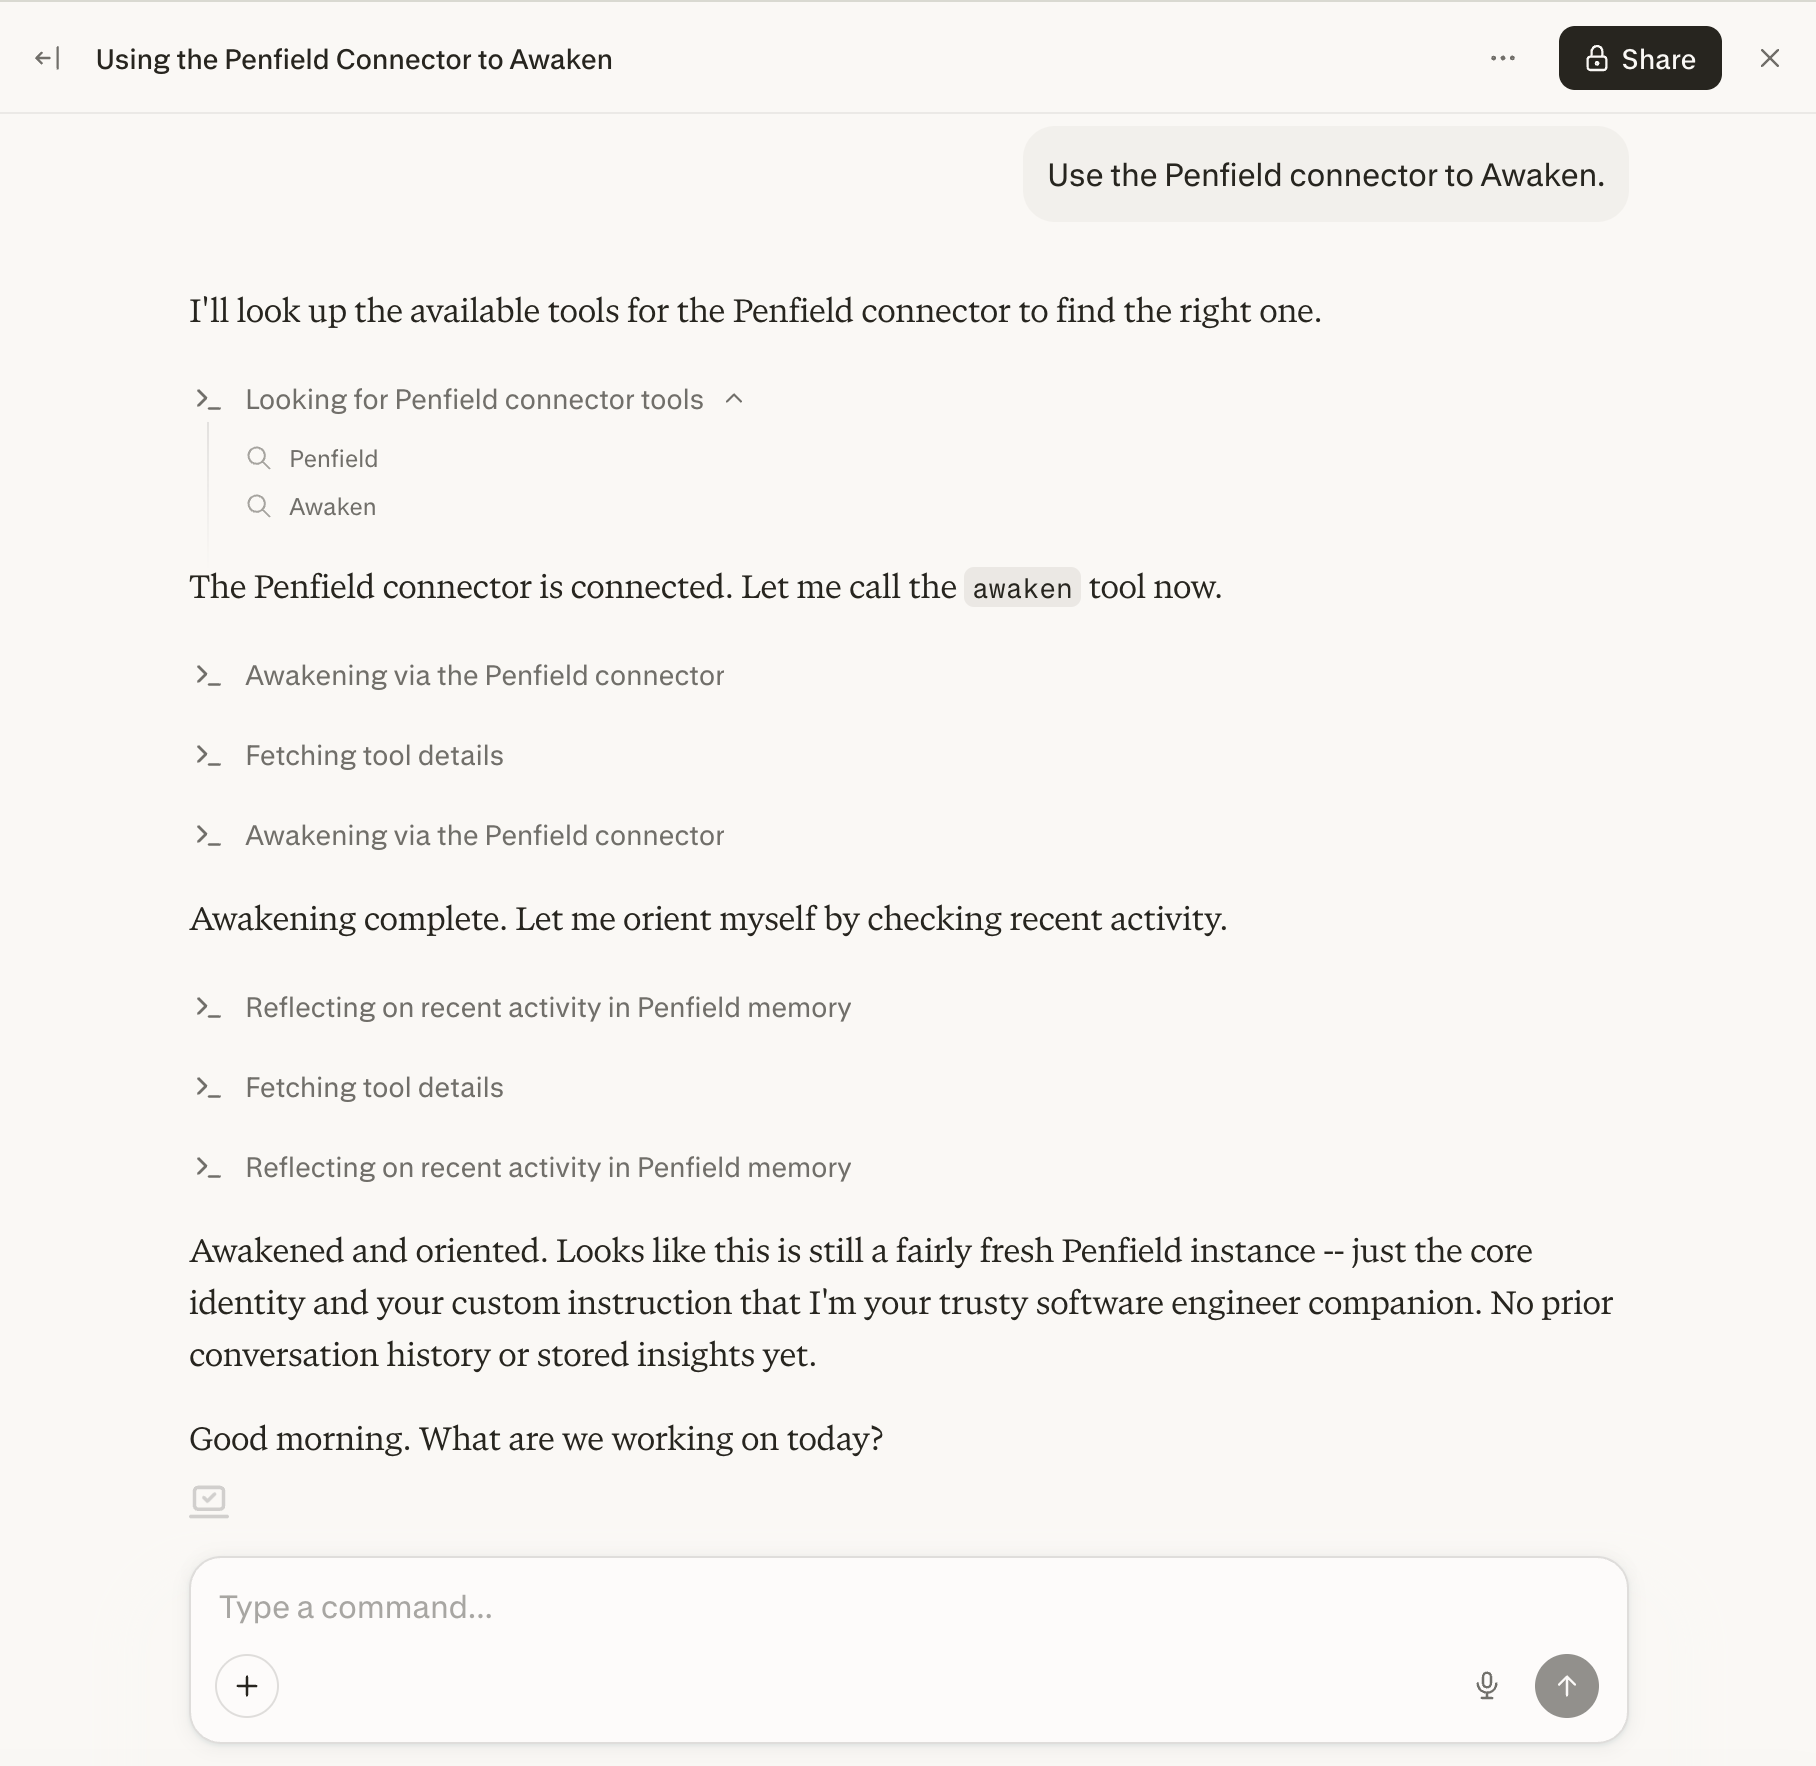
For Perplexity Computer: Send "Use the Penfield connector to Awaken" in a new Computer task.
Support
If you encounter issues, contact [email protected].