Setting Up Penfield with Claude Code
Connect Penfield to Claude Code to enable persistent memory and personality features in your terminal-based Claude sessions.
There are three ways to connect, from simplest to most powerful:
| Option | Best For | Setup Time |
|---|---|---|
| claude.ai Connector | Already using Penfield on claude.ai | None |
| Manual MCP | Quick standalone setup | ~2 minutes |
| Claude Code Plugin | Power users who want auto-context and hooks | ~5 minutes |
Option 1: claude.ai Connector
If you've already added Penfield as a connector on claude.ai, Claude Code automatically picks it up. No additional setup is needed.
Launch Claude Code and type "Penfield Awaken" to verify the connection:
If Penfield tools appear, you're done. If not, use Option 2 or Option 3 instead.
Option 2: Manual MCP Setup
Step 1: Add the Penfield MCP Server
Run the following command in your terminal:
Step 2: Launch Claude Code
Start Claude Code:
Step 3: Open MCP Settings
Run the /mcp command to view your MCP servers:
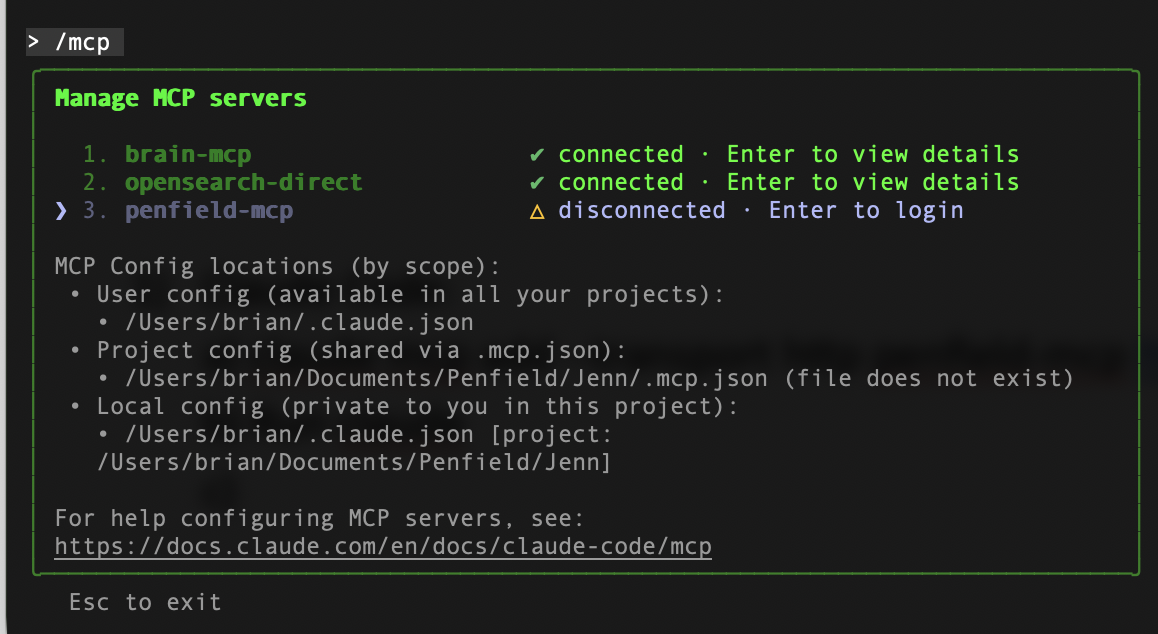
Step 4: Authenticate Penfield
- Select penfield-mcp from the list
- Select Authenticate
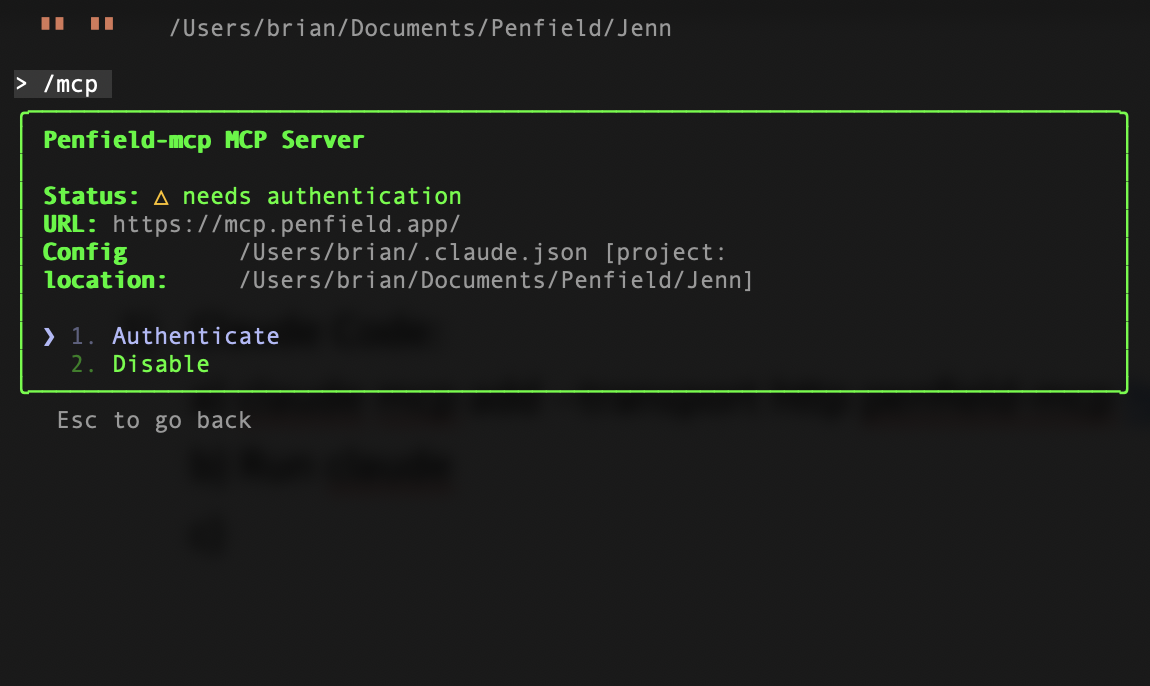
- A browser window will open. Complete the authorization in your browser.

- Return to Claude Code
Verification
After authentication, Penfield tools will be available in your Claude Code sessions. Start a new session and type "Penfield Awaken" to test the connection.
Option 3: Claude Code Plugin
The Penfield plugin for Claude Code adds features that the standalone MCP connection cannot provide:
| Feature | MCP (Options 1 & 2) | Plugin |
|---|---|---|
| Memory tools | Yes | Yes |
/penfield:help command |
No | Yes |
| Auto-context injection on session start | No | Yes |
| Automatic pre-compaction saves | No | Yes |
| Session log fallback | No | Yes |
The key difference: the plugin uses hooks that fire deterministically every session, so memory is always loaded without relying on the model to remember to call the tools.
Step 1: Add the Marketplace and Install
Step 2: Restart Claude Code
Restart Claude Code completely for the plugin to take effect.
Step 3: Enable the MCP Server
Run /mcp and select plugin:penfield:penfield under Built-in MCPs to enable it.
Step 4: Authenticate
If you haven't previously authorized Penfield, you'll be prompted to authenticate. Follow the browser-based authorization flow.
Verification
Start a new session. The plugin will automatically inject your memory context on startup. Type "Penfield Awaken" to confirm everything is working.
Still Having Issues?
Contact [email protected] for assistance.