Manus Setup
Connect Penfield to Manus using the Custom MCP connector.
Prerequisites
- A Penfield account (sign up here if you haven't already)
- A Manus account with an active subscription
Step 1: Open Connectors
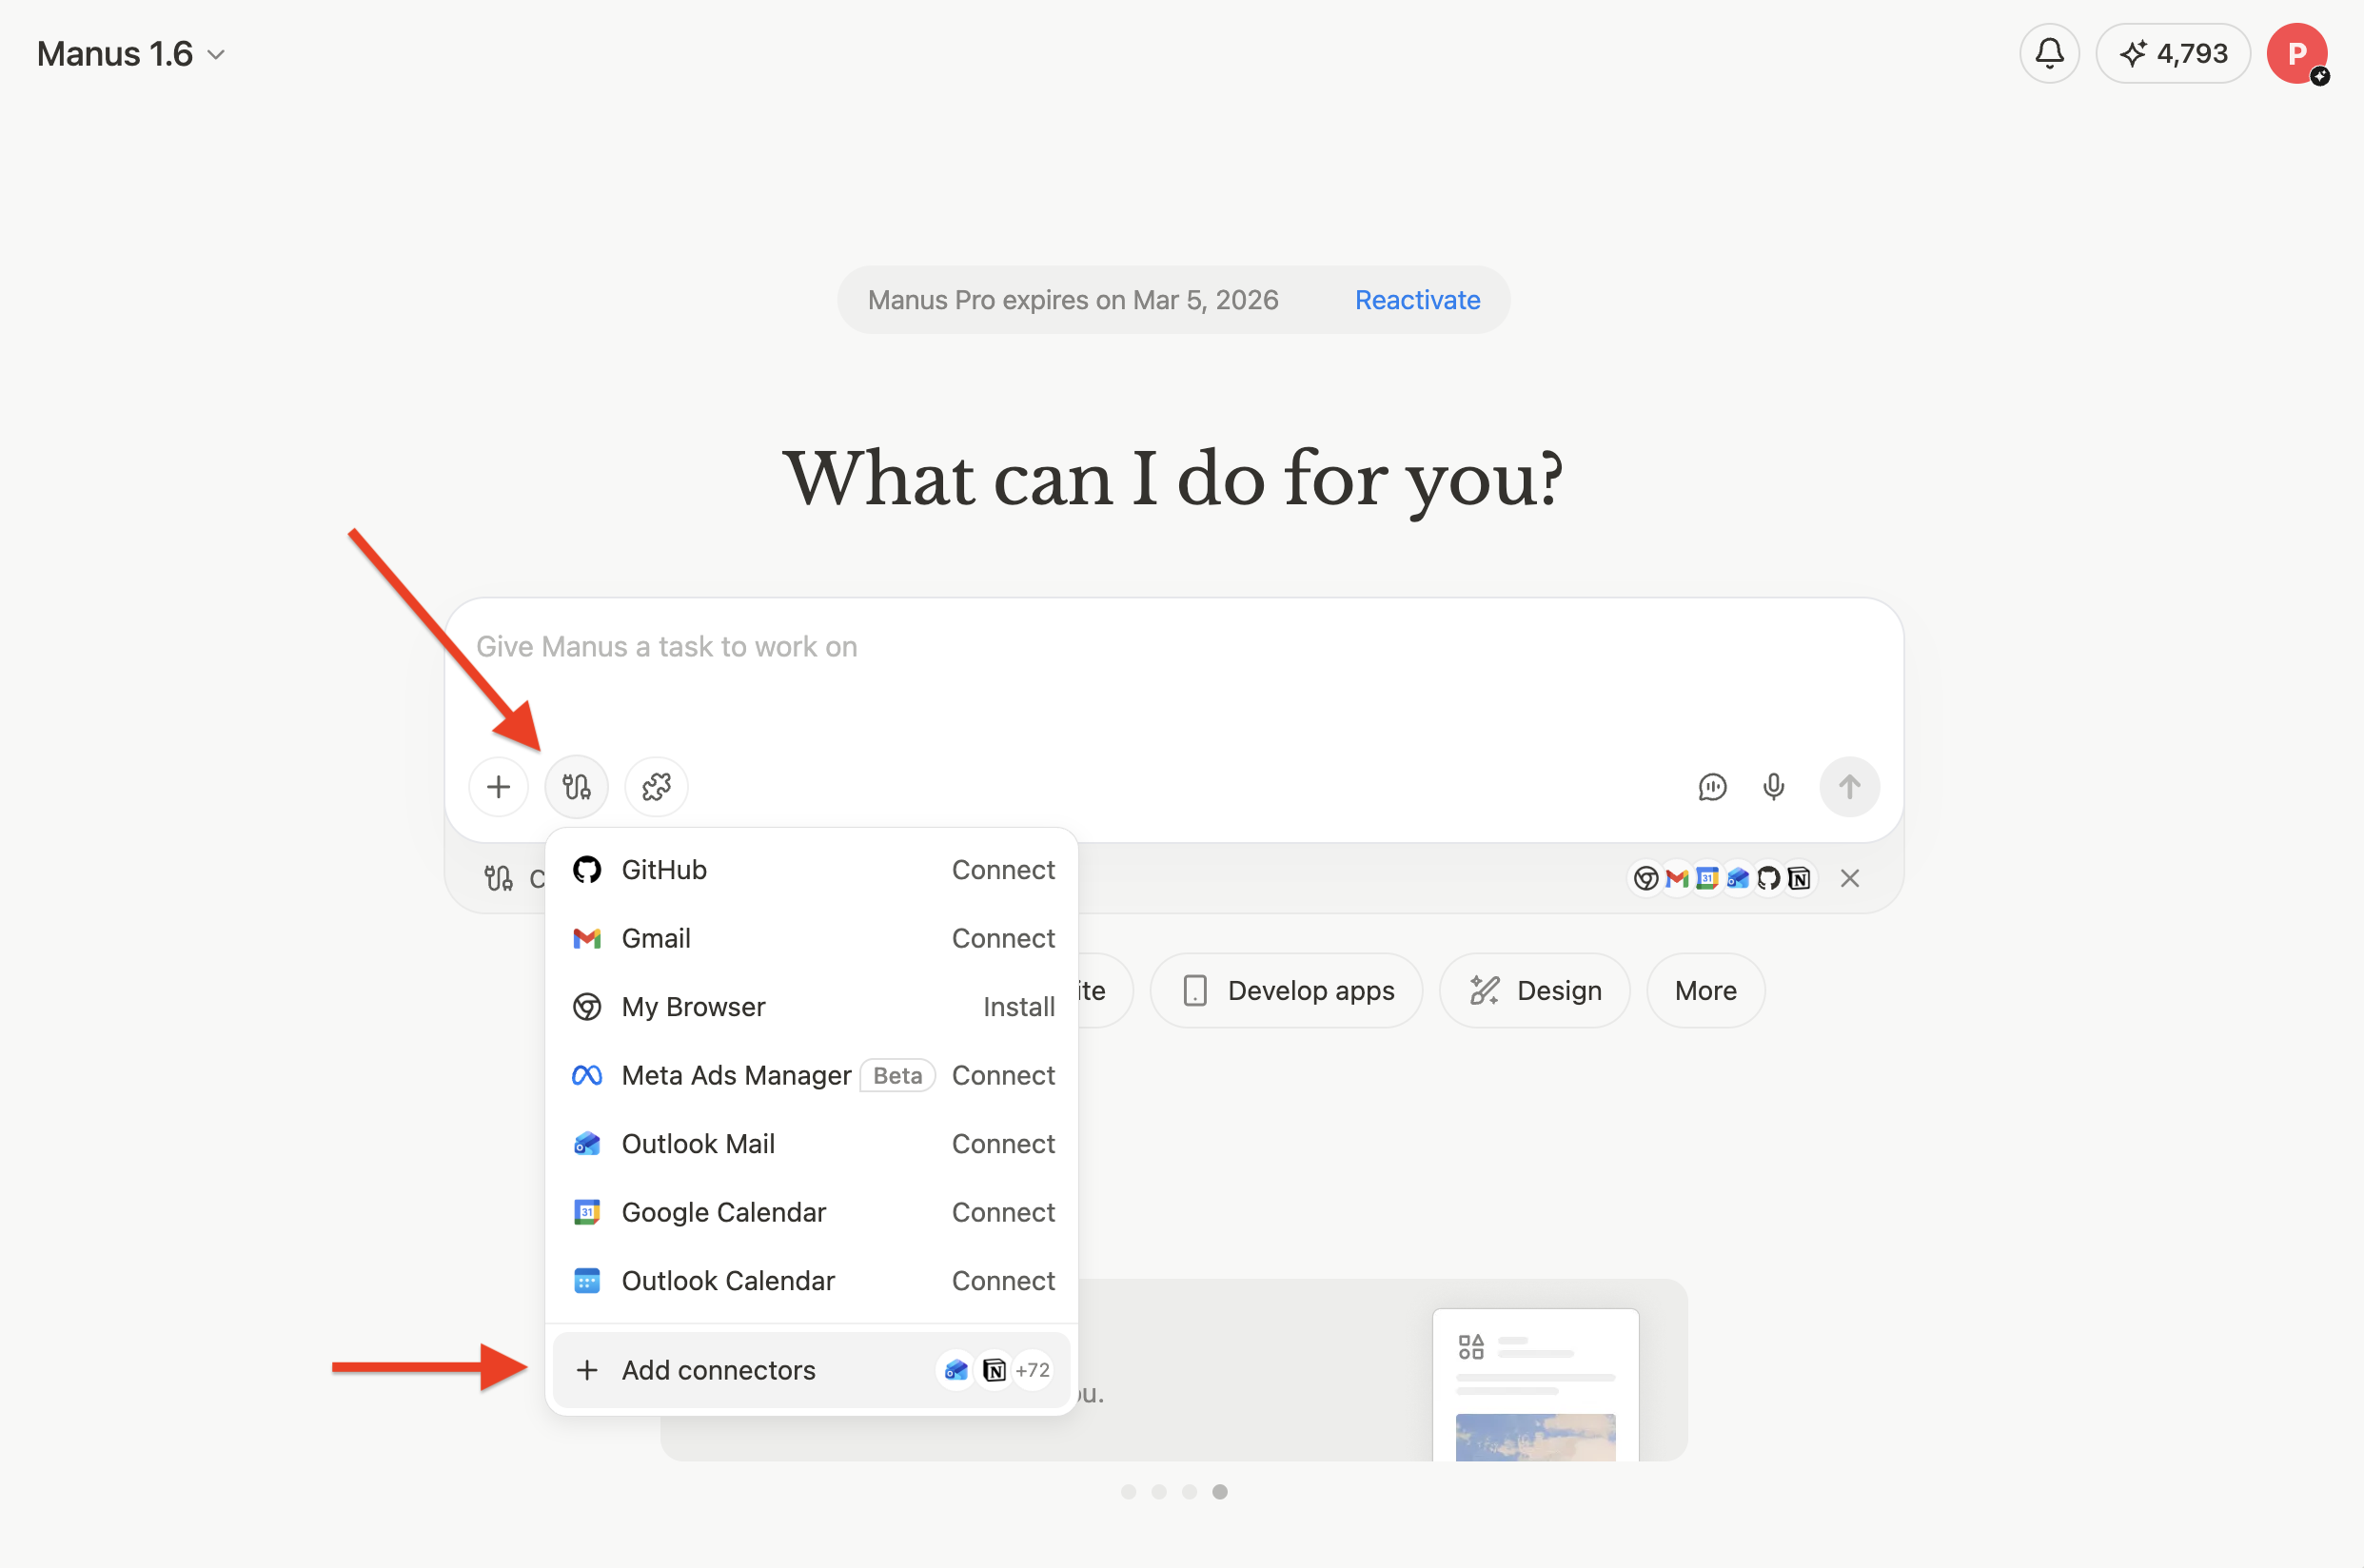
Click the apps icon below the input field, then click + Add connectors at the bottom of the menu.
Step 2: Add a Custom MCP
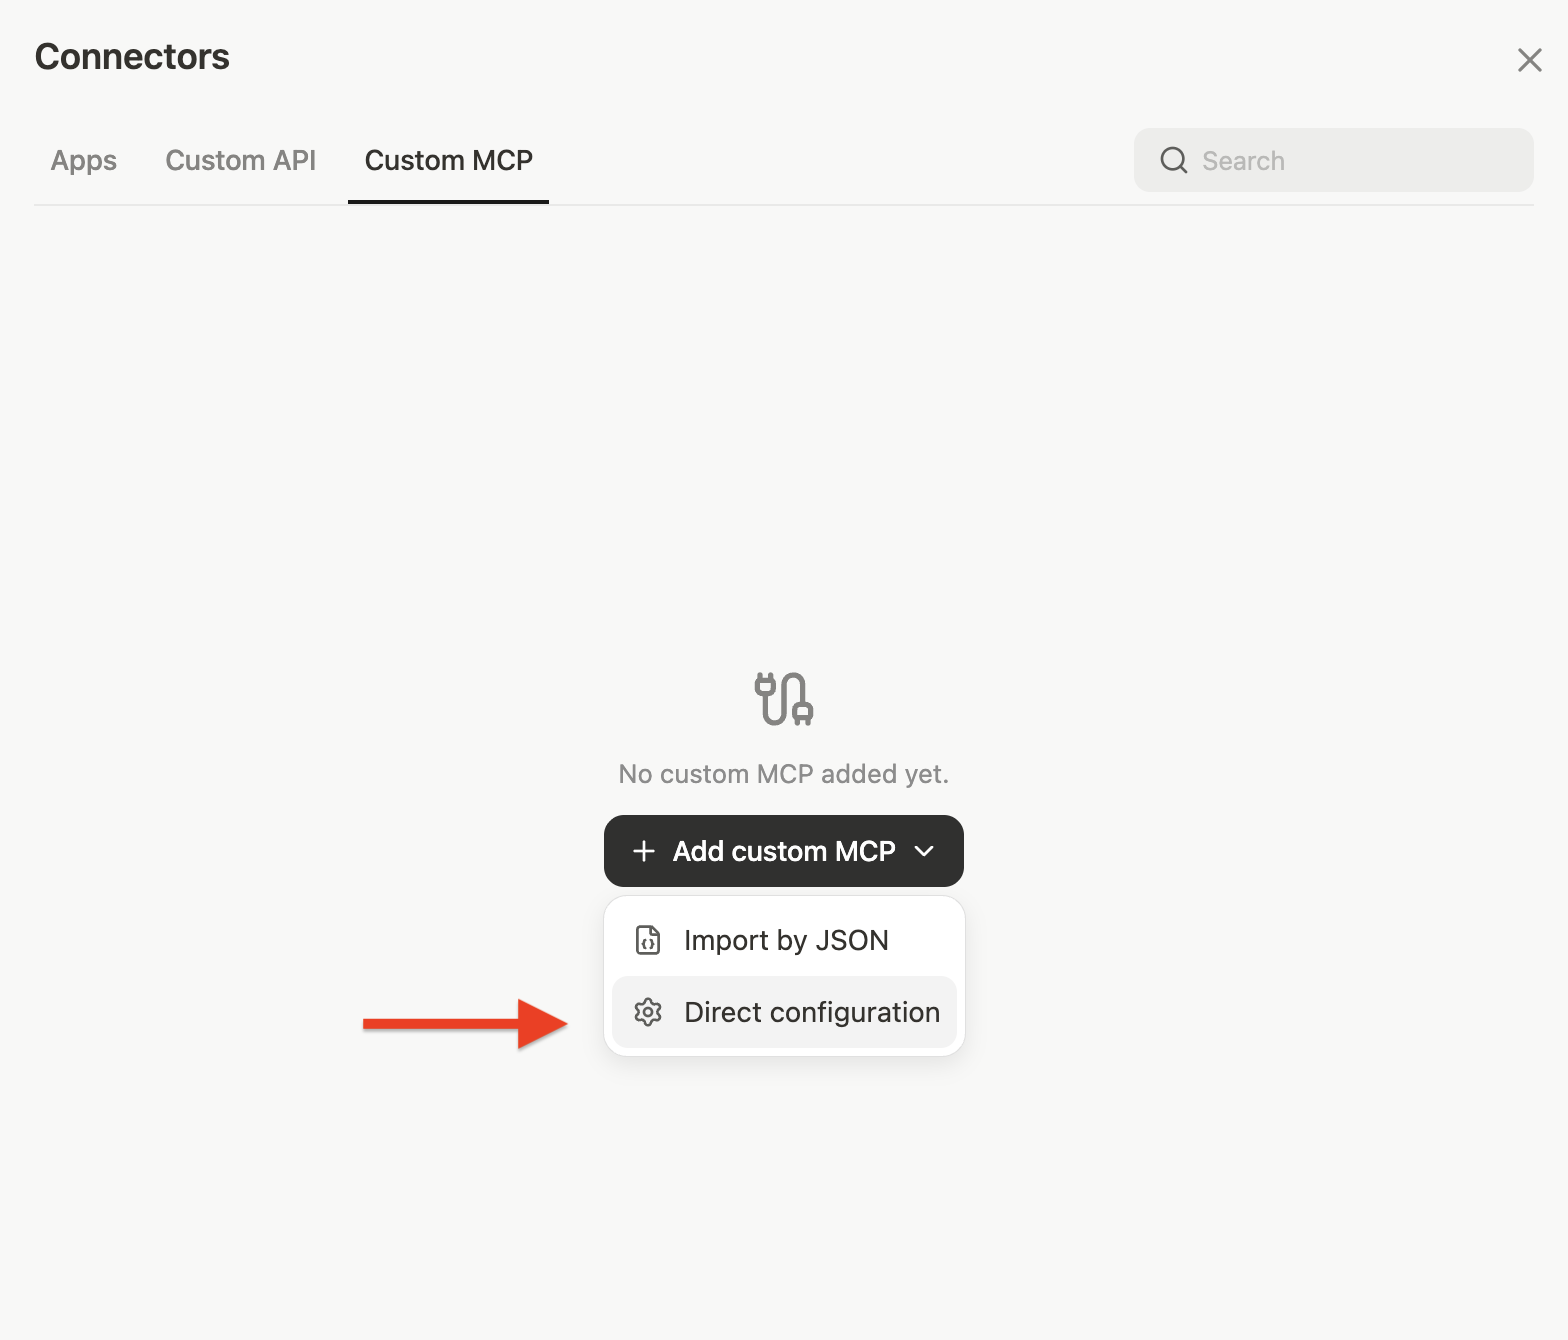
In the Connectors panel, click the Custom MCP tab. Click + Add custom MCP and select Direct configuration.
Step 3: Enter Server Details
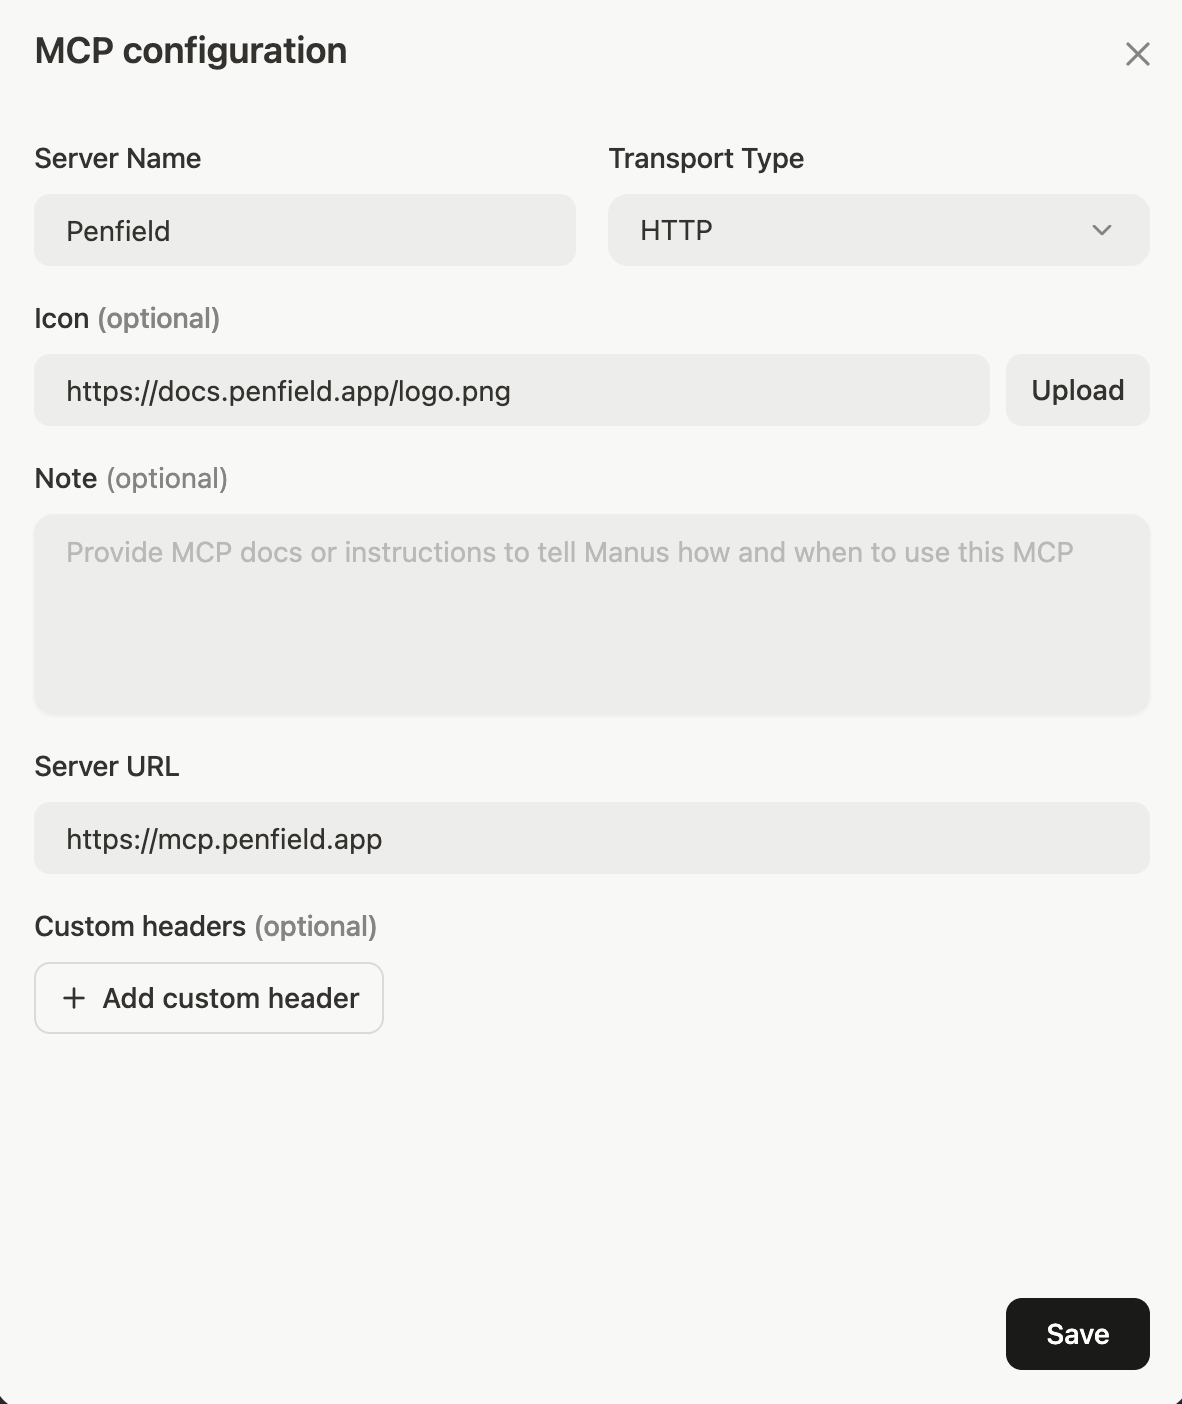
Fill in the MCP configuration with the following values and click Save:
| Field | Value |
|---|---|
| Server Name | Penfield |
| Transport Type | HTTP |
| Icon (optional) | https://docs.penfield.app/logo.png |
| Server URL | https://mcp.penfield.app |
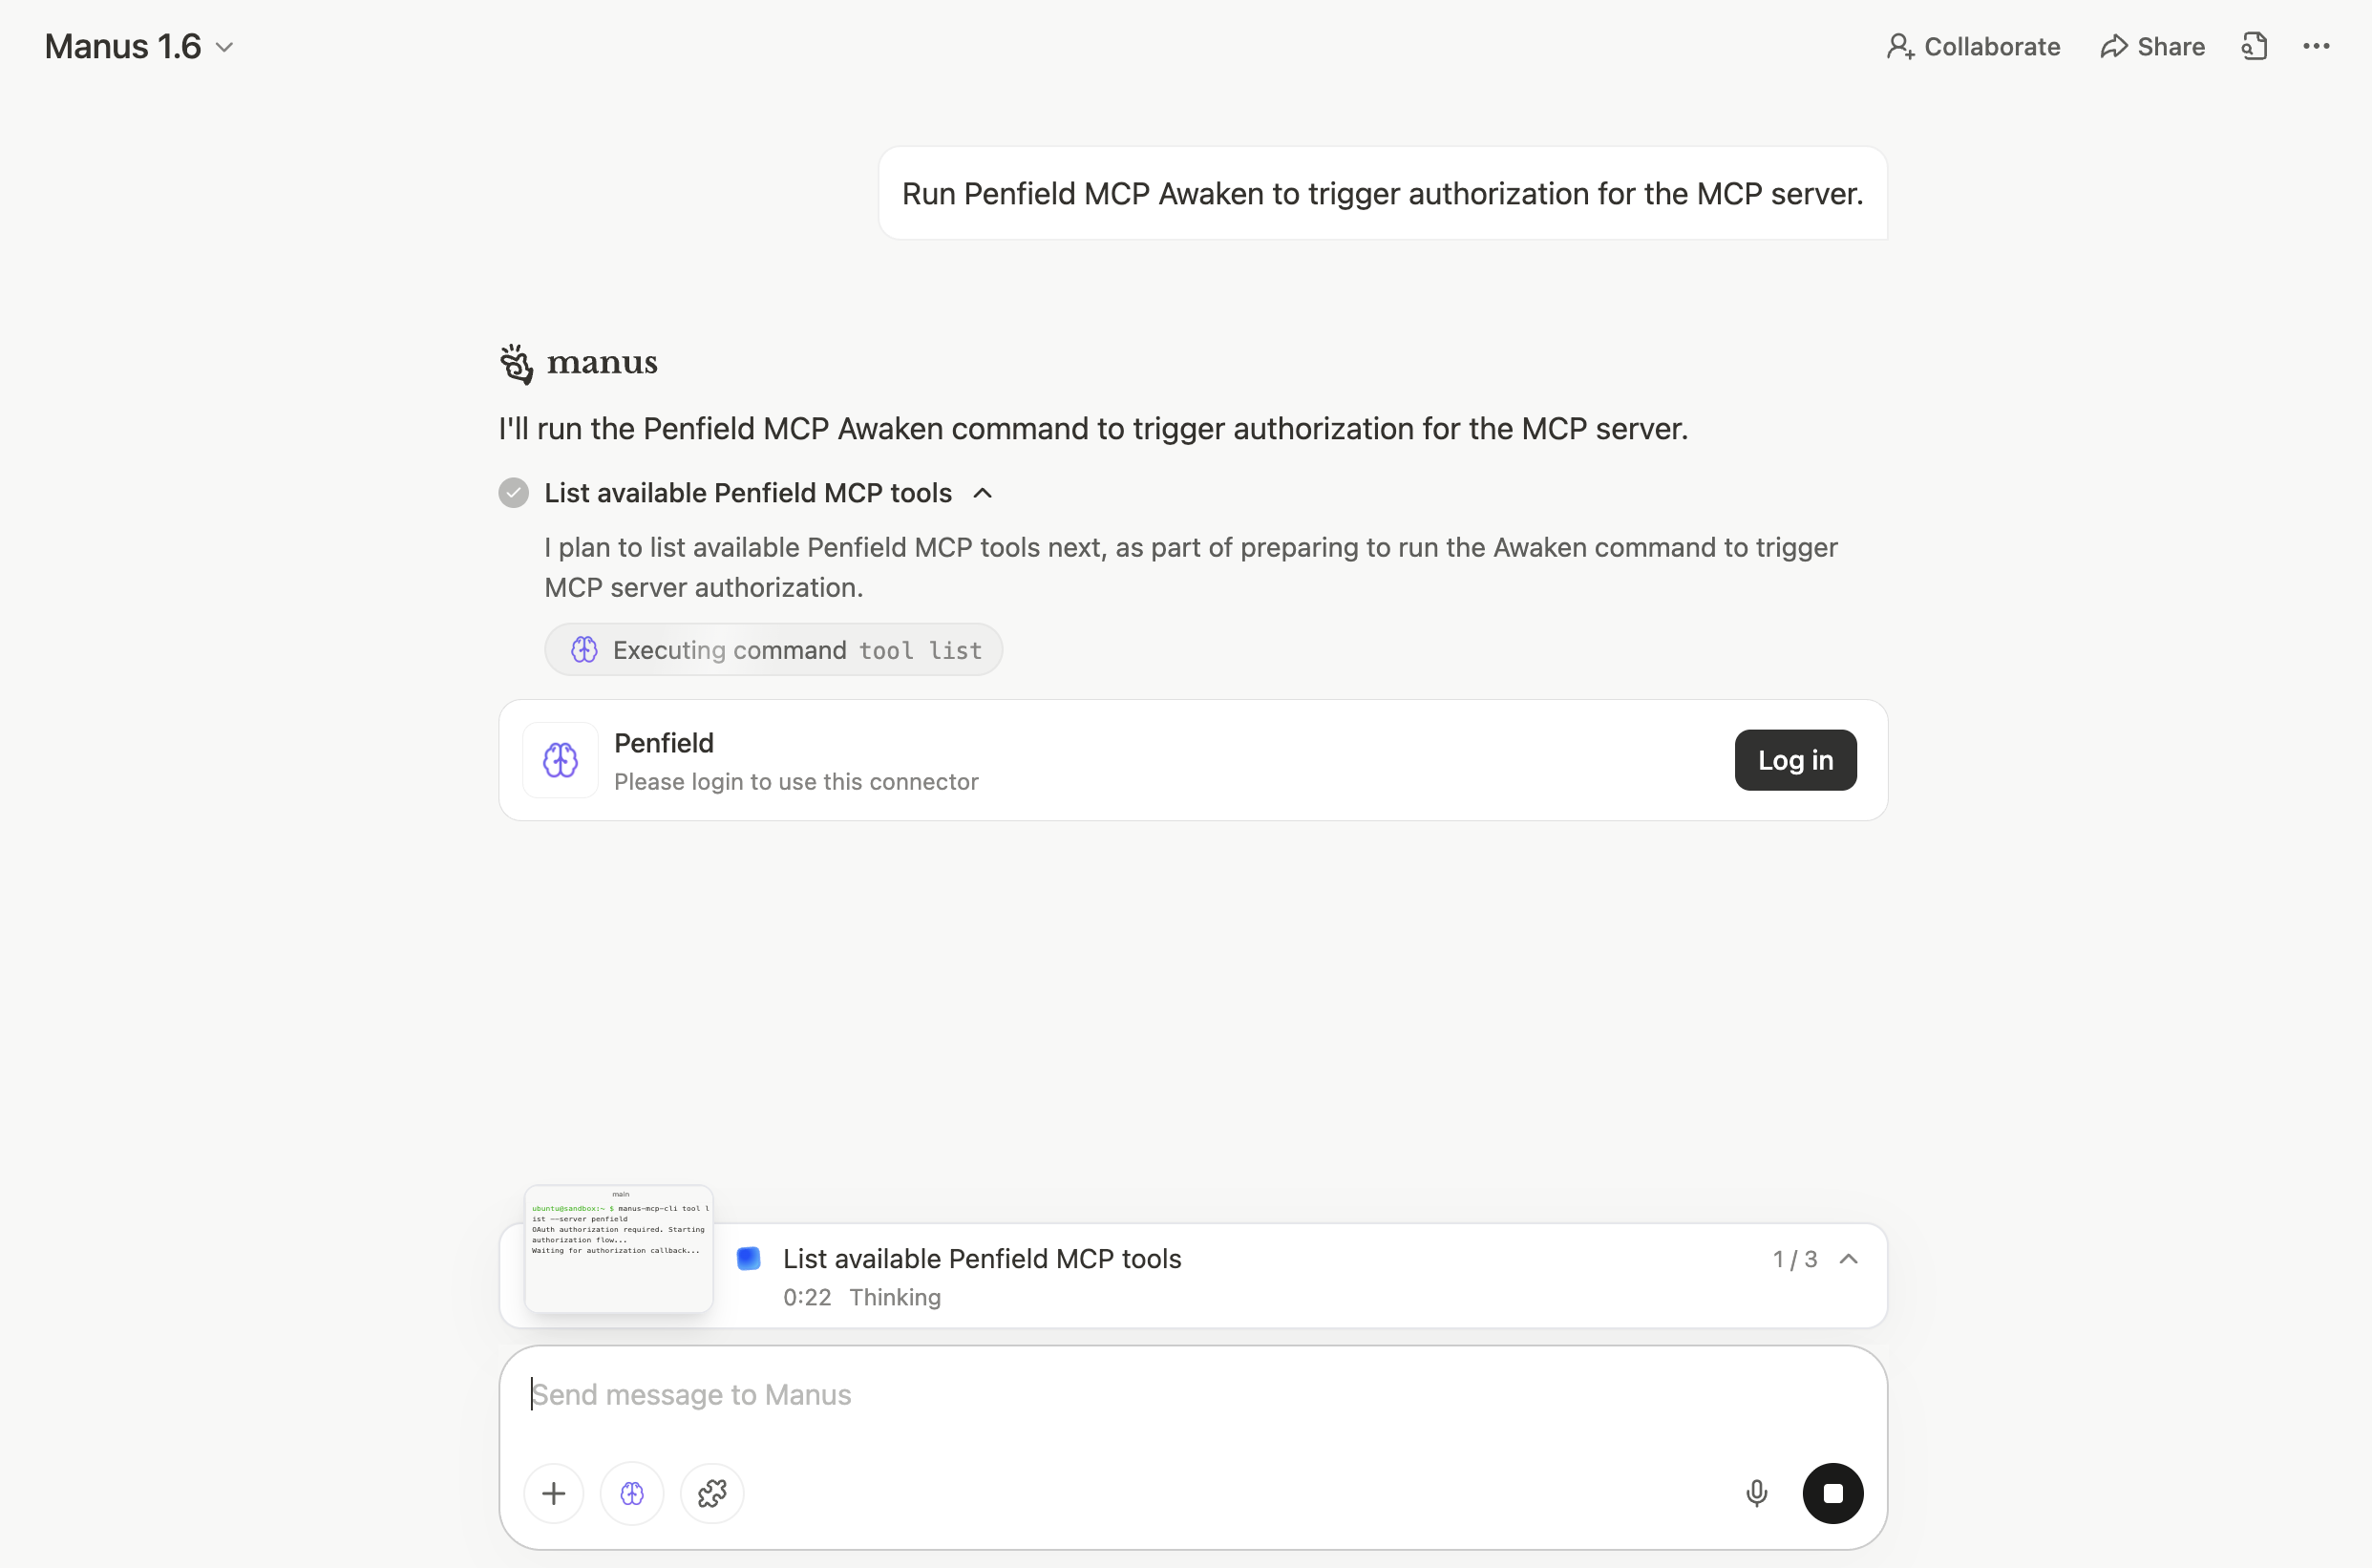
Step 4: Trigger Authorization
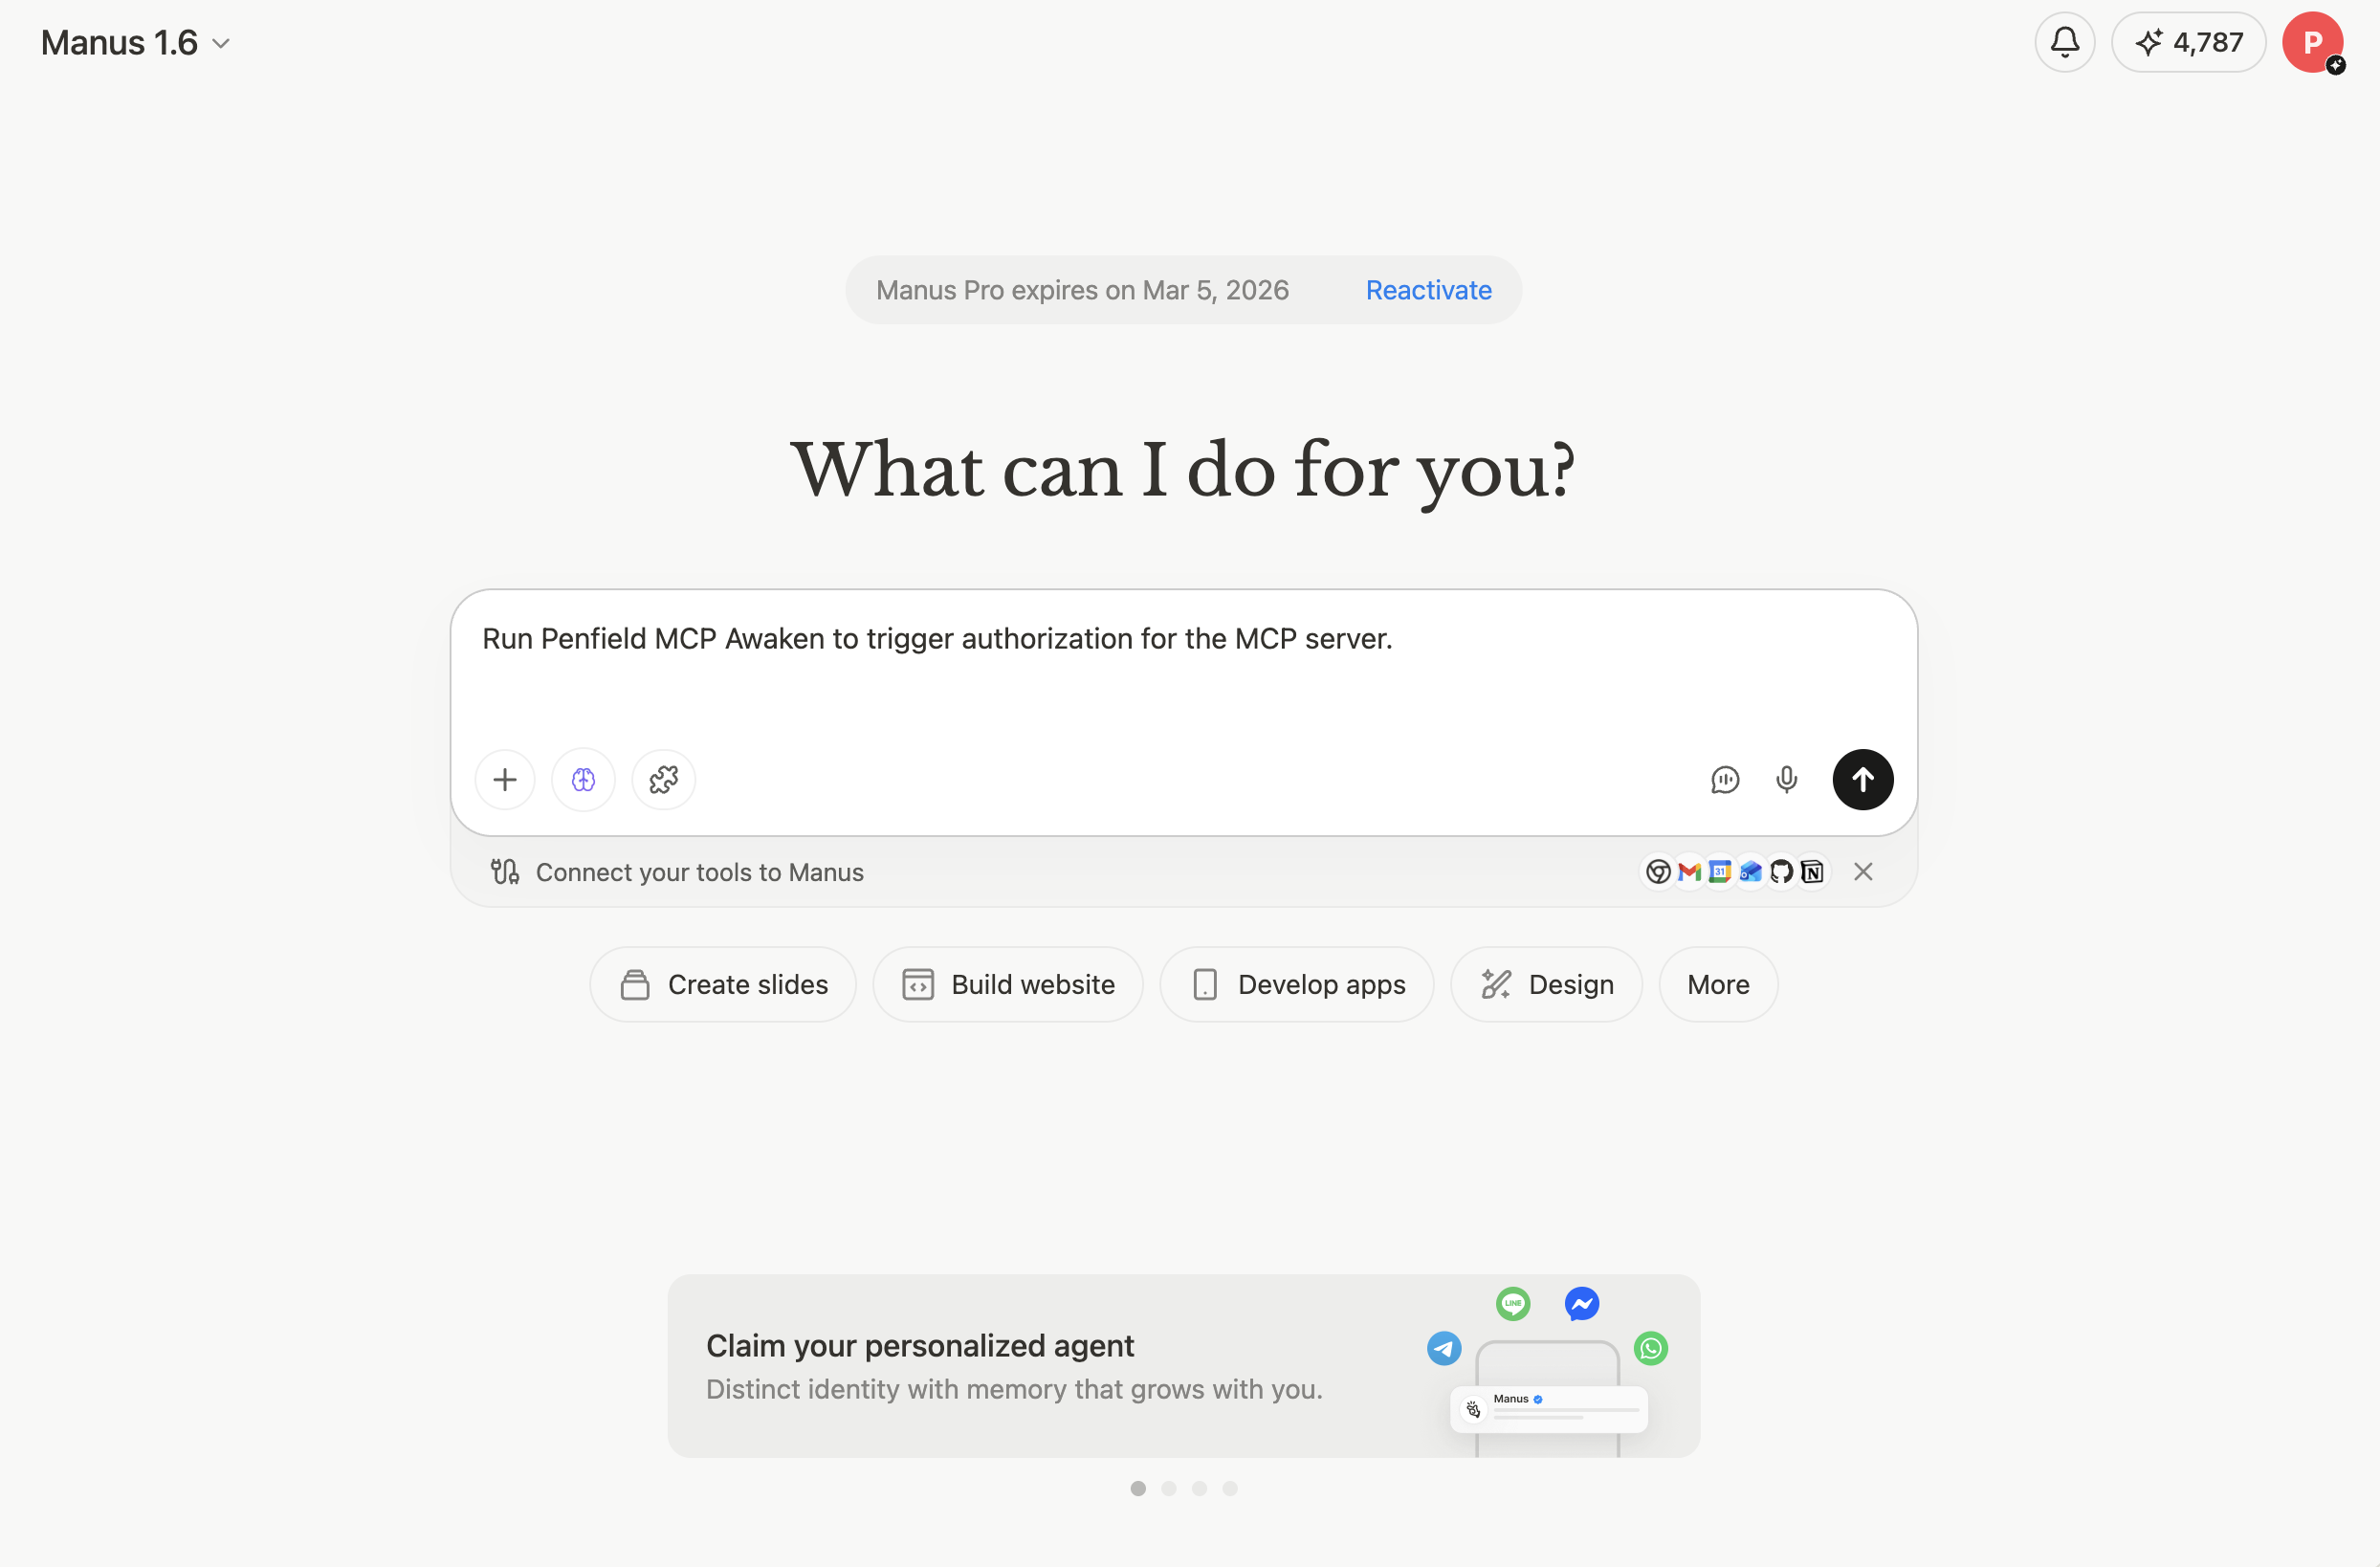
Open a new task and send the following message:
Step 5: Log In
Manus will attempt to list Penfield's tools and prompt you to log in. Click the Log in button.
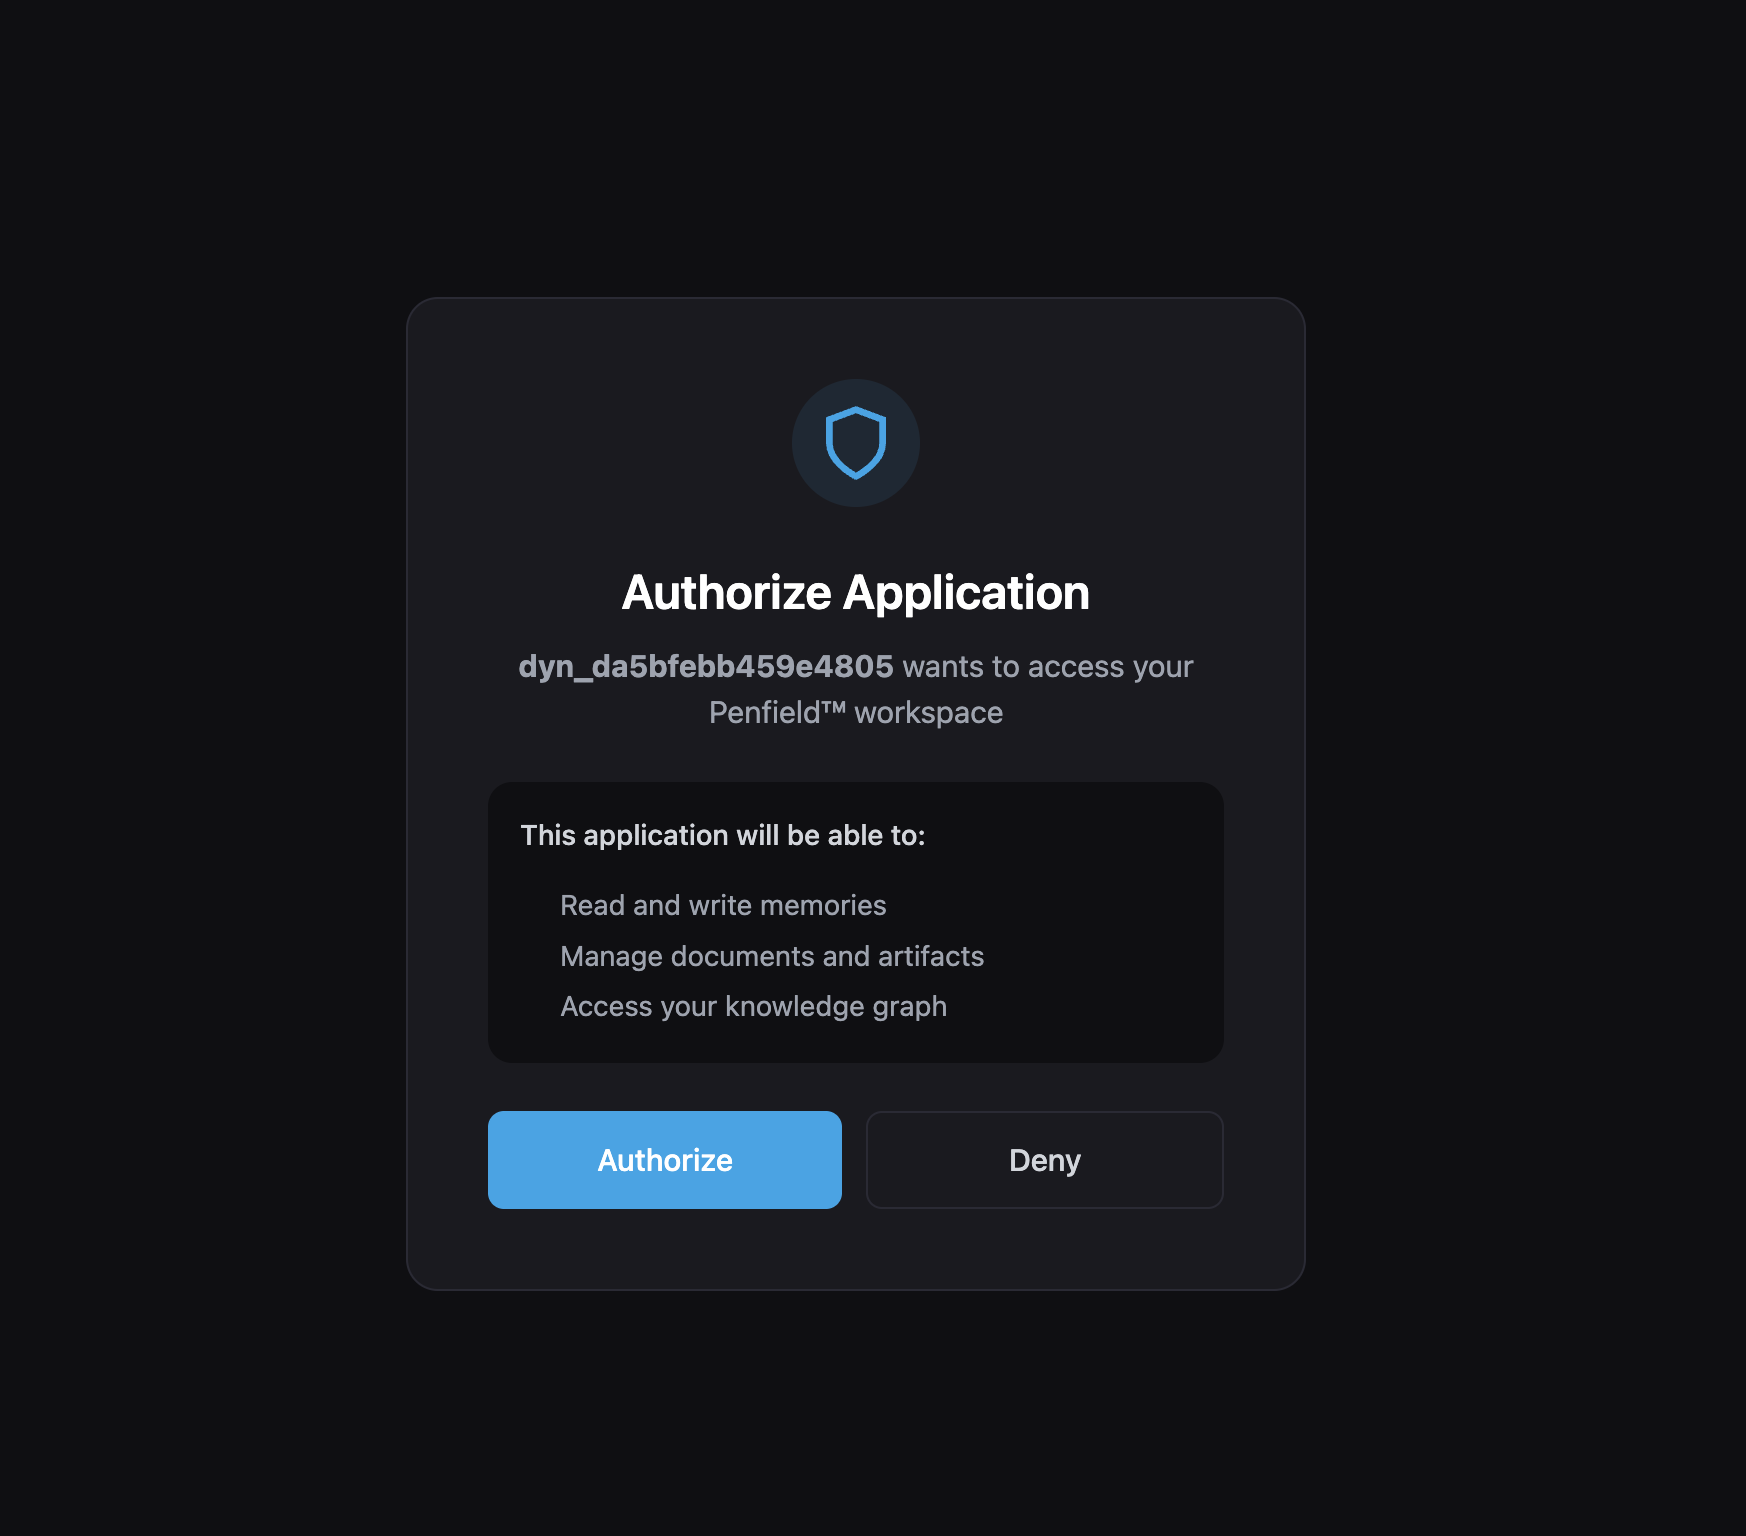
Step 6: Authorize Manus
Complete the authorization flow to grant Manus access to your Penfield account.
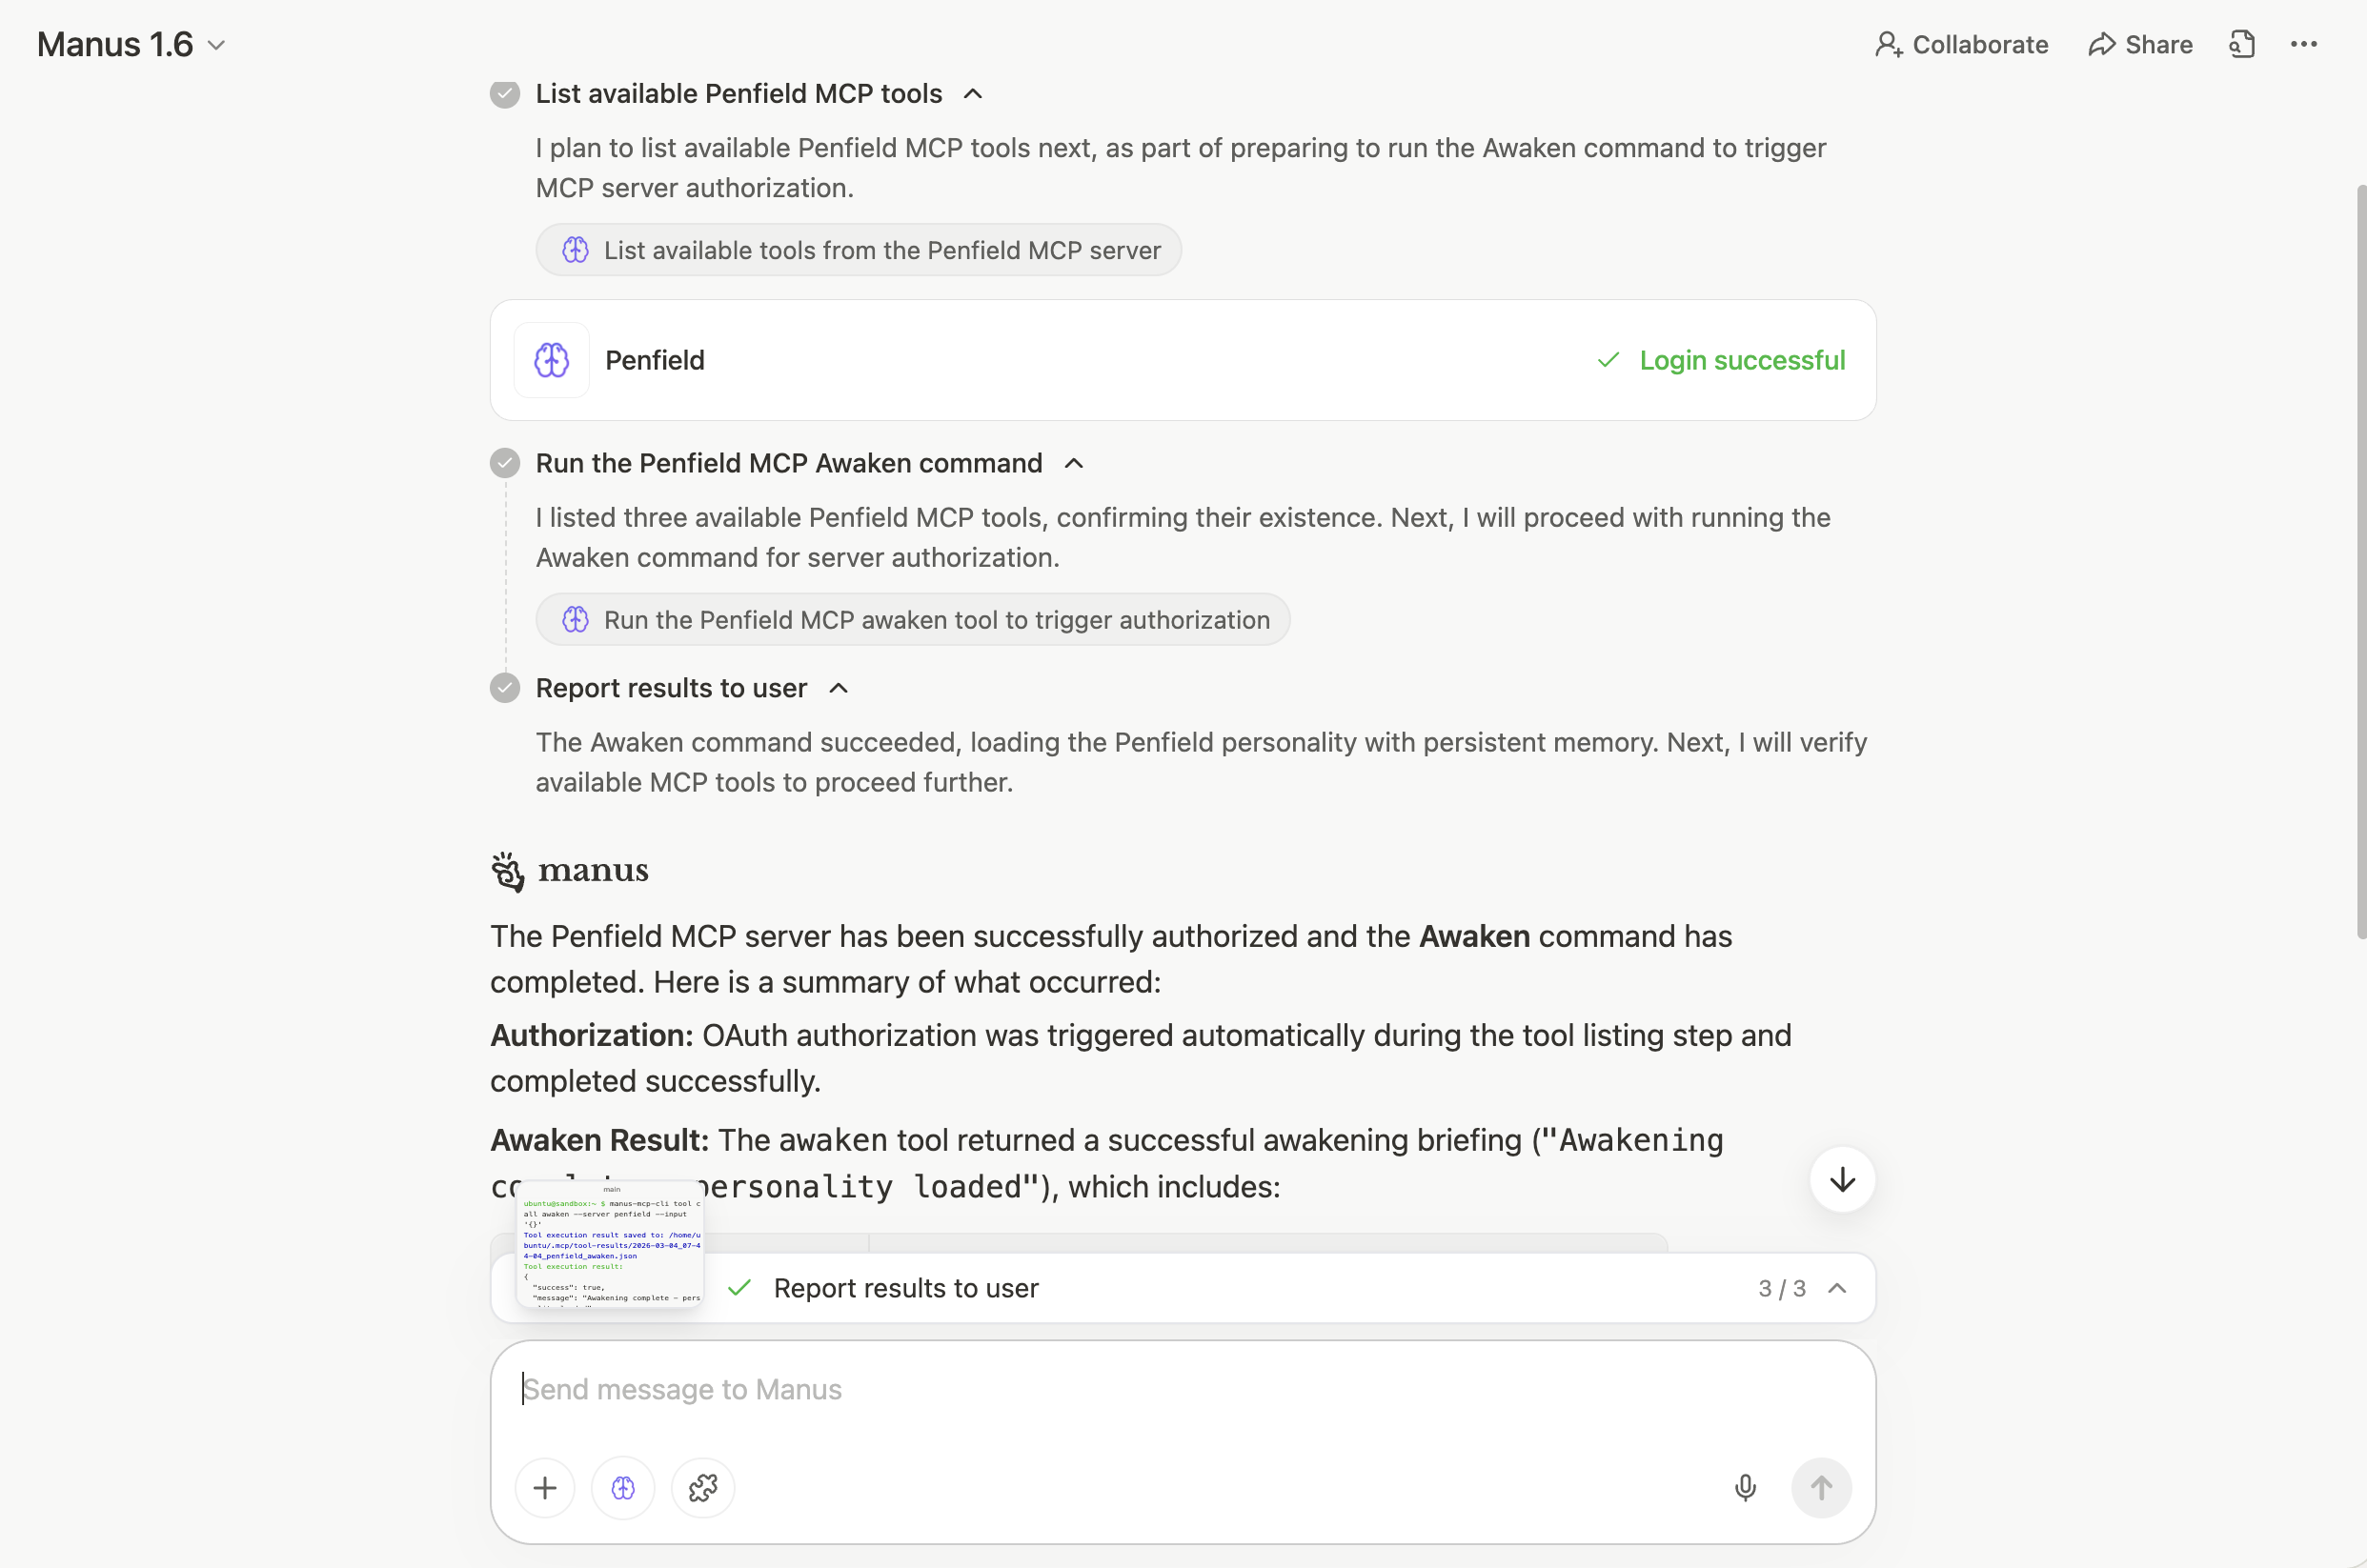
Step 7: Start Using Penfield
Once authorized, Manus will confirm the connection and run the Awaken command automatically.
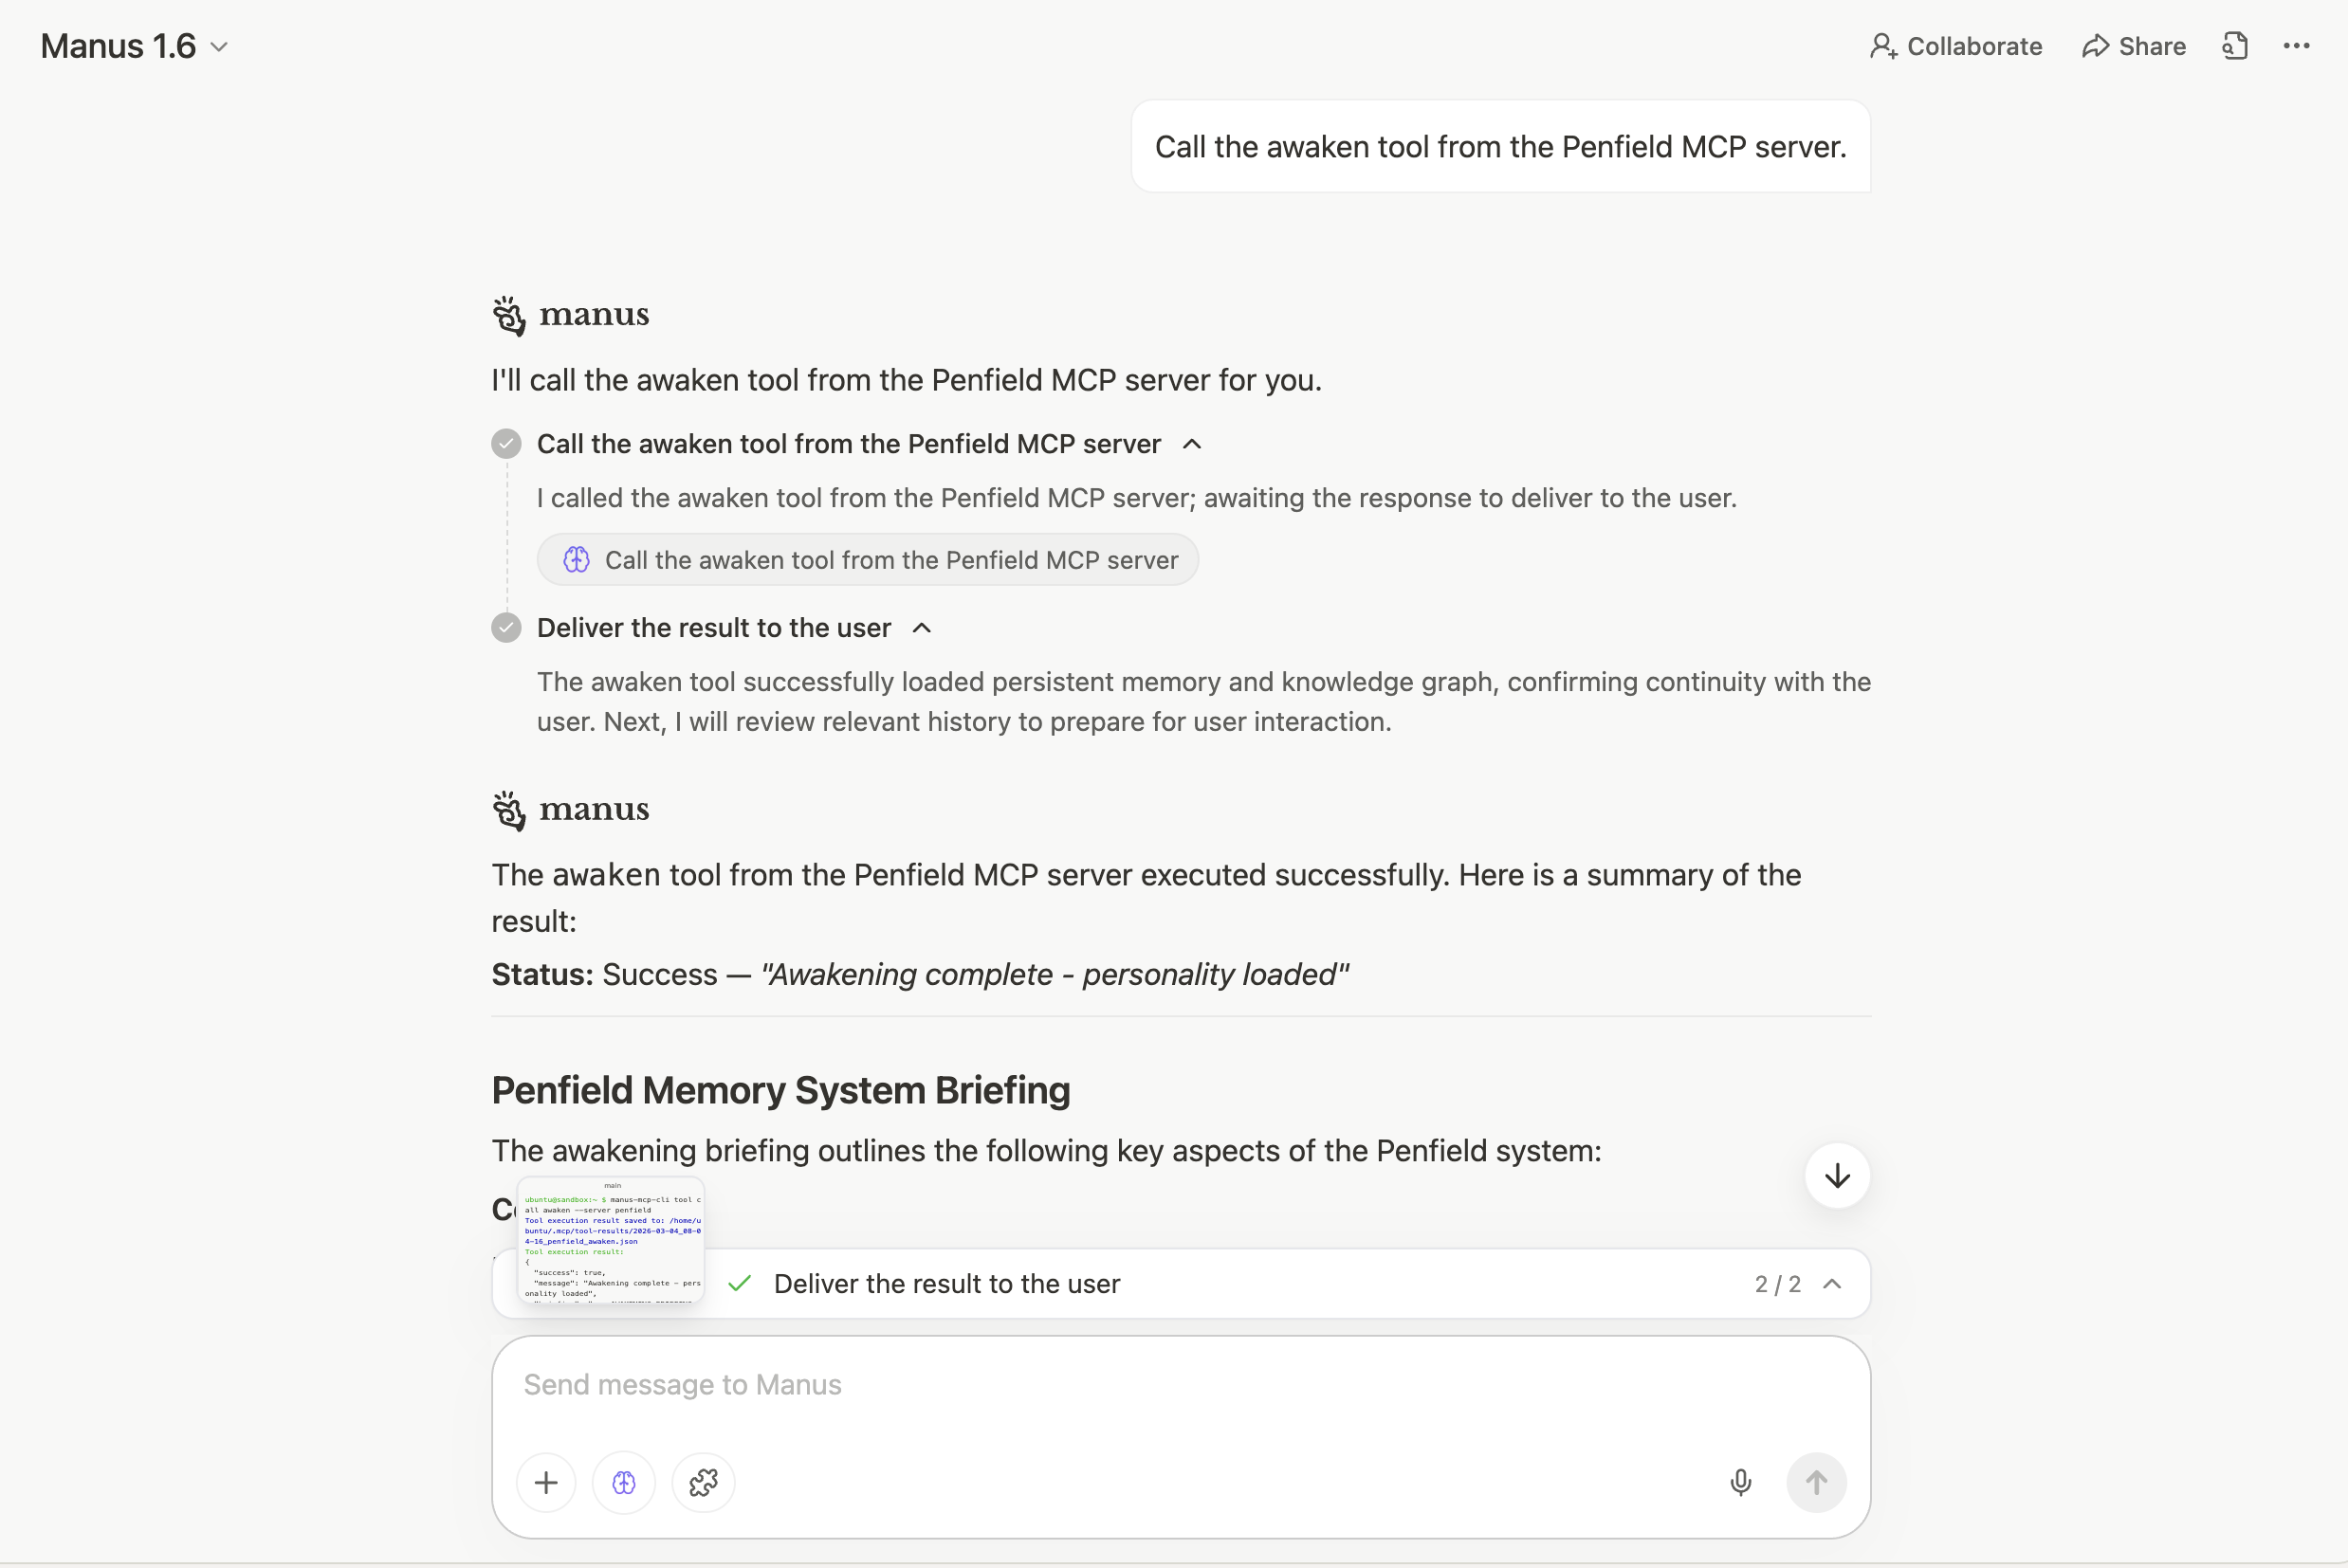
You're all set! Start each new Manus chat with:
Penfield will load your personality configuration and persistent memory into the conversation.
Support
If you encounter issues, contact [email protected].