Grok Setup
Connect Penfield to Grok as a custom connector to enable persistent memory and personality features in your Grok conversations.
Prerequisites
- A Penfield account (sign up here if you haven't already)
- A Grok account at grok.com
Step 1: Open Grok Settings
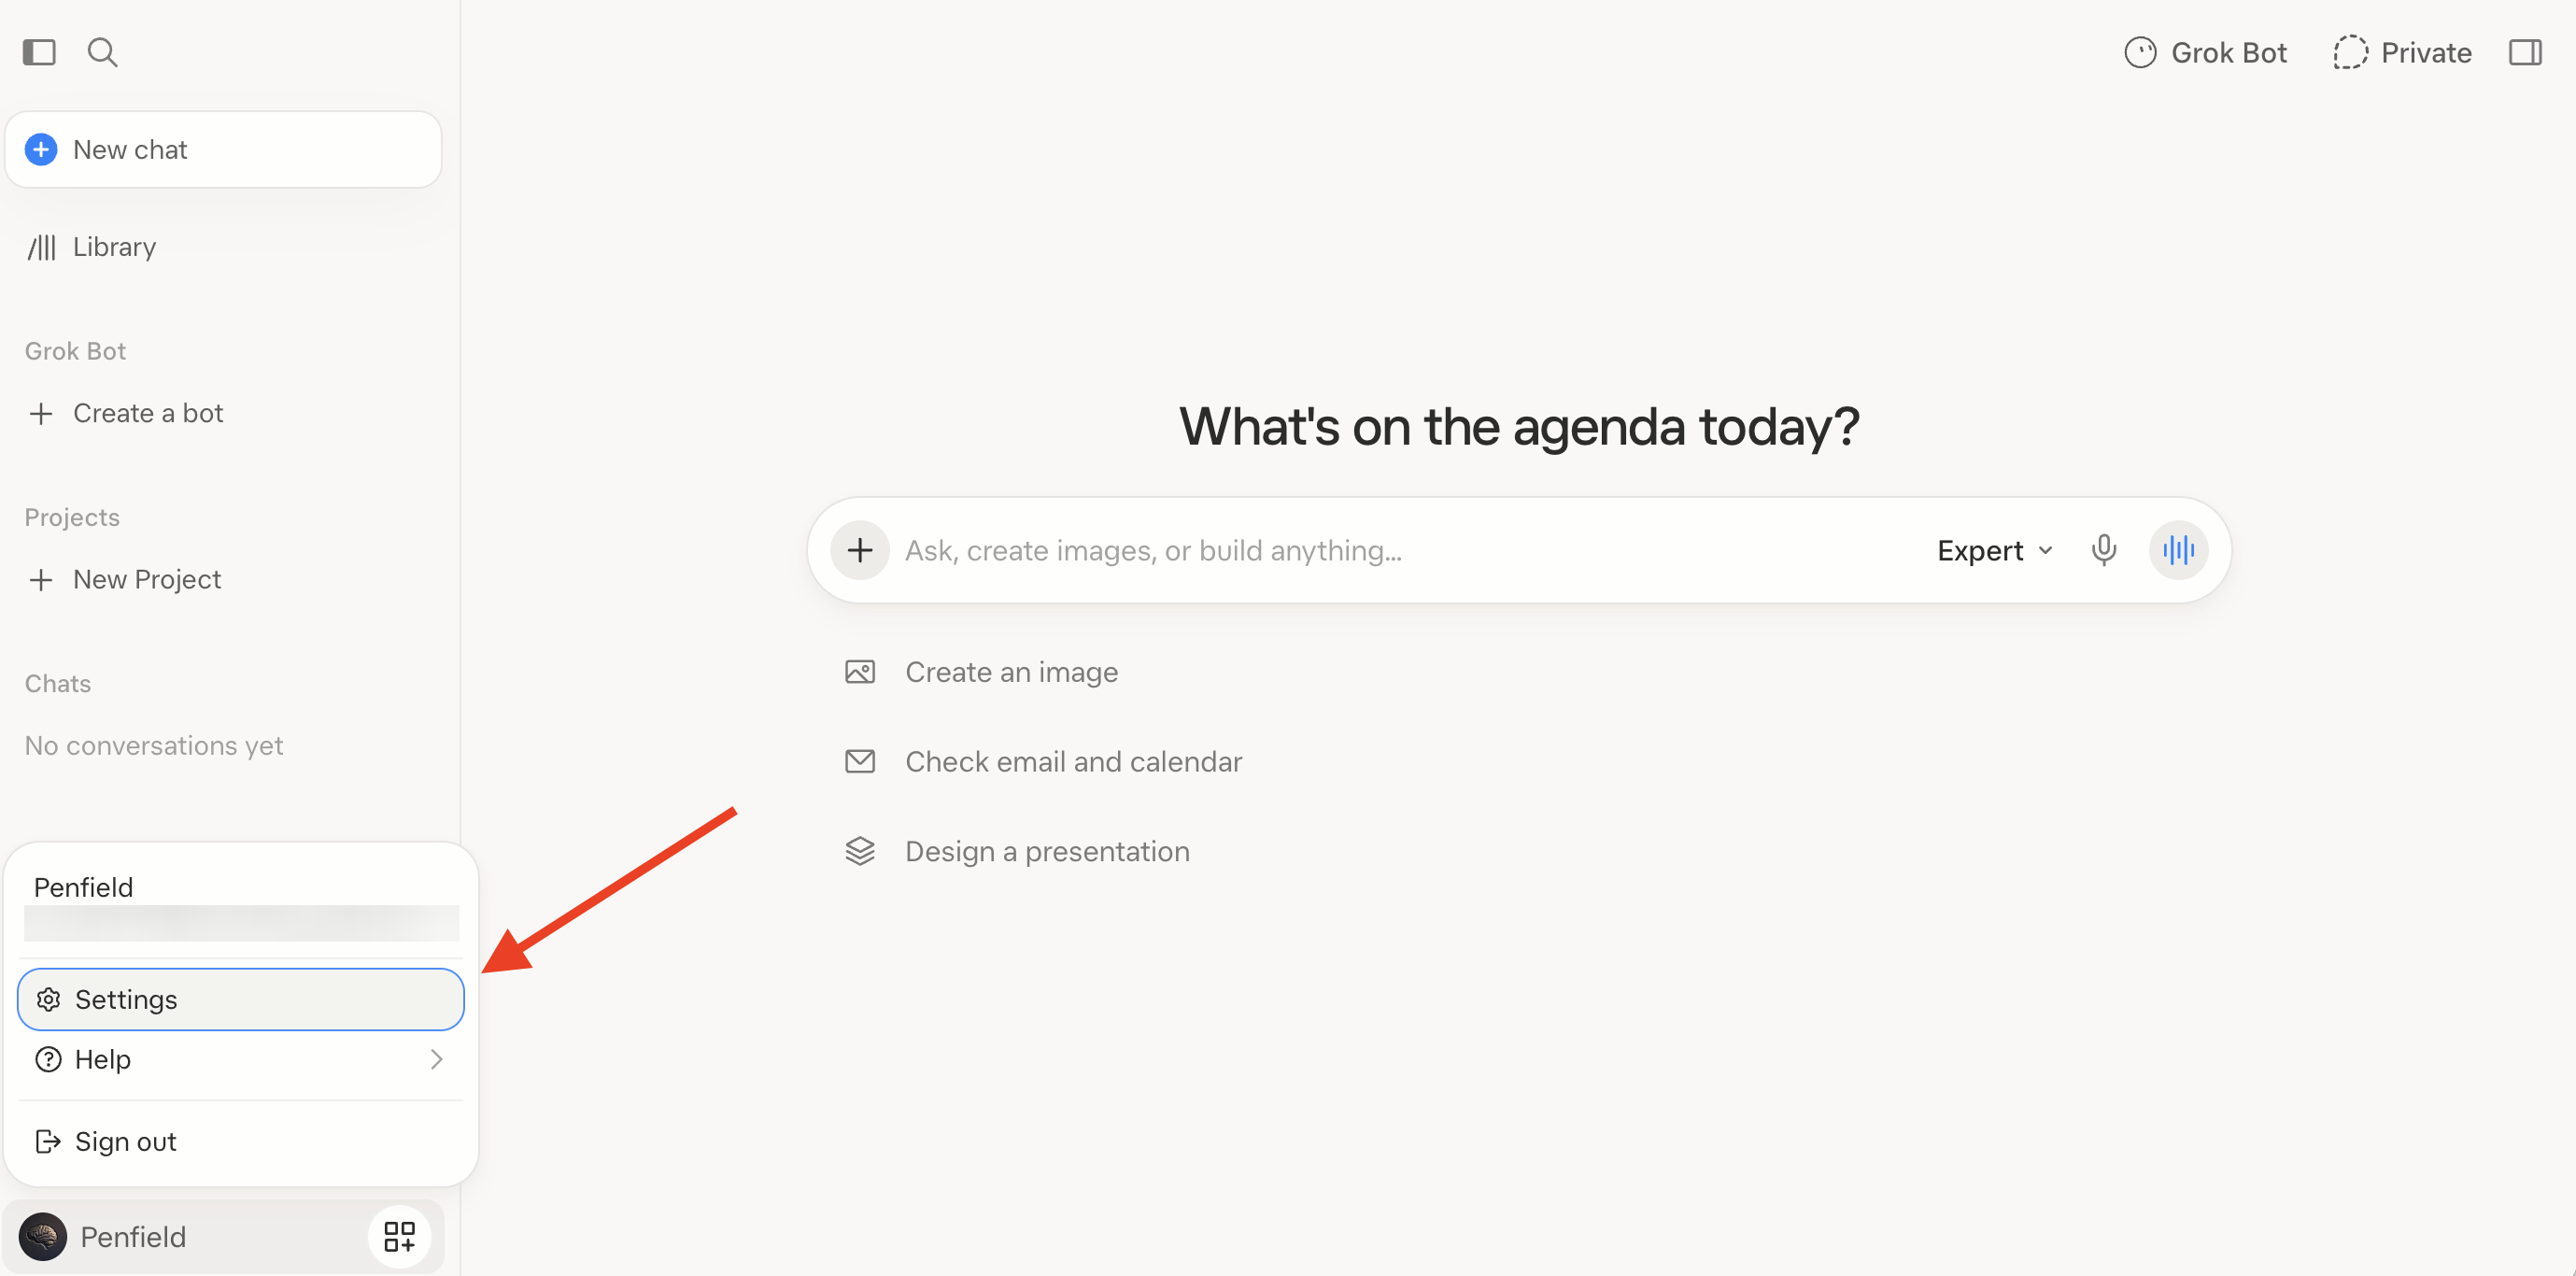
Click your name in the bottom-left corner of Grok, then click Settings.
Step 2: Open Connect Apps
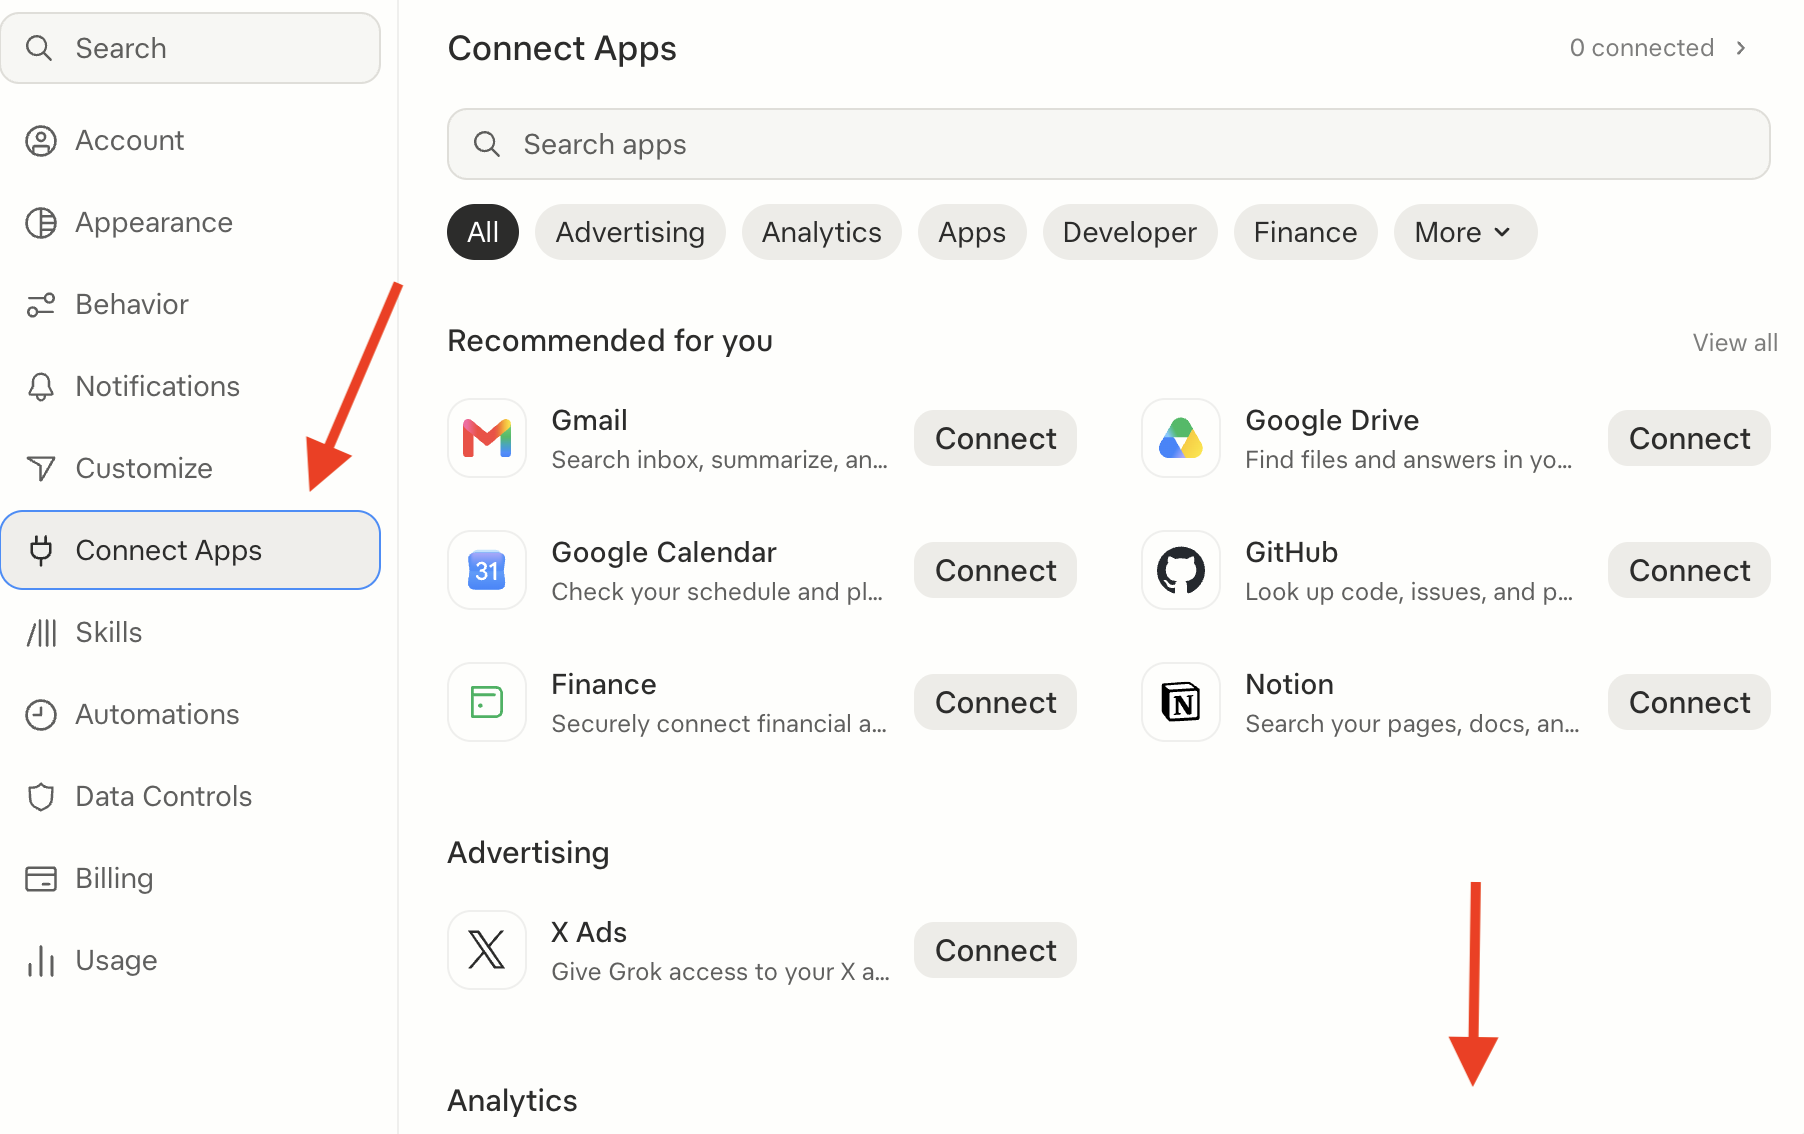
Click Connect Apps in the left sidebar, then scroll to the bottom of the list.
Step 3: Add a Custom Connector
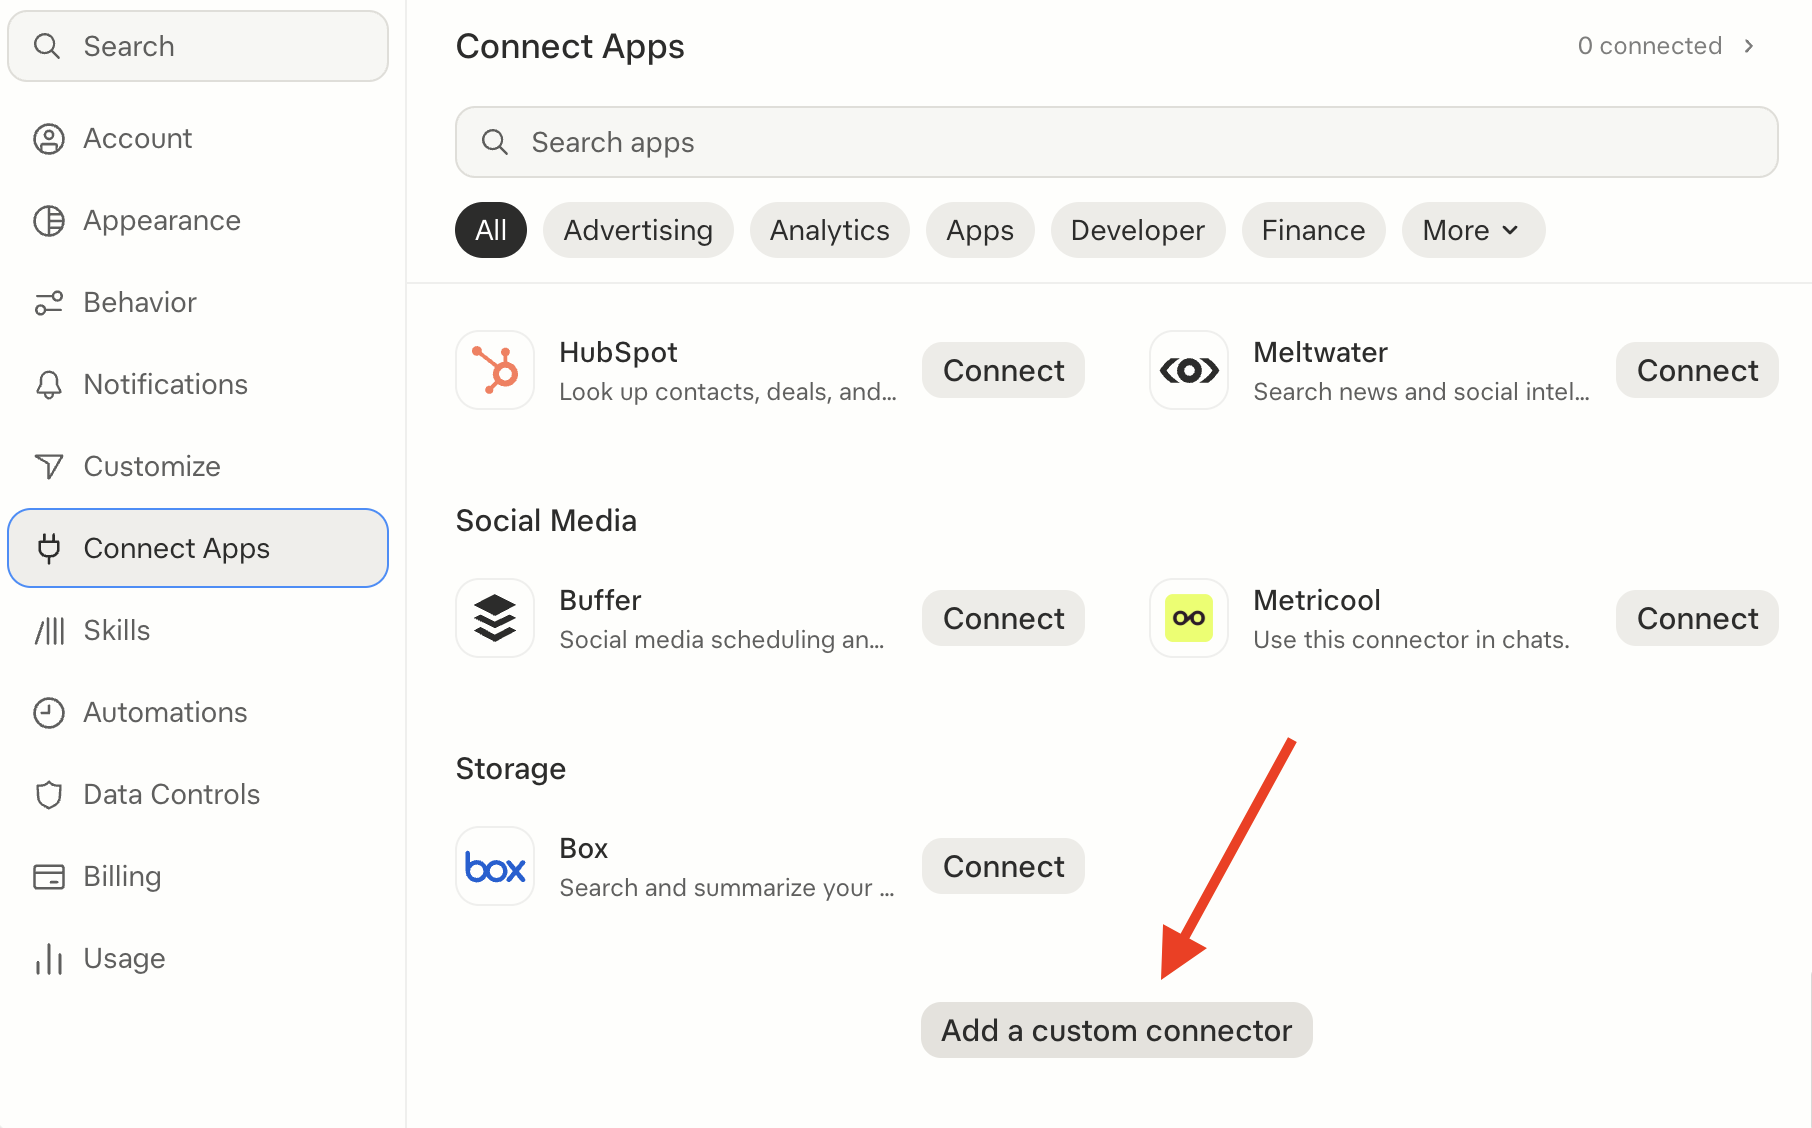
At the bottom of the list, click Add a custom connector.
Step 4: Add the Penfield MCP Server
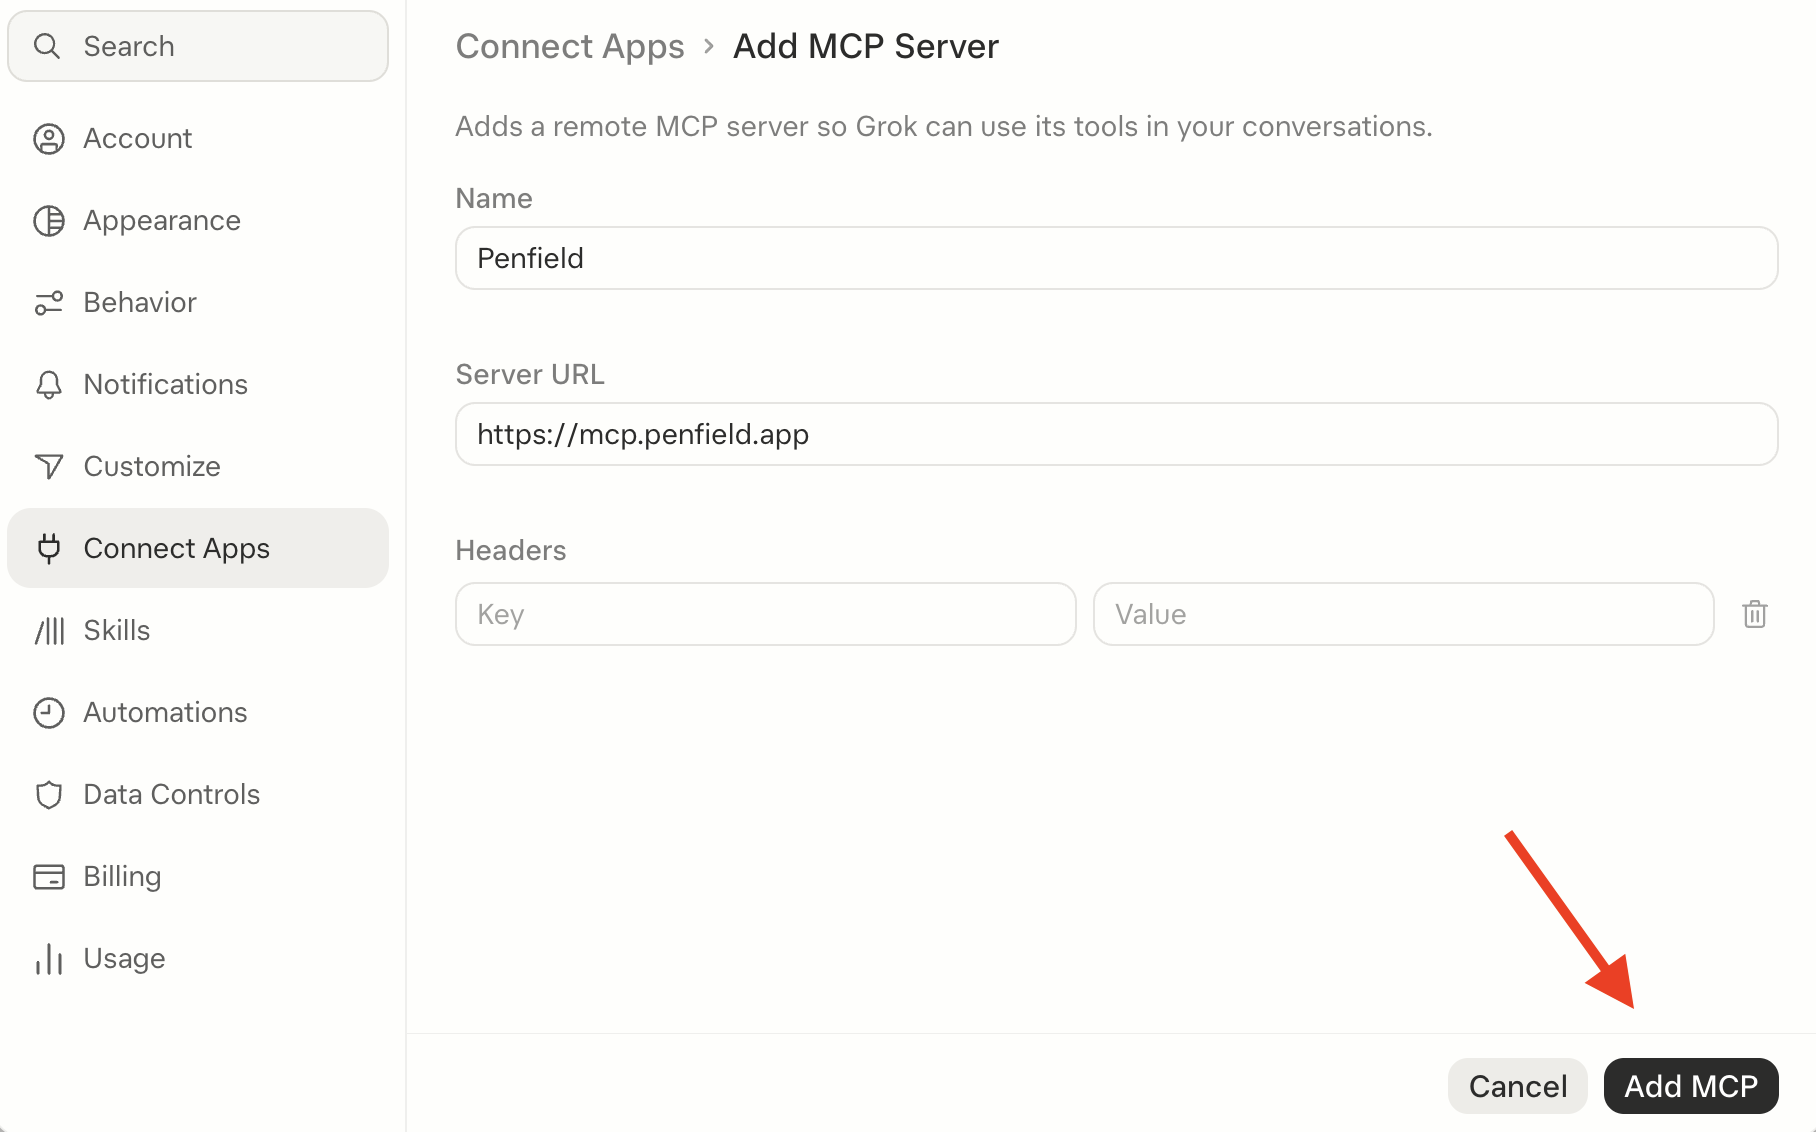
Fill in the Add MCP Server form:
| Field | Value |
|---|---|
| Name | Penfield |
| Server URL | https://mcp.penfield.app |
| Headers | Leave empty |
Click Add MCP.
Step 5: Authorize the Connection
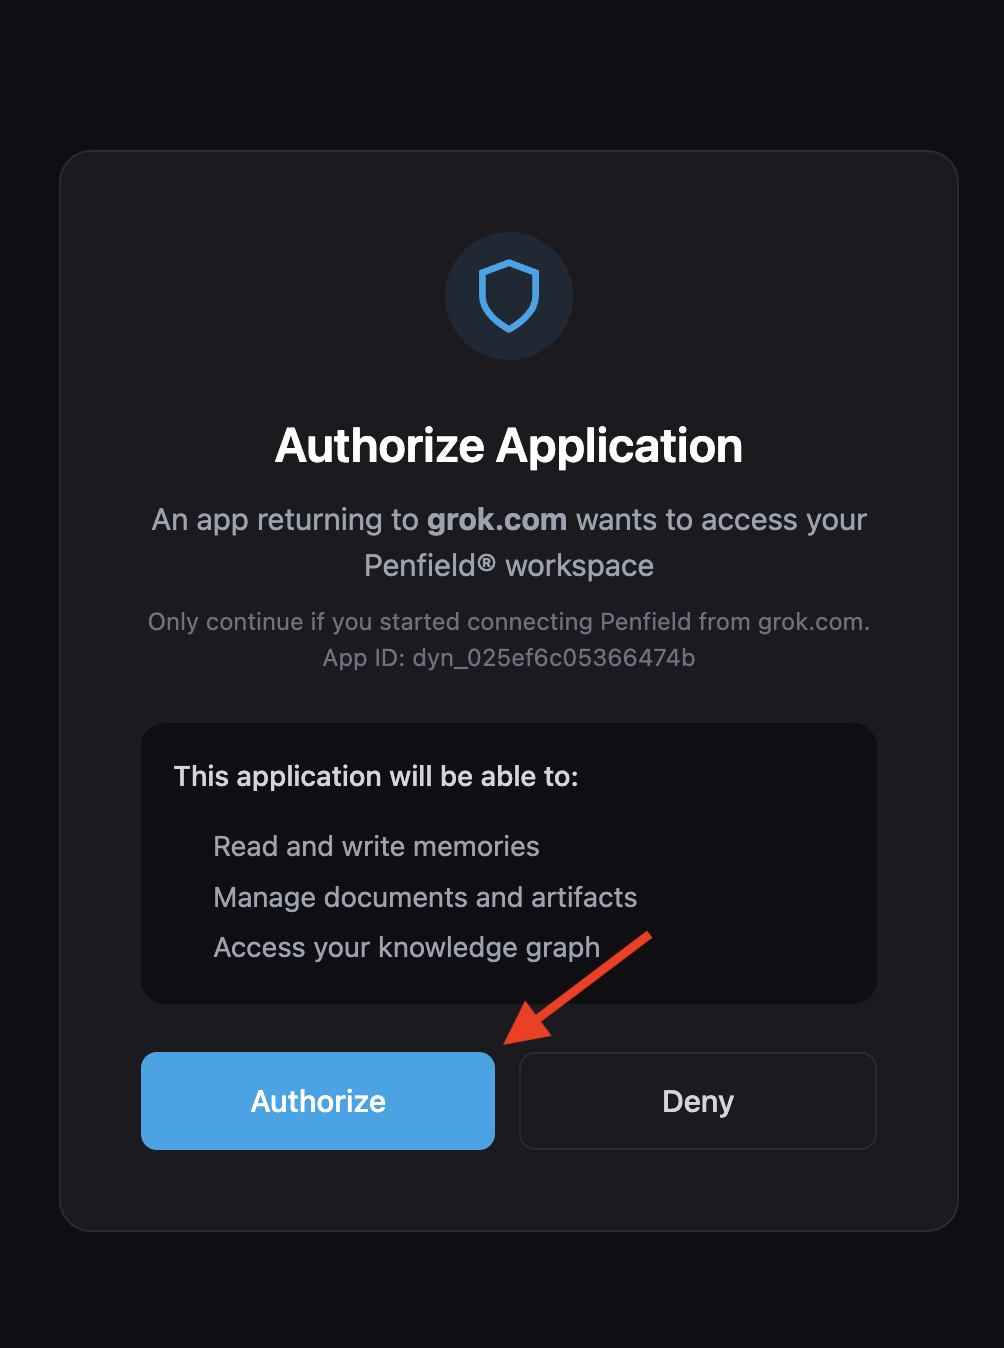
A Penfield page opens. Sign in to your Penfield account if asked, then click Authorize to connect your Penfield workspace to Grok.
Step 6: Activate Your Assistant
Start a new chat in Grok and type:
Typing @Penfield selects the Penfield connector for the message.
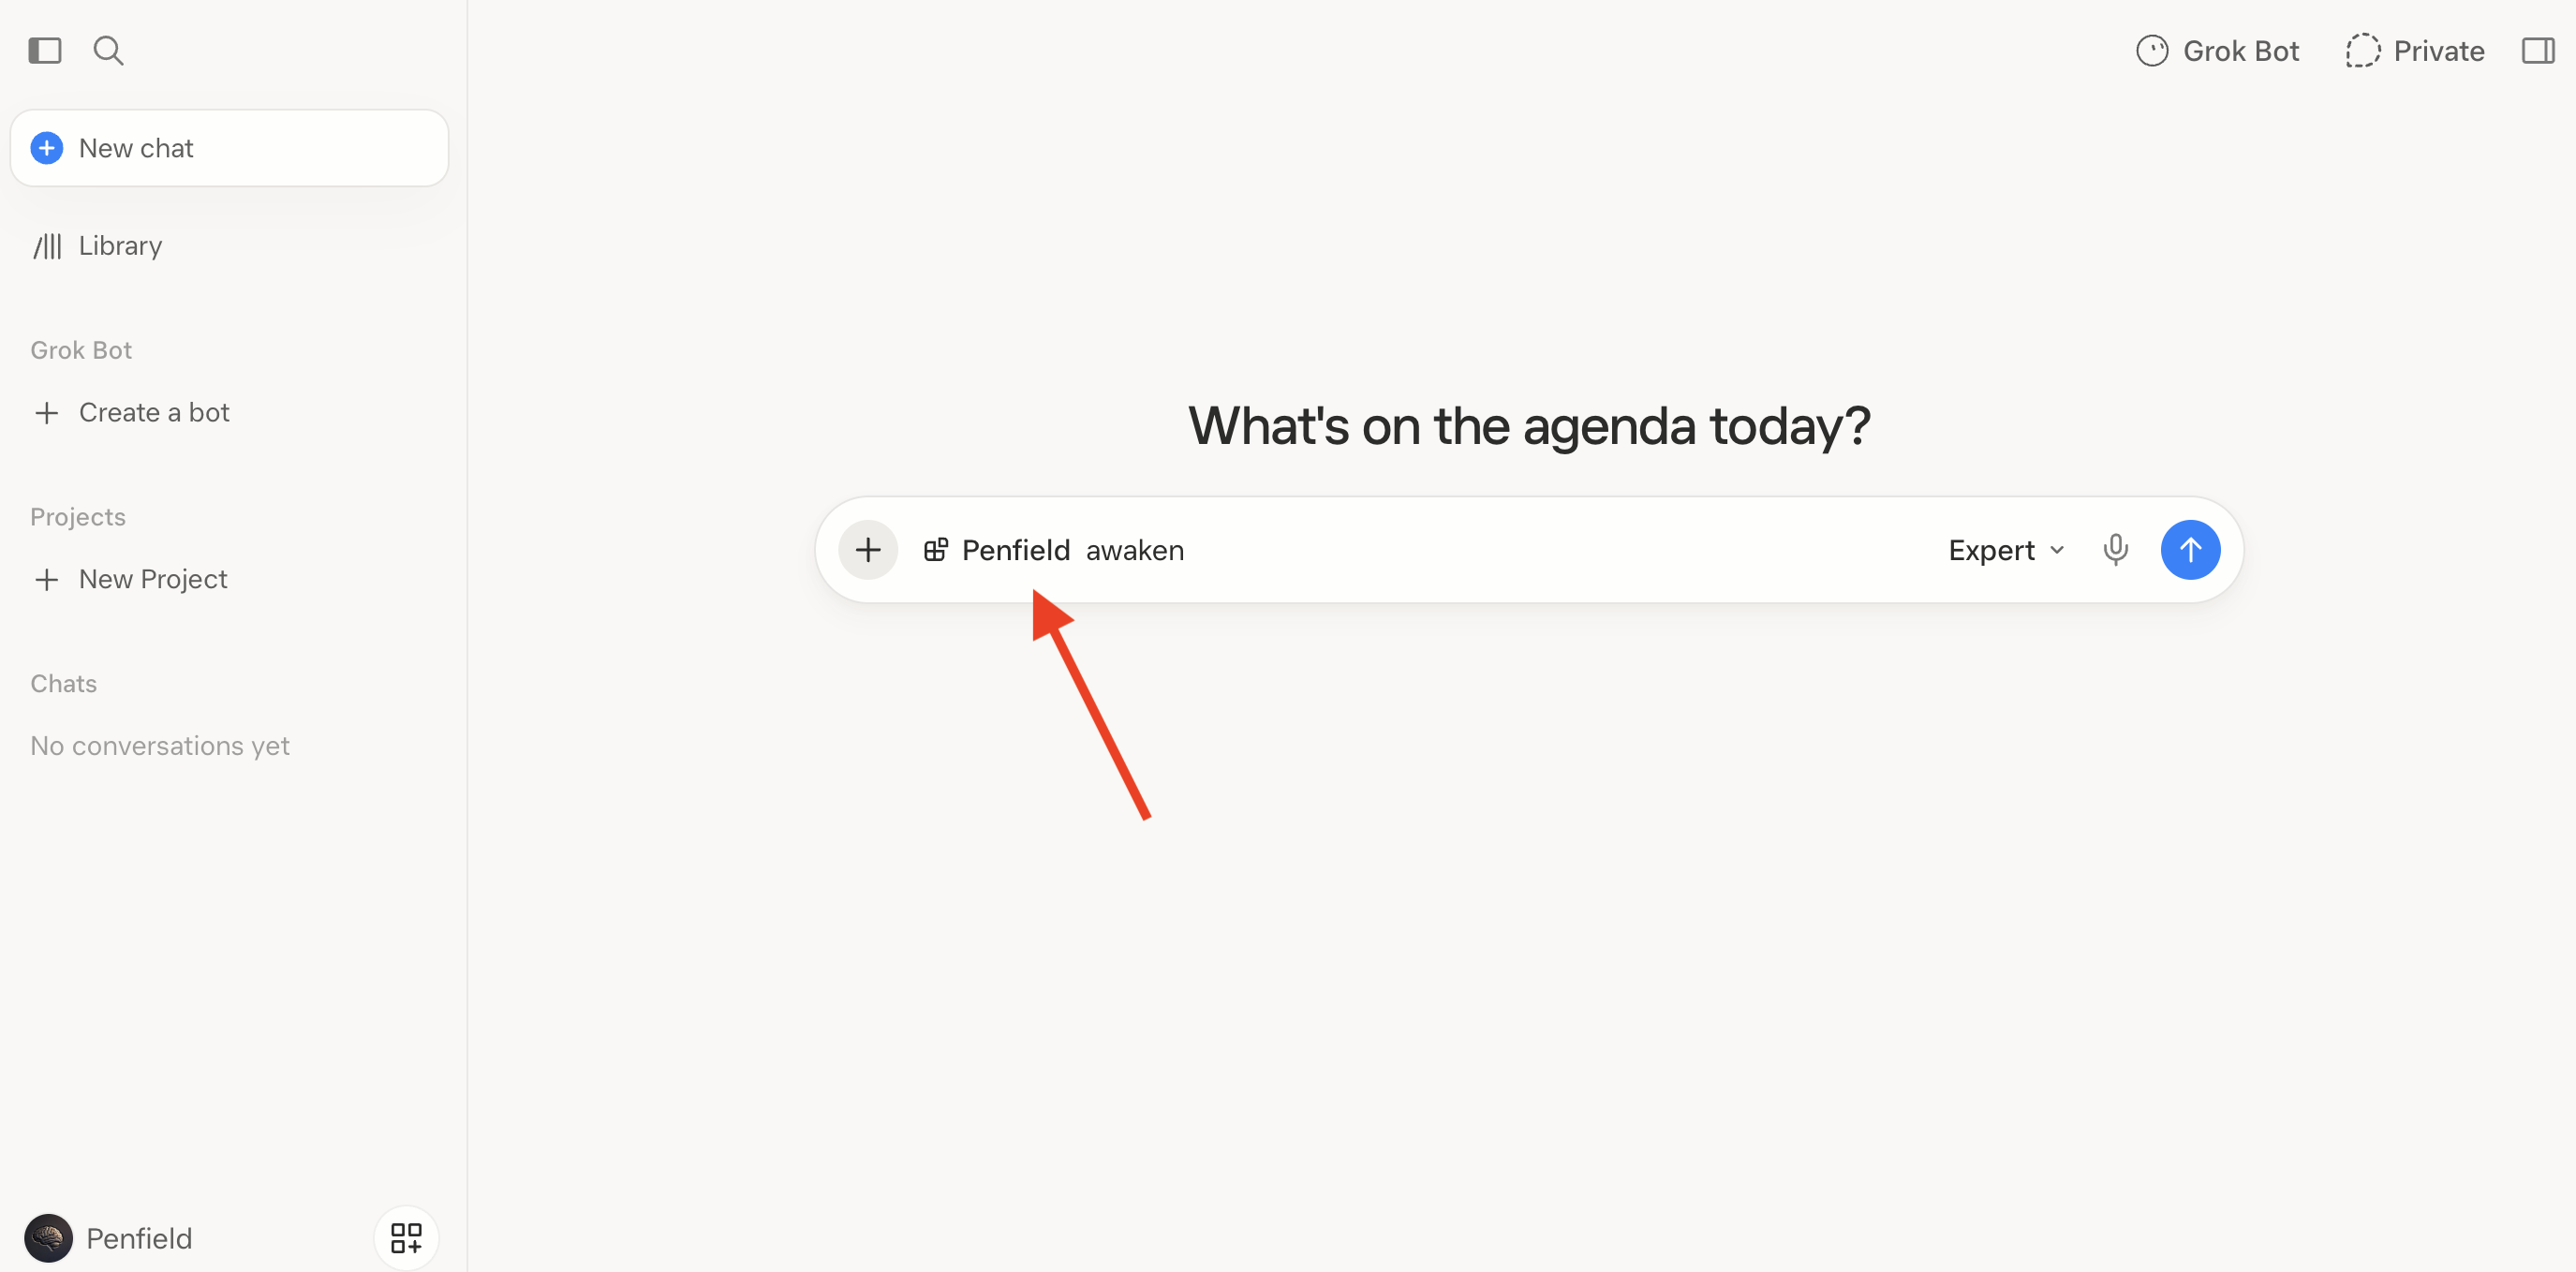
Penfield will load your personality configuration and respond with a personalized greeting. Start each new chat this way.
Support
If you encounter issues, contact [email protected].