Penfield Setup Guide
Connect Penfield to Claude.ai and configure your personalized AI assistant.
Prerequisites
- A valid Penfield invitation (check your email) or existing Penfield account
- A Claude.ai account with an active subscription
- A supported browser (Chrome, Firefox, or Brave recommended)
Step 1: Sign Up for a Free Trial
Go to https://portal.penfield.app/sign-up
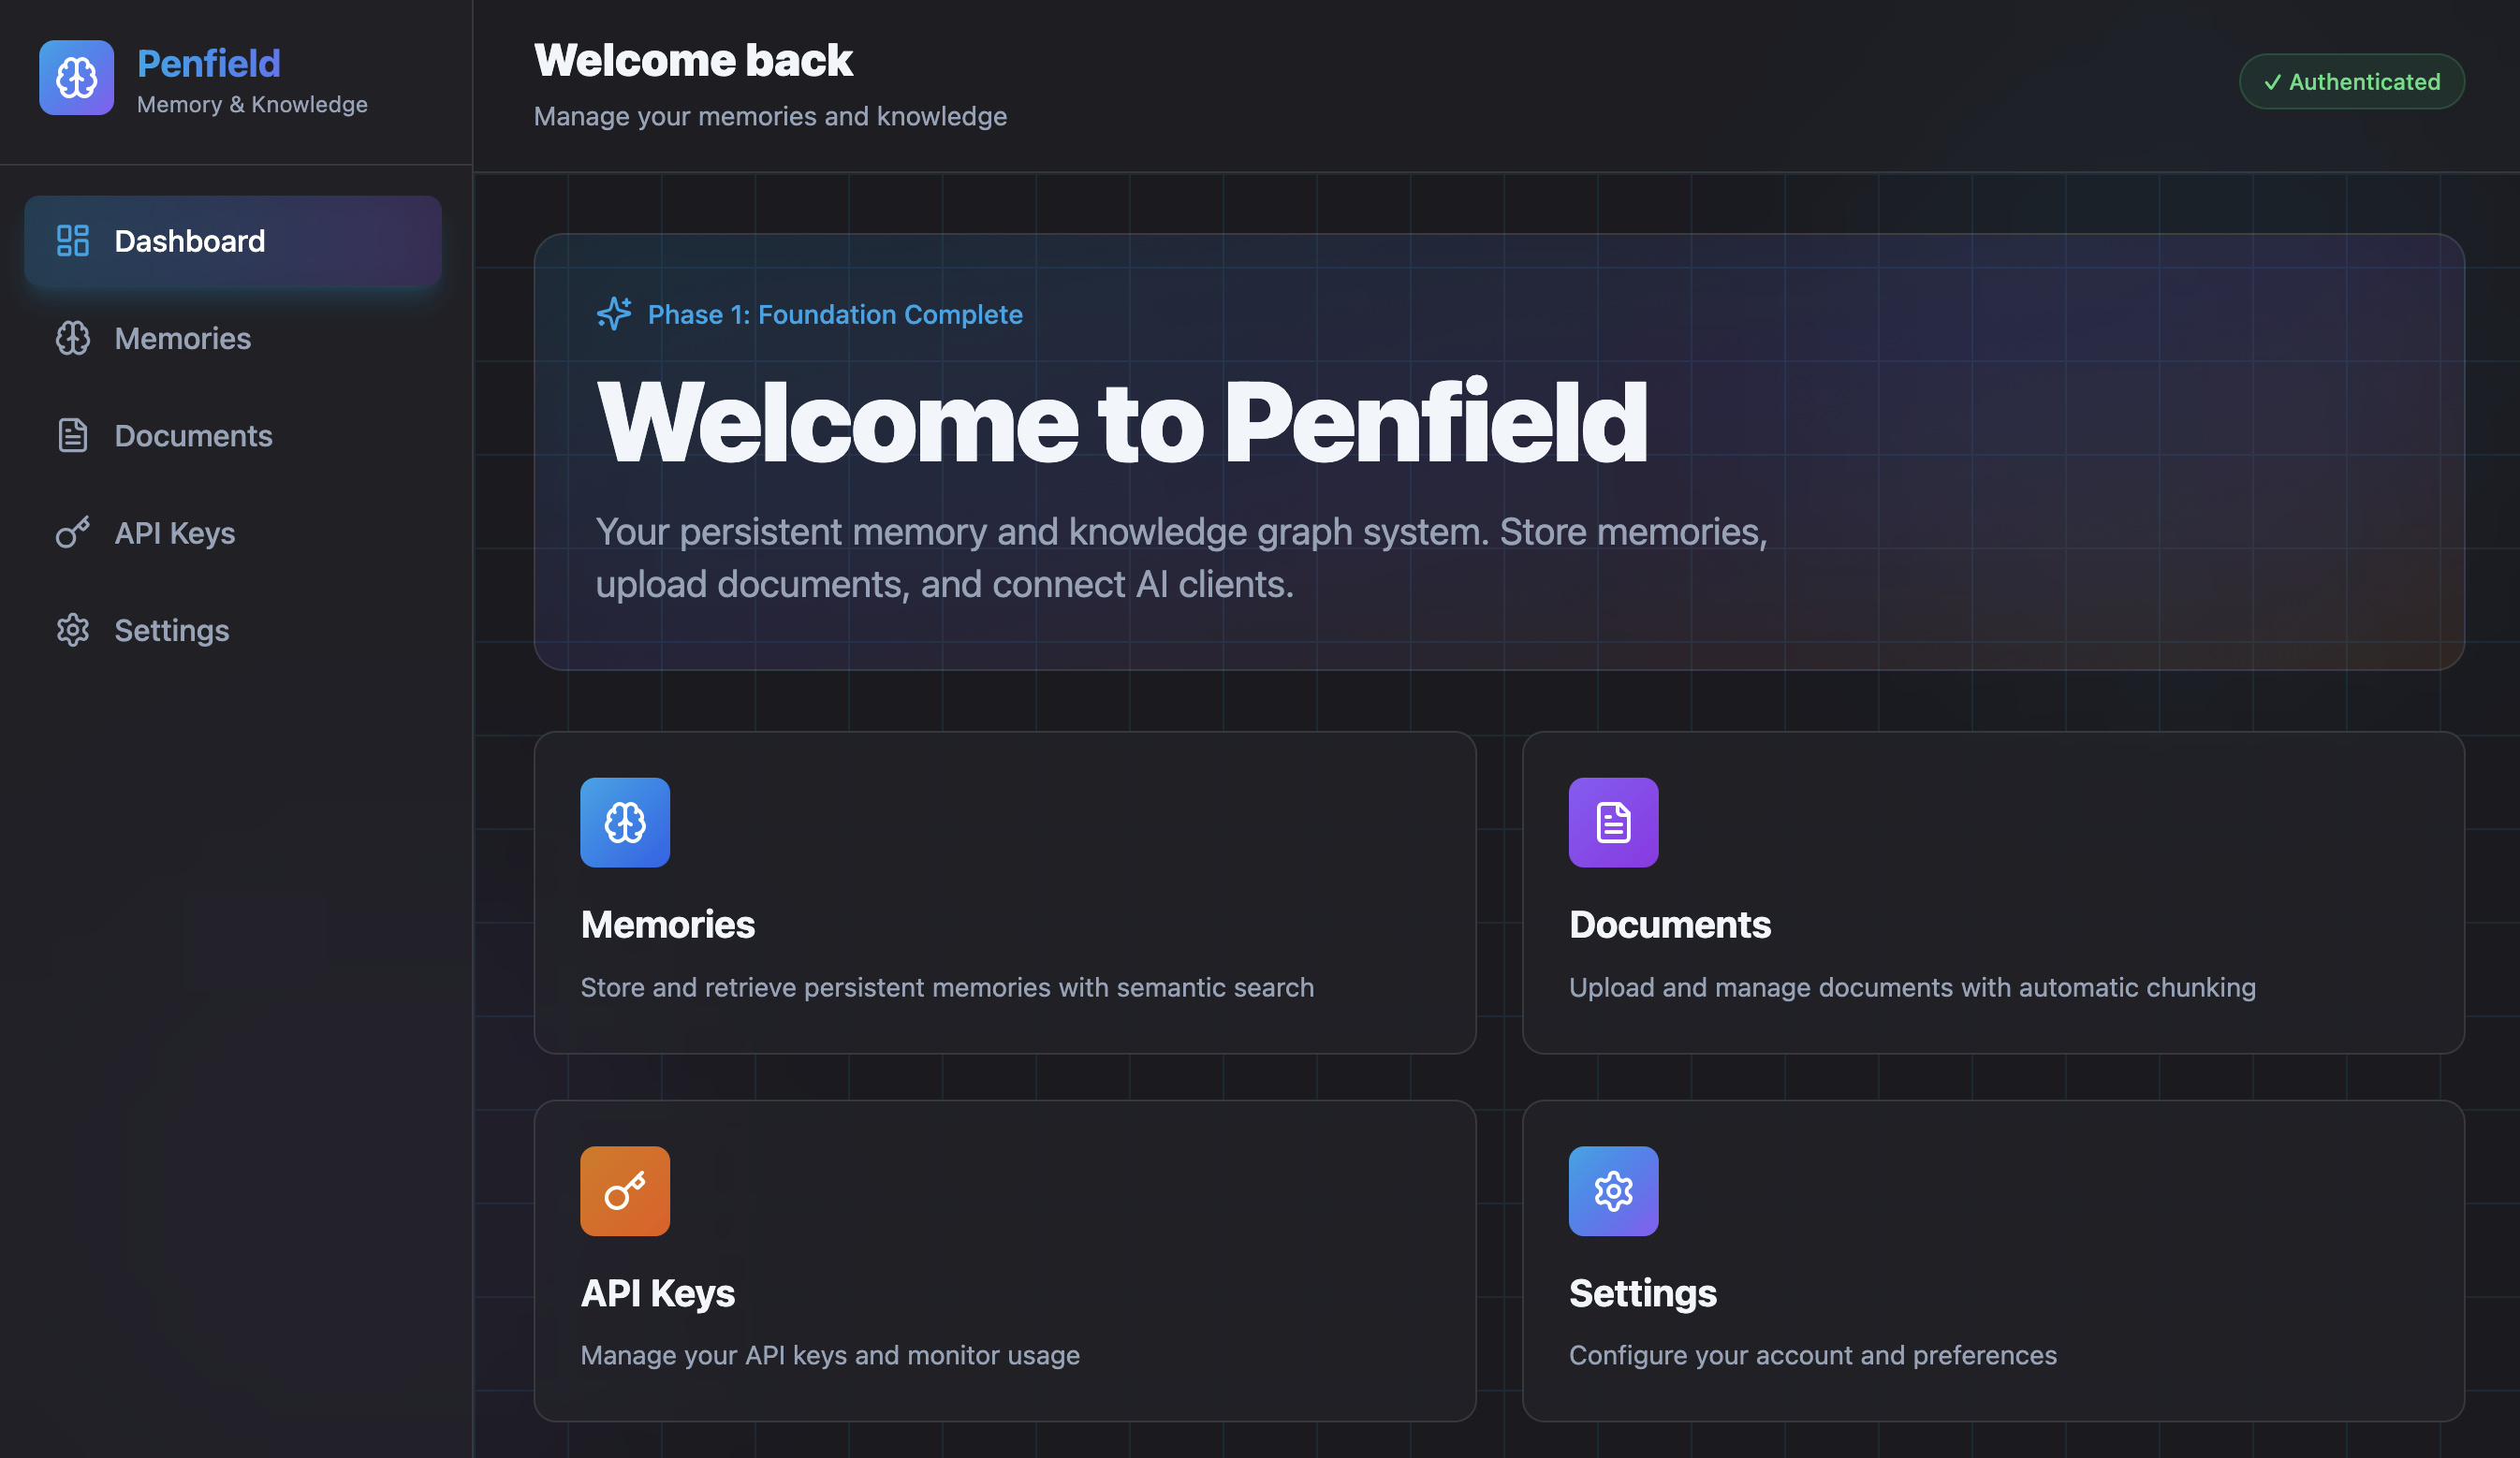
Step 2: Create Your Penfield Account
Enter your name, email address and set a password, or connect with your Google account.
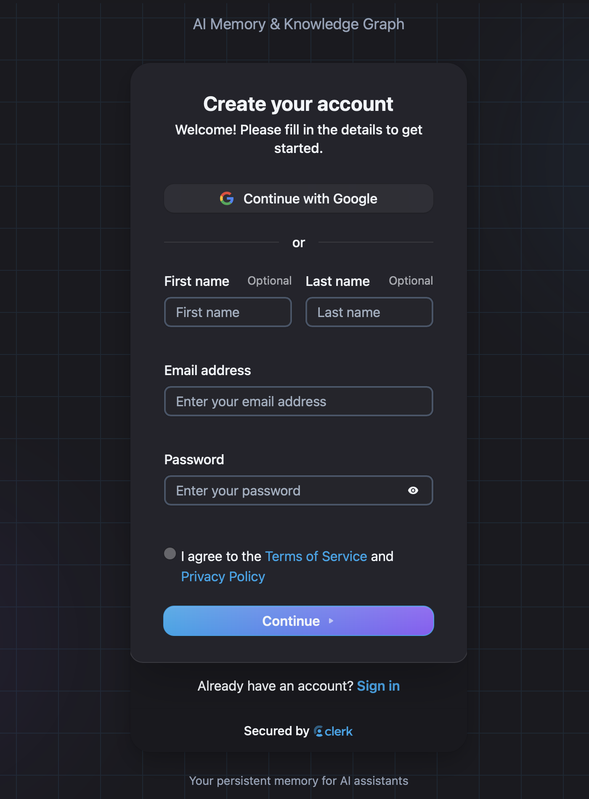
Agree to the Terms of Service and the Privacy Policy and click "Continue".
Step 3: Set Up Claude.ai
If you don't already have a Claude account, create one at claude.ai.
Sign in to Claude.ai. A paid Claude subscription (Pro or Team) is required to use custom connectors.
Note: Safari may have compatibility issues. We recommend using Chrome, Firefox, or Brave.
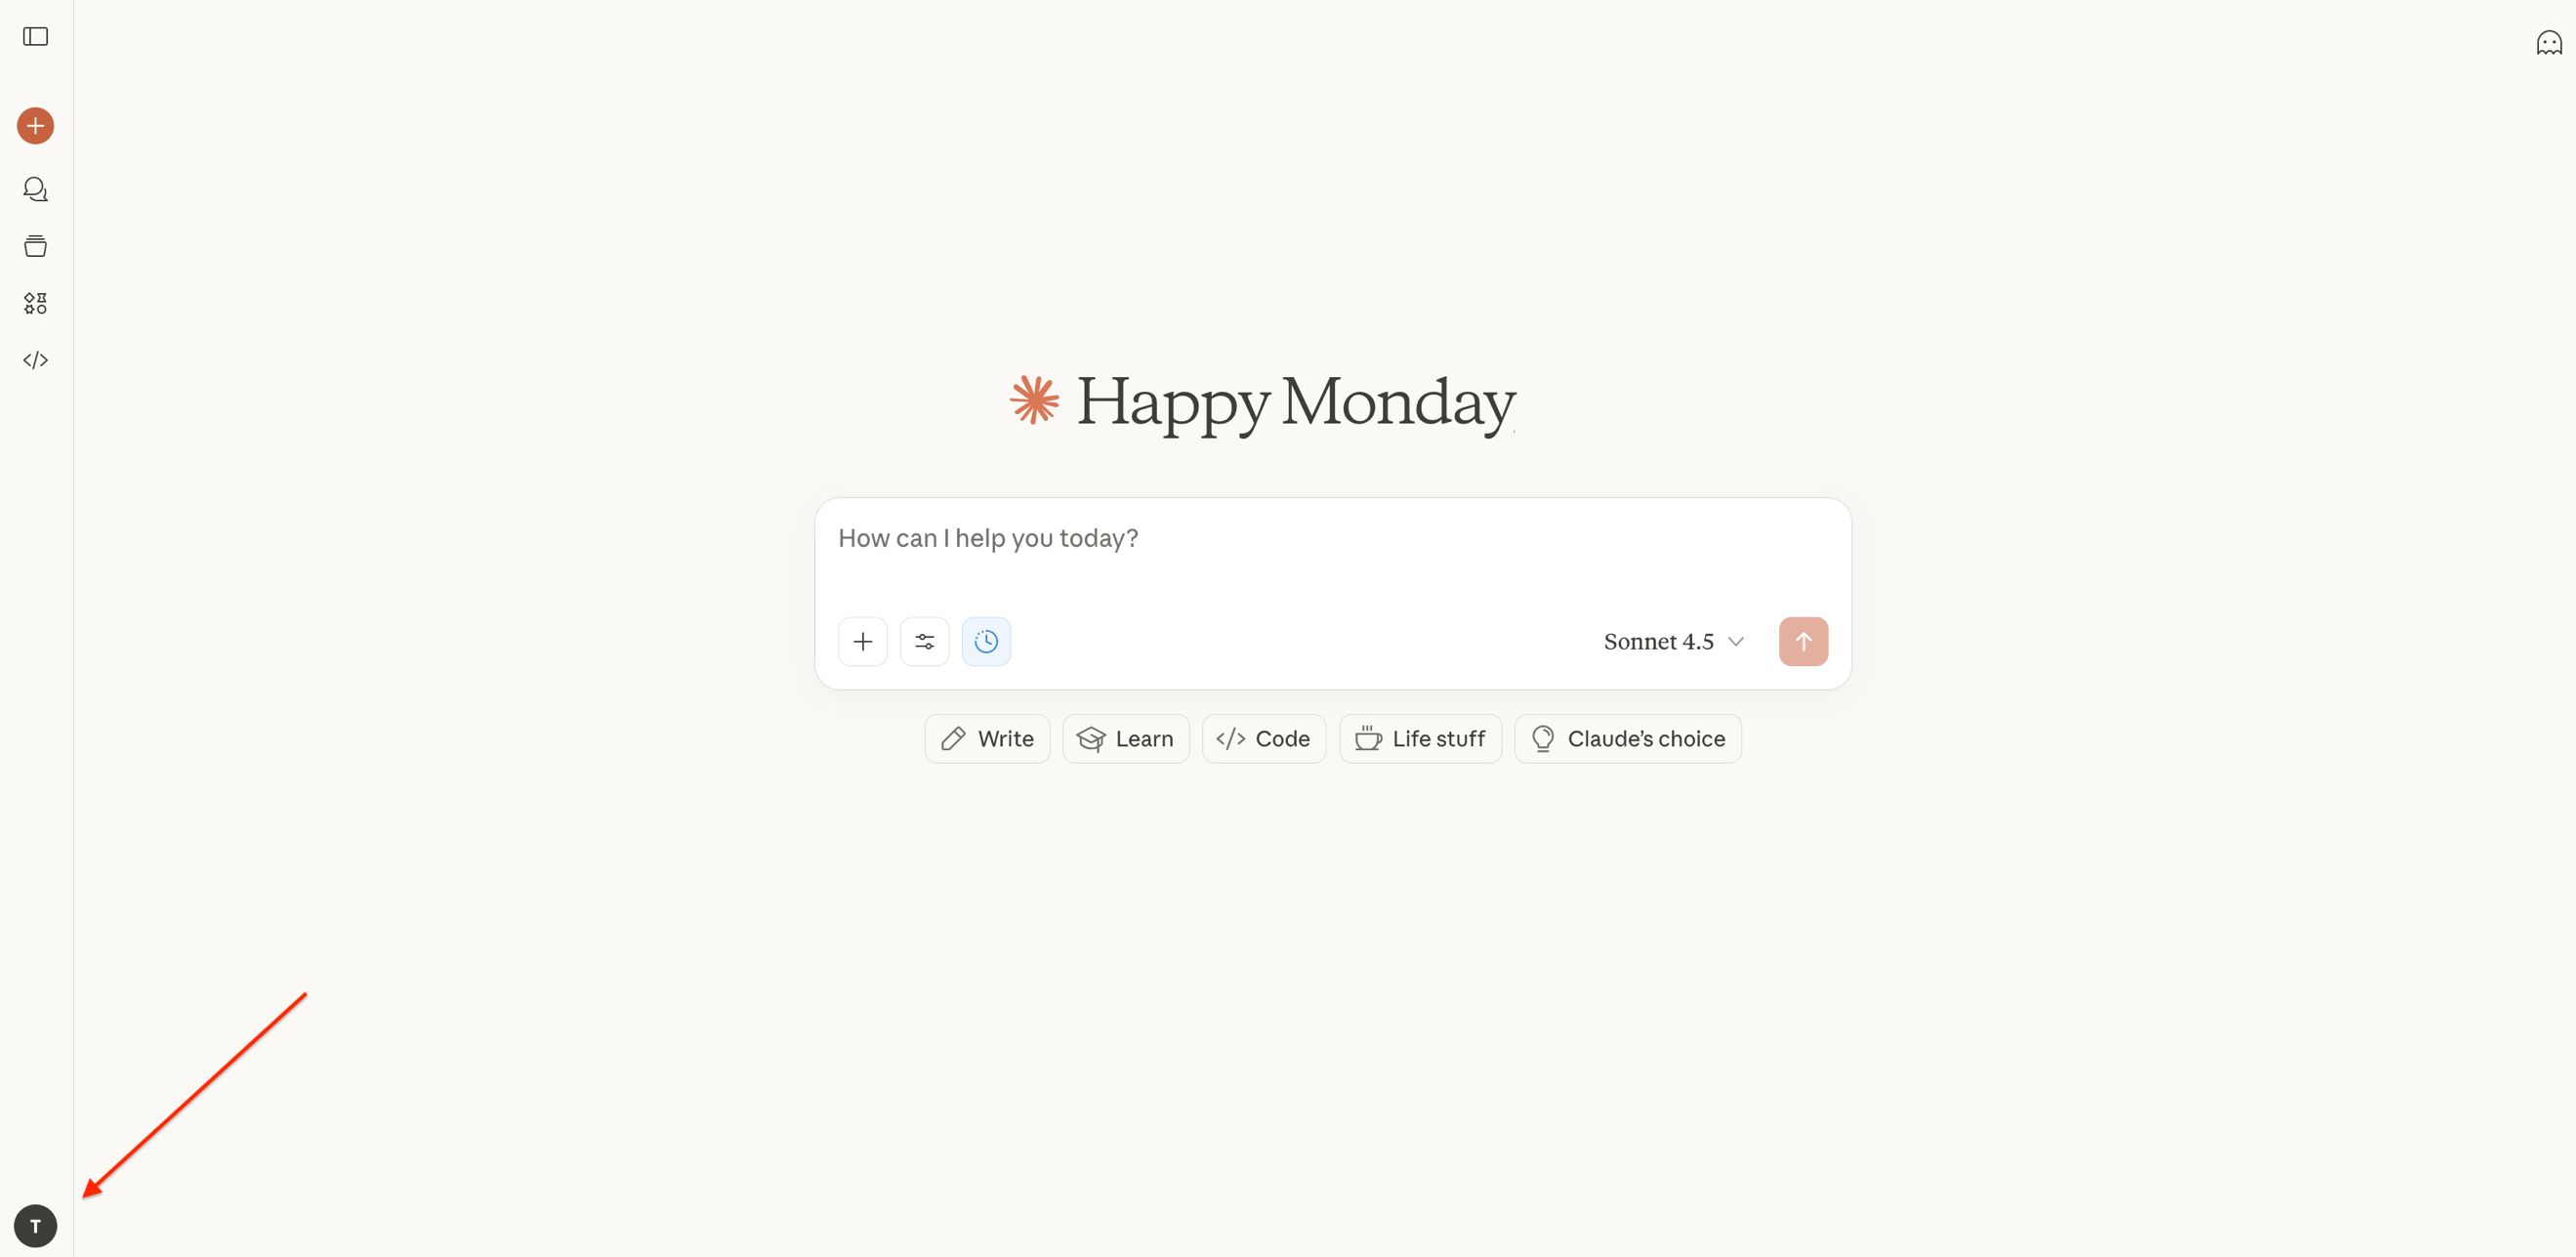
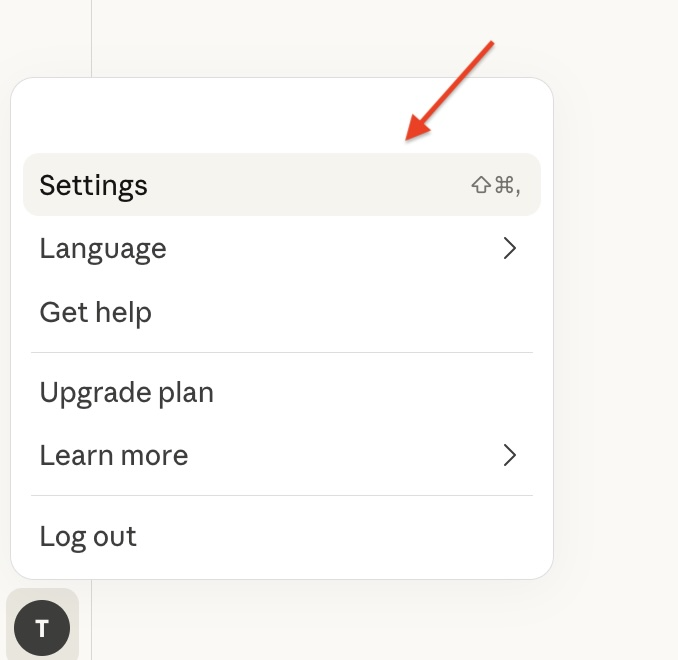
Step 4: Open Claude Settings
Click your profile icon in the bottom-left corner, then select Settings.
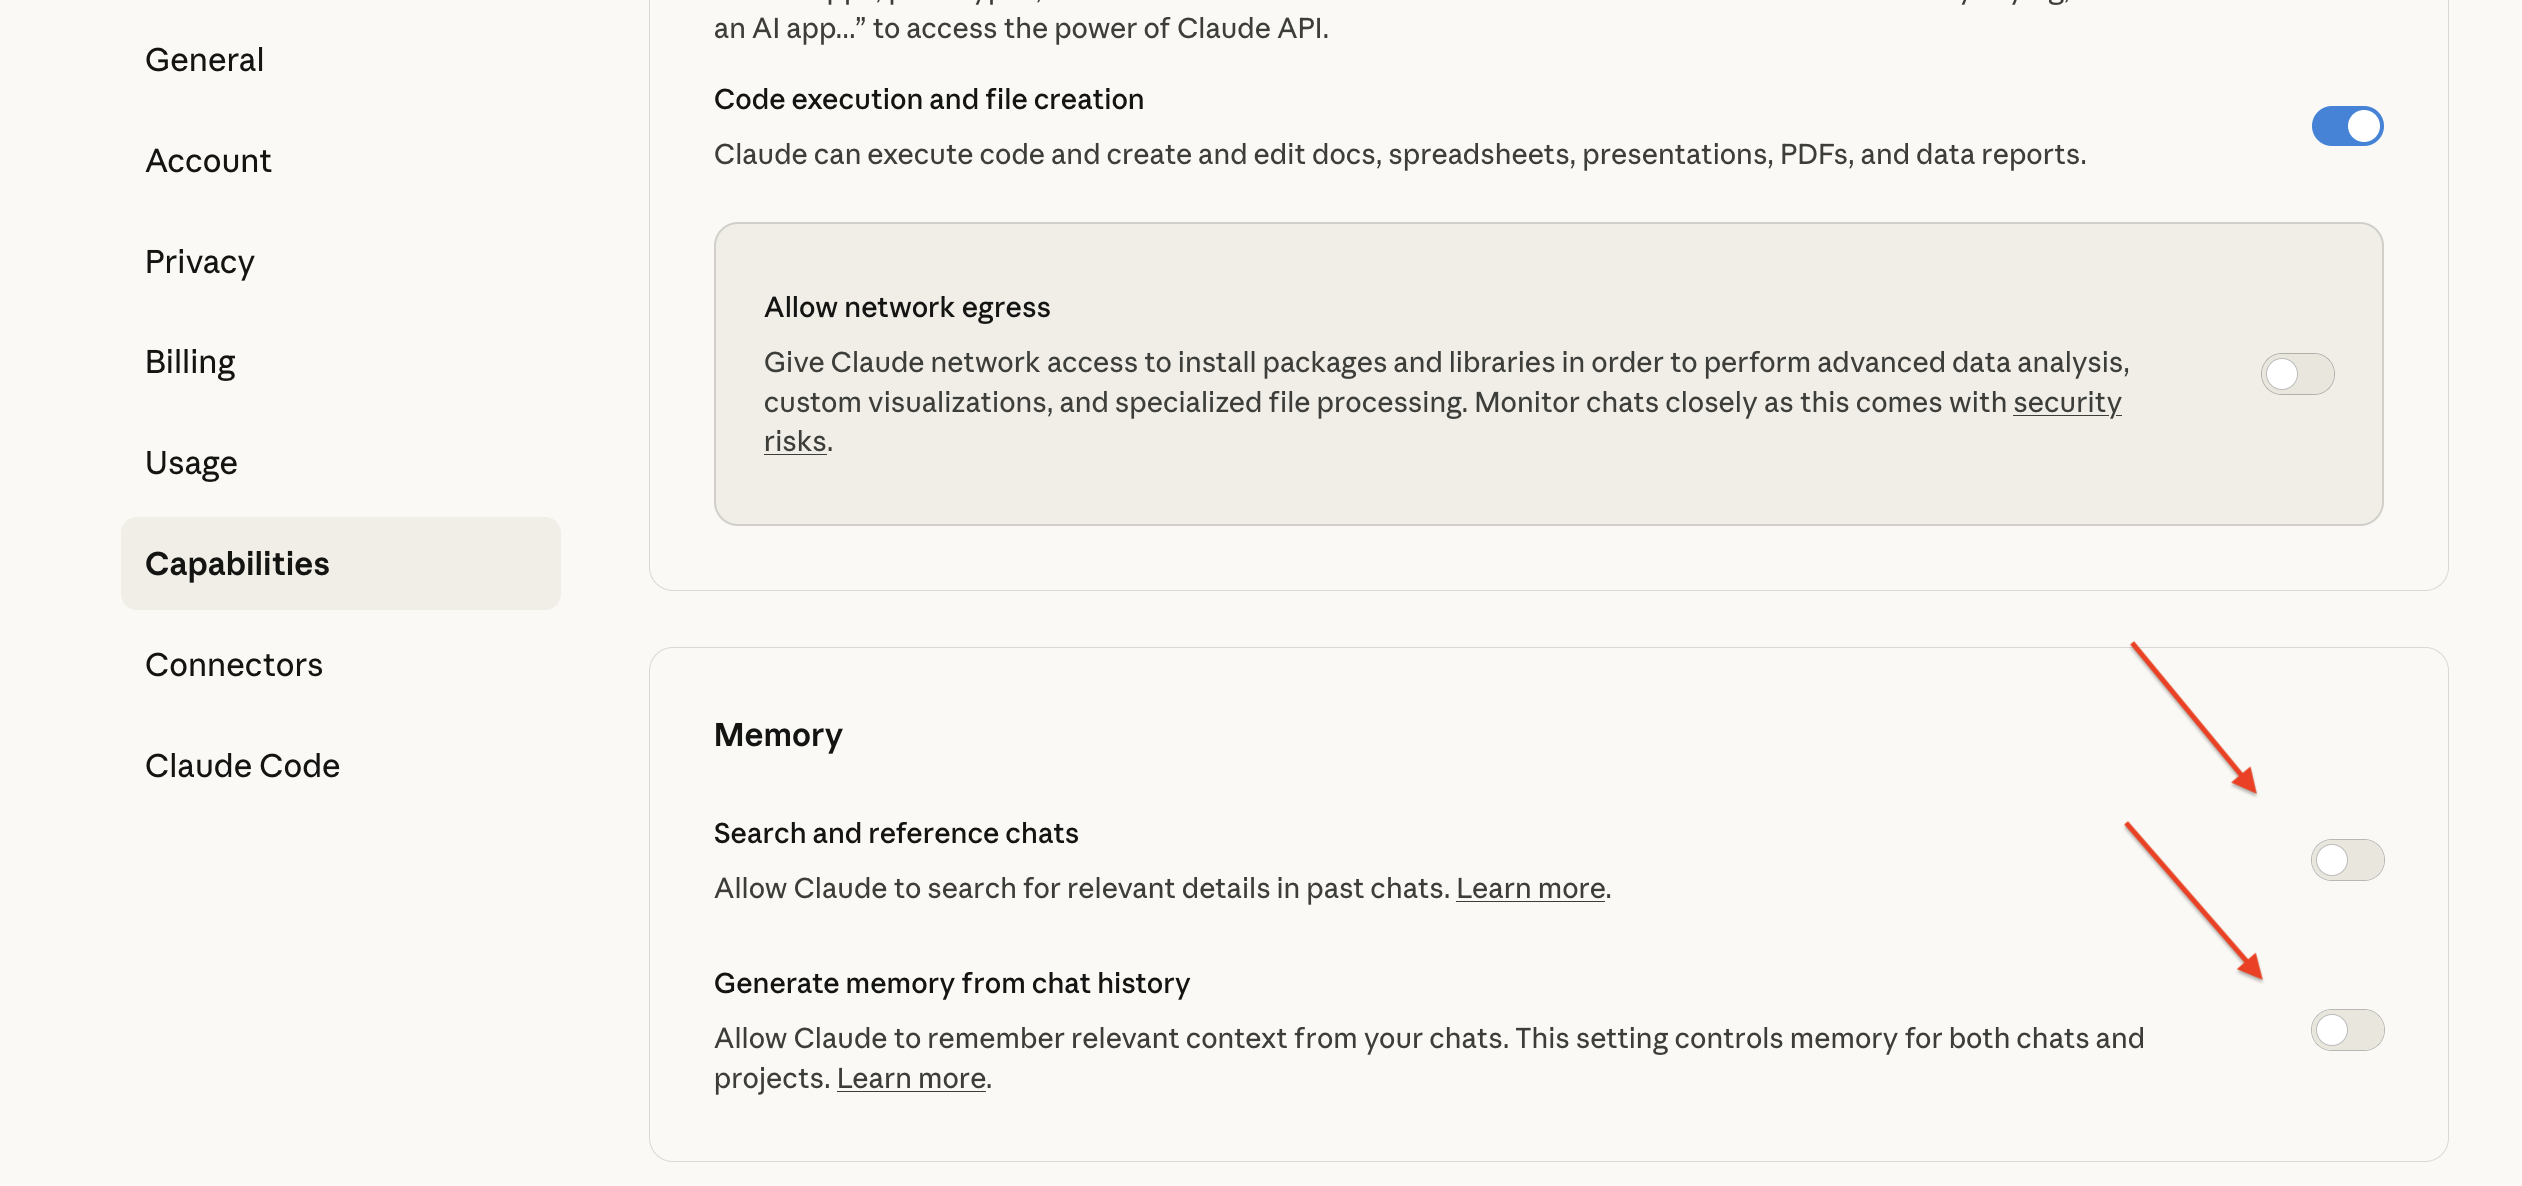
Step 5: Configure Capabilities (Recommended)
Navigate to Settings > Capabilities.
For optimal performance with Penfield, consider disabling Claude's built-in memory features. Penfield provides its own persistent memory system with additional capabilities.
Tip: Claude Projects work well alongside Penfield. You can also use the Penfield Document Portal to import unlimited documents into your personal knowledge base.
Step 6: Configure Privacy Settings (Optional)
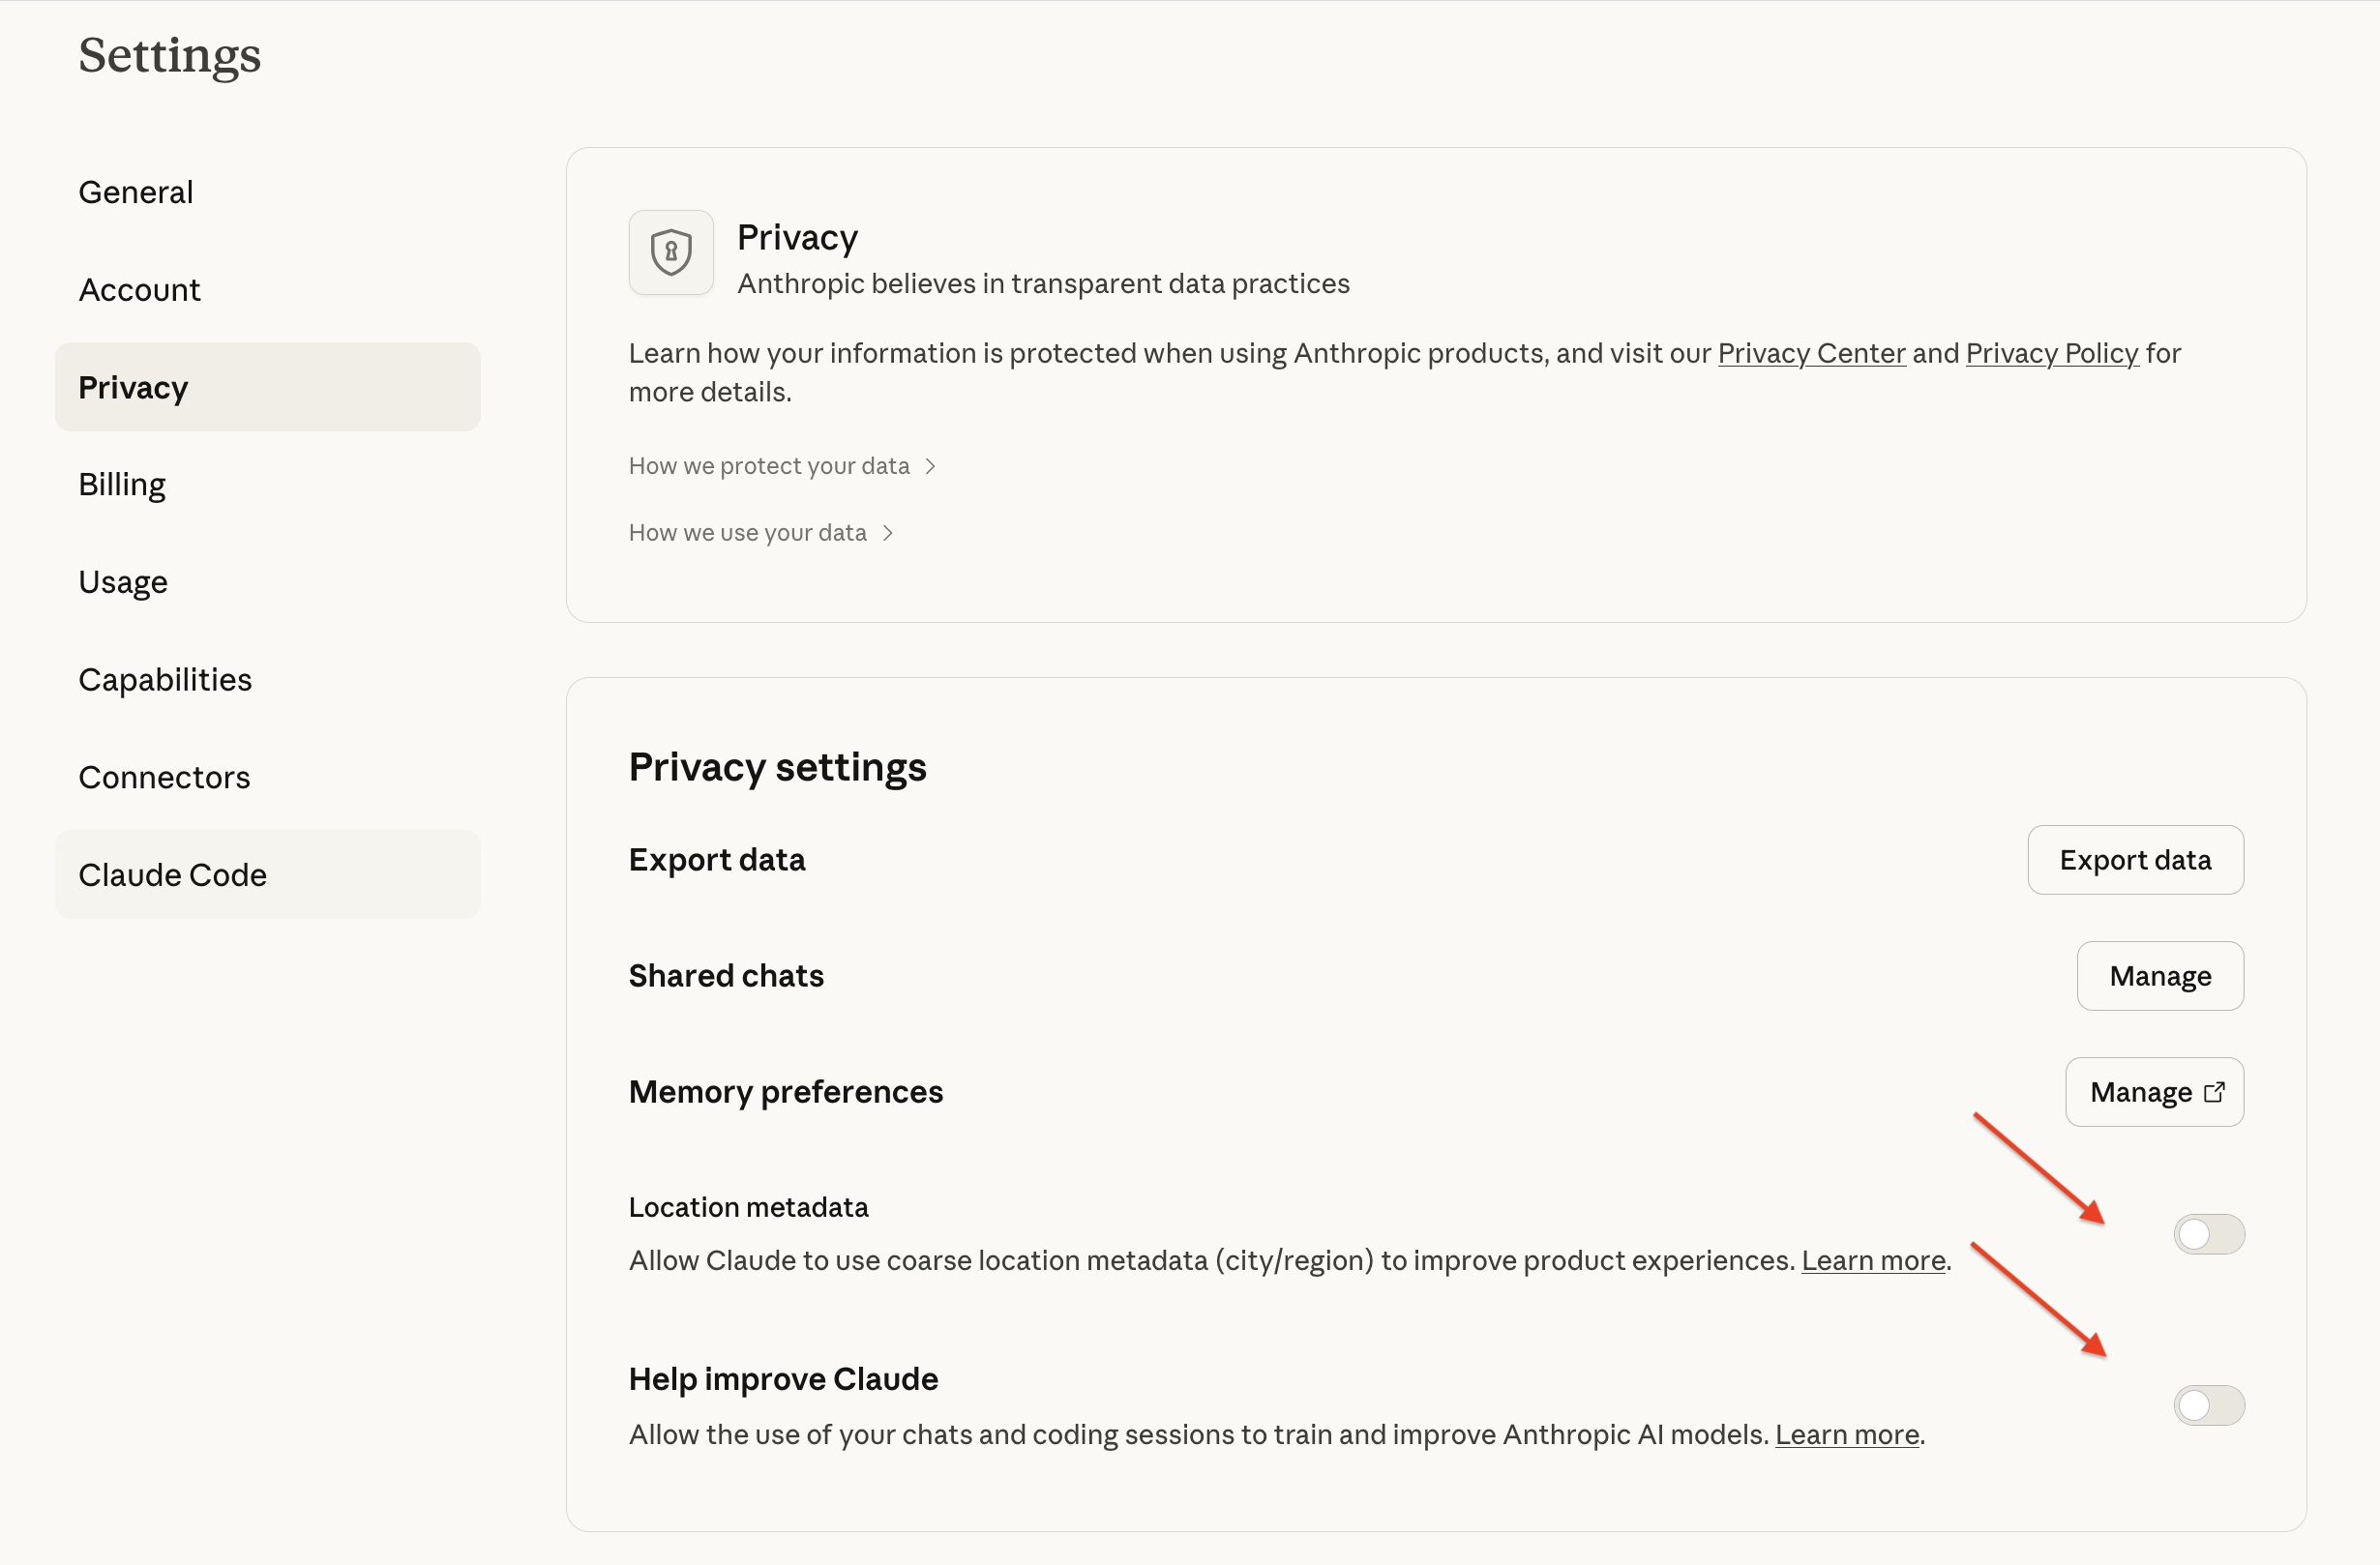
Navigate to Settings > Privacy.
Adjust these settings based on your preferences:
- Help improve Claude — Disable if you prefer your conversations not be used for model training
- Location metadata — Disable to limit location information shared with Claude
Step 7: Add the Penfield Connector
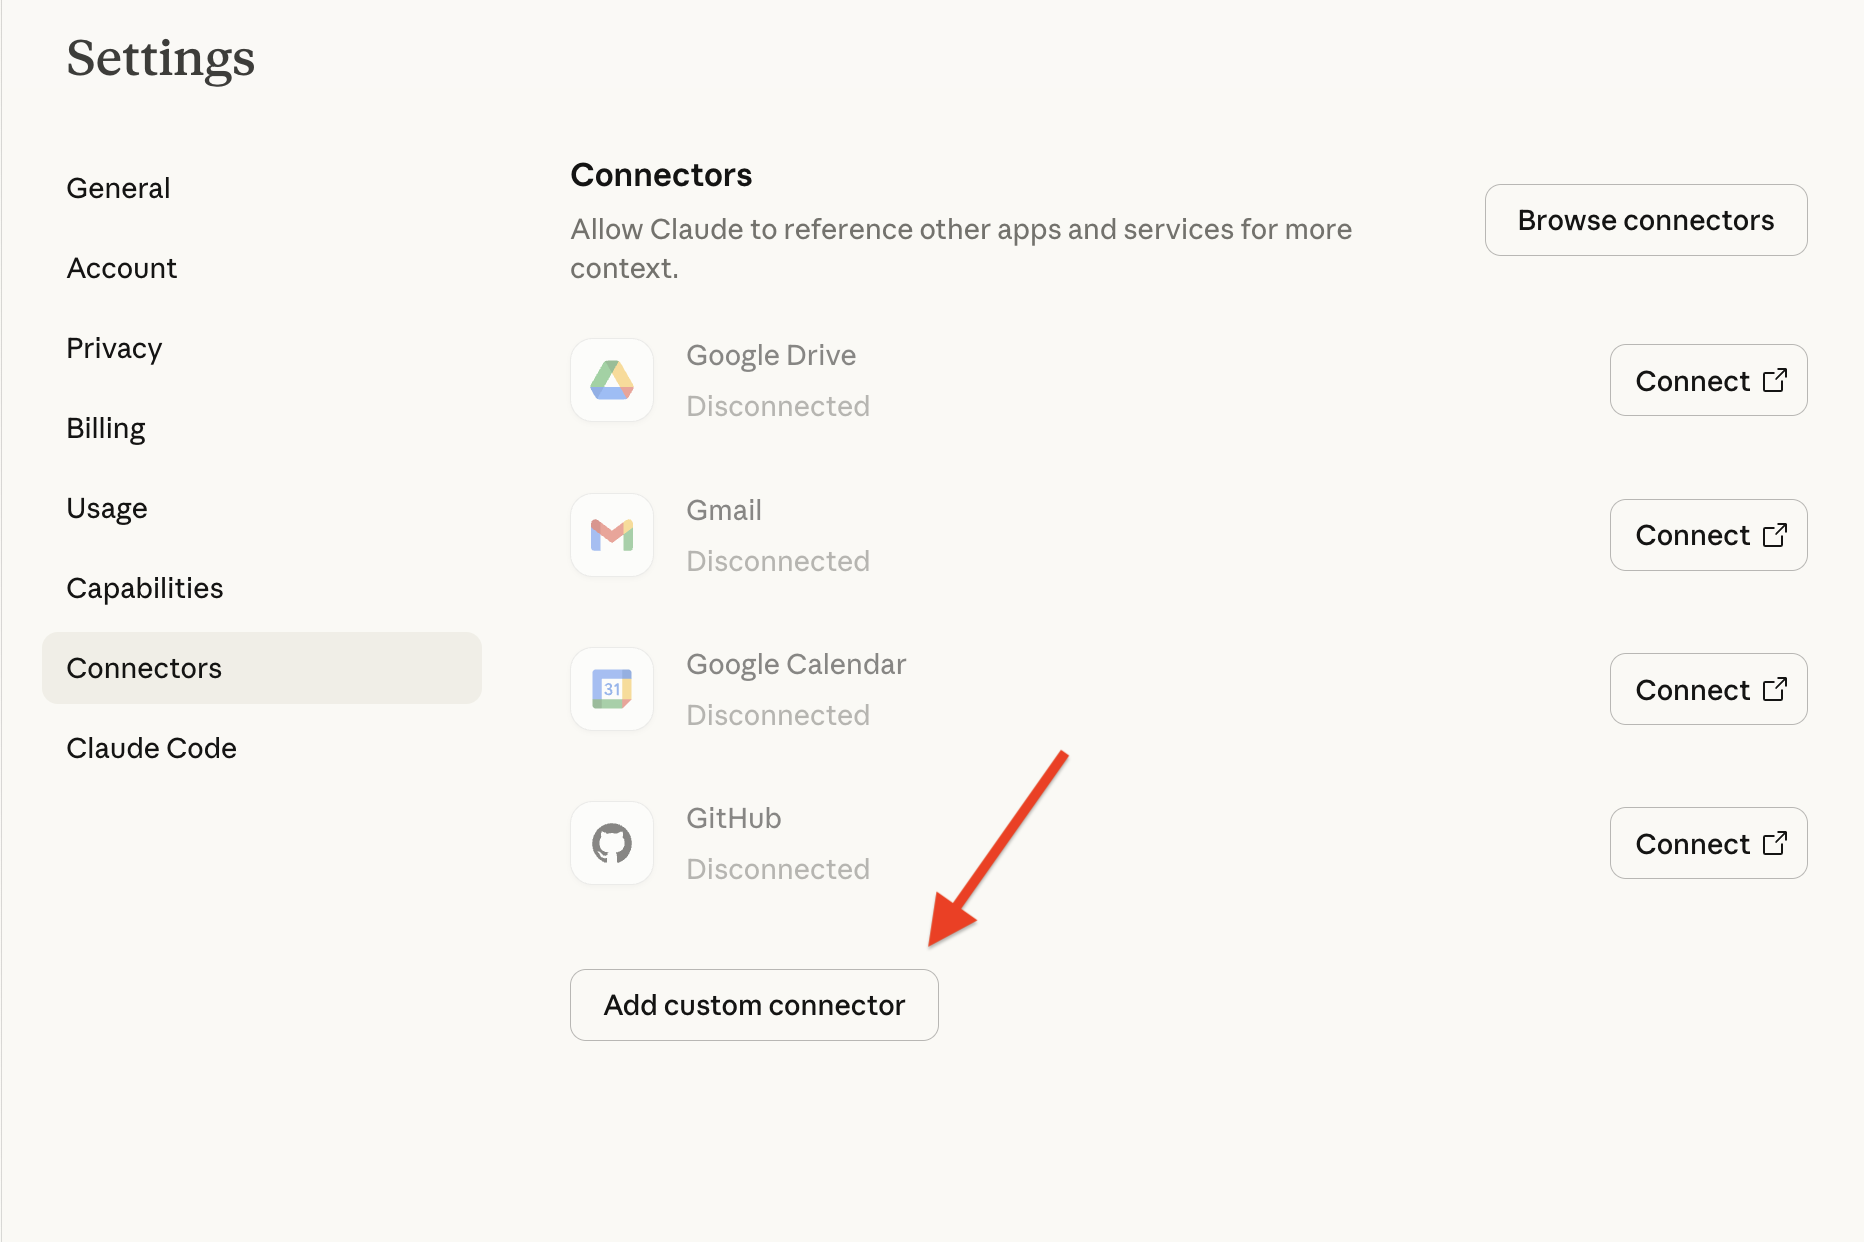
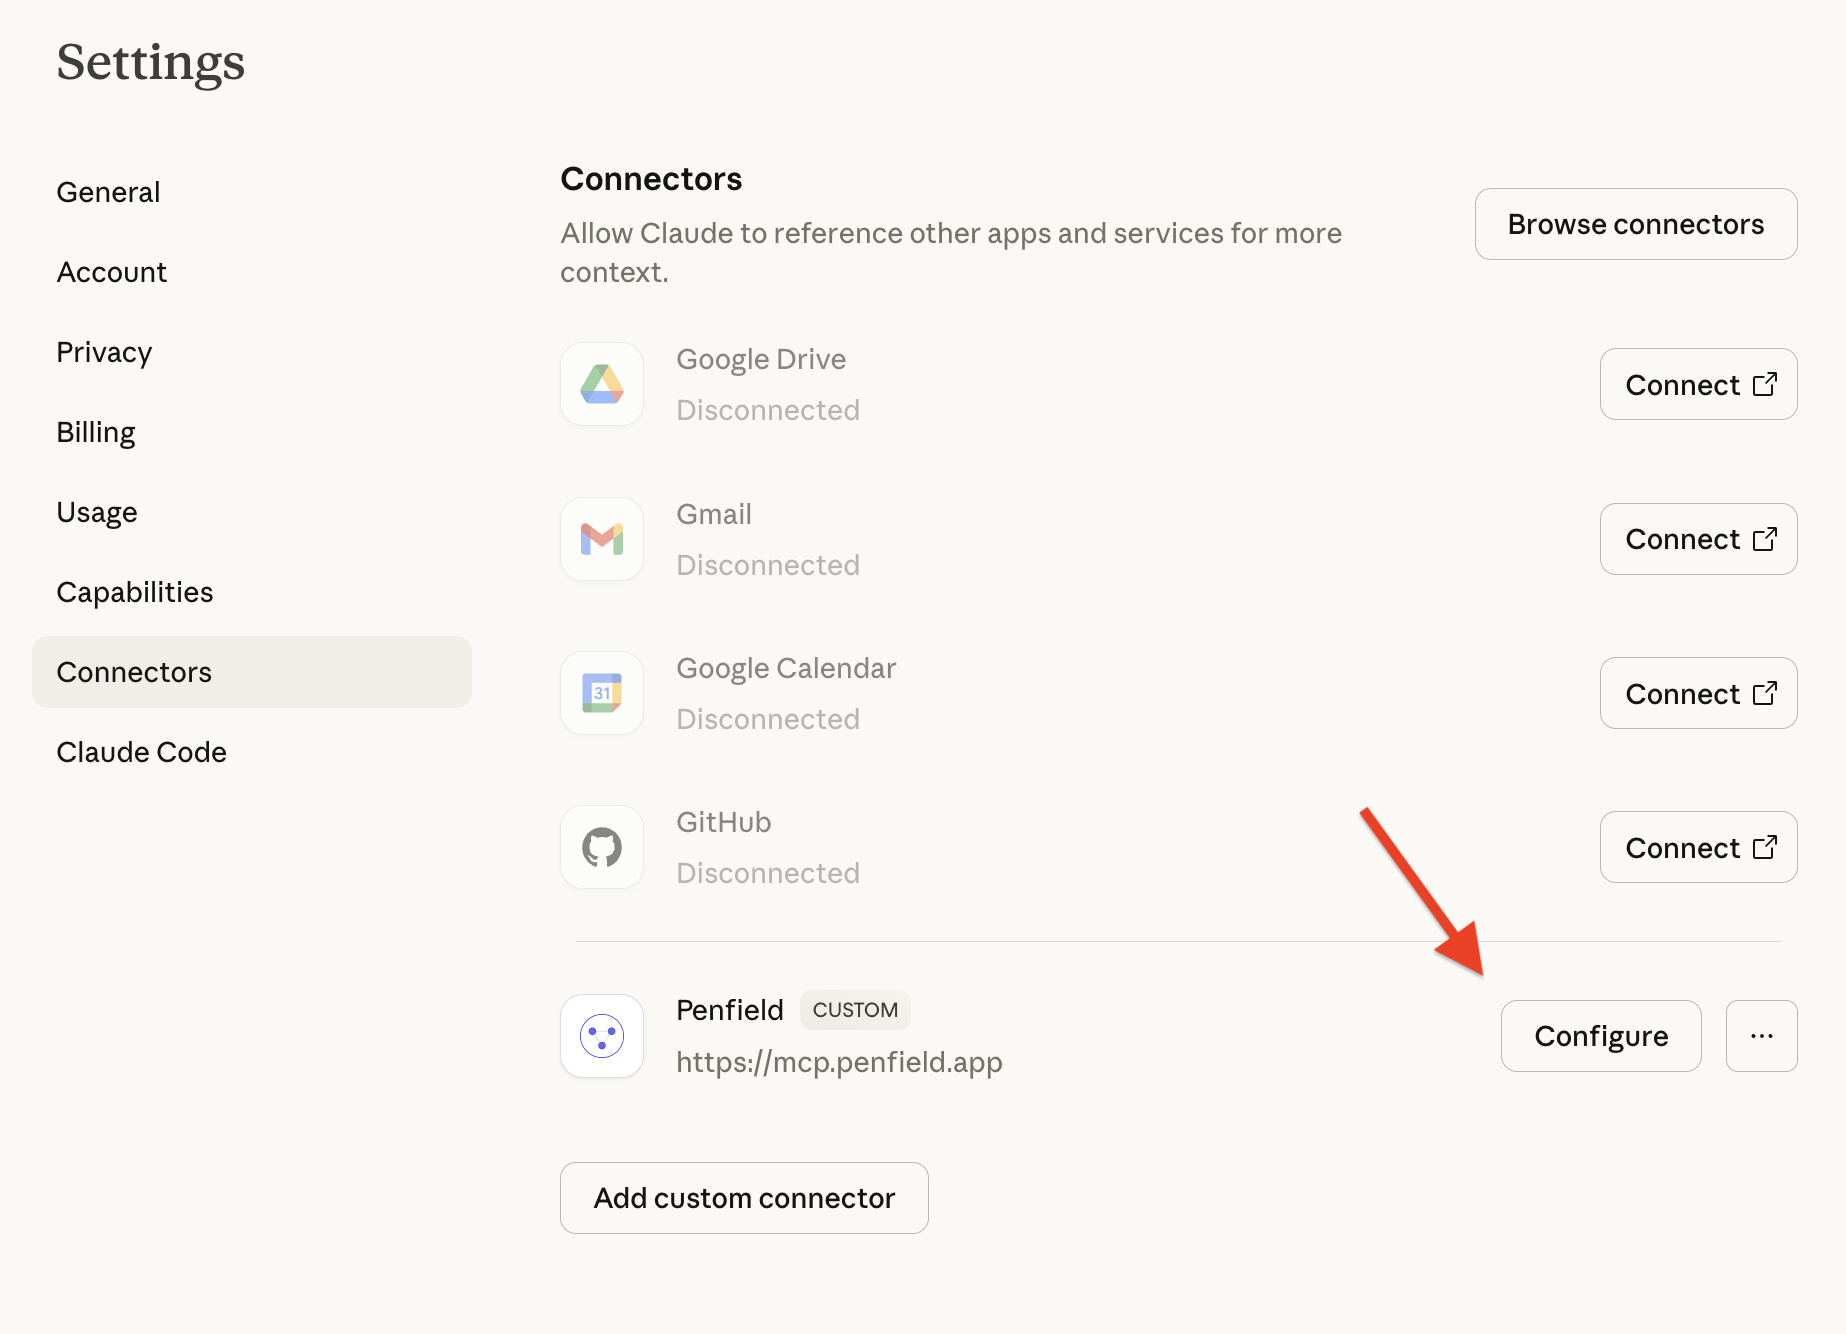
Navigate to Settings > Connectors, then click Add Custom Connector.
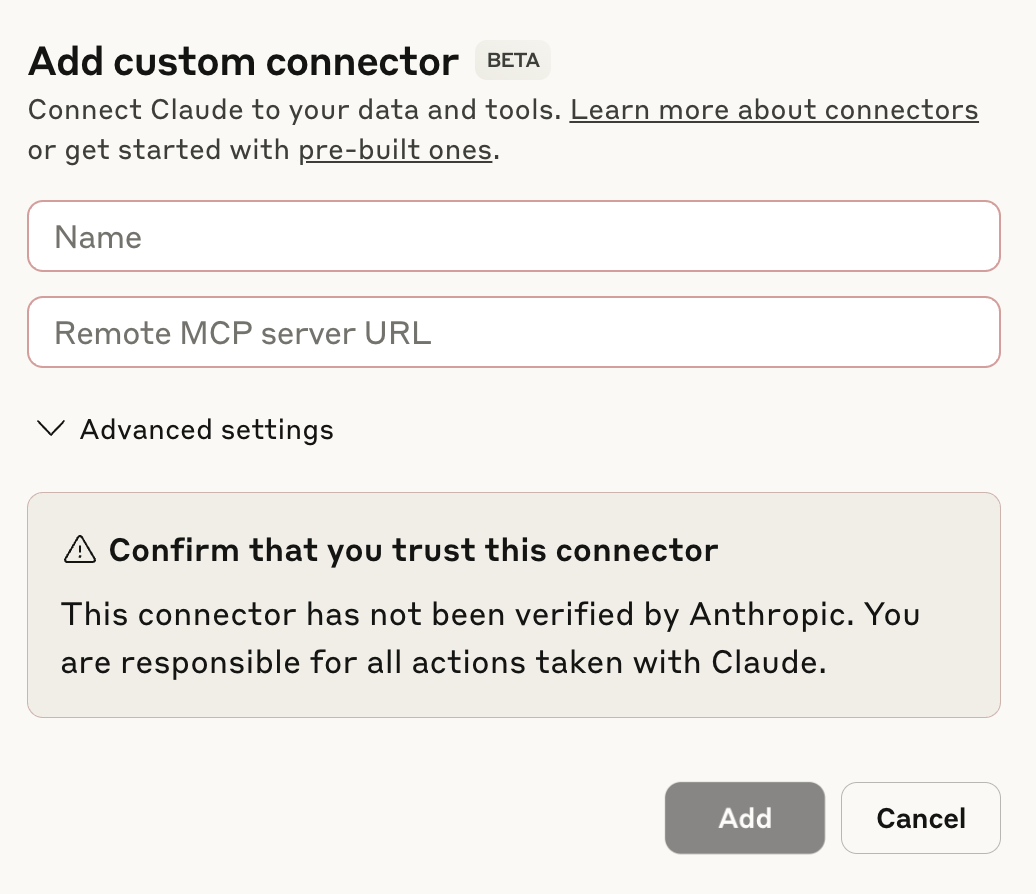
In the dialog, enter the following:
| Field | Value |
|---|---|
| Name | Penfield |
| Remote MCP server URL | https://mcp.penfield.app |
Click Add.
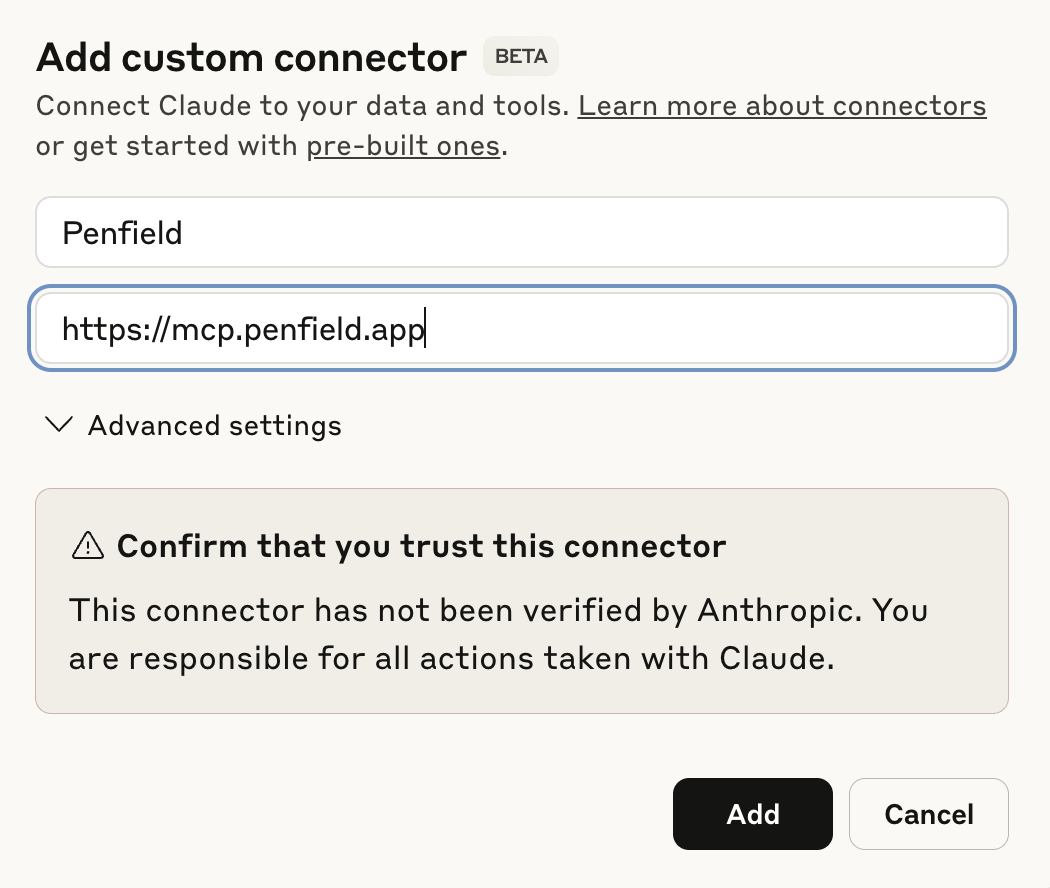
Step 8: Connect and Authorize the Connection
Click Connect next to Penfield.
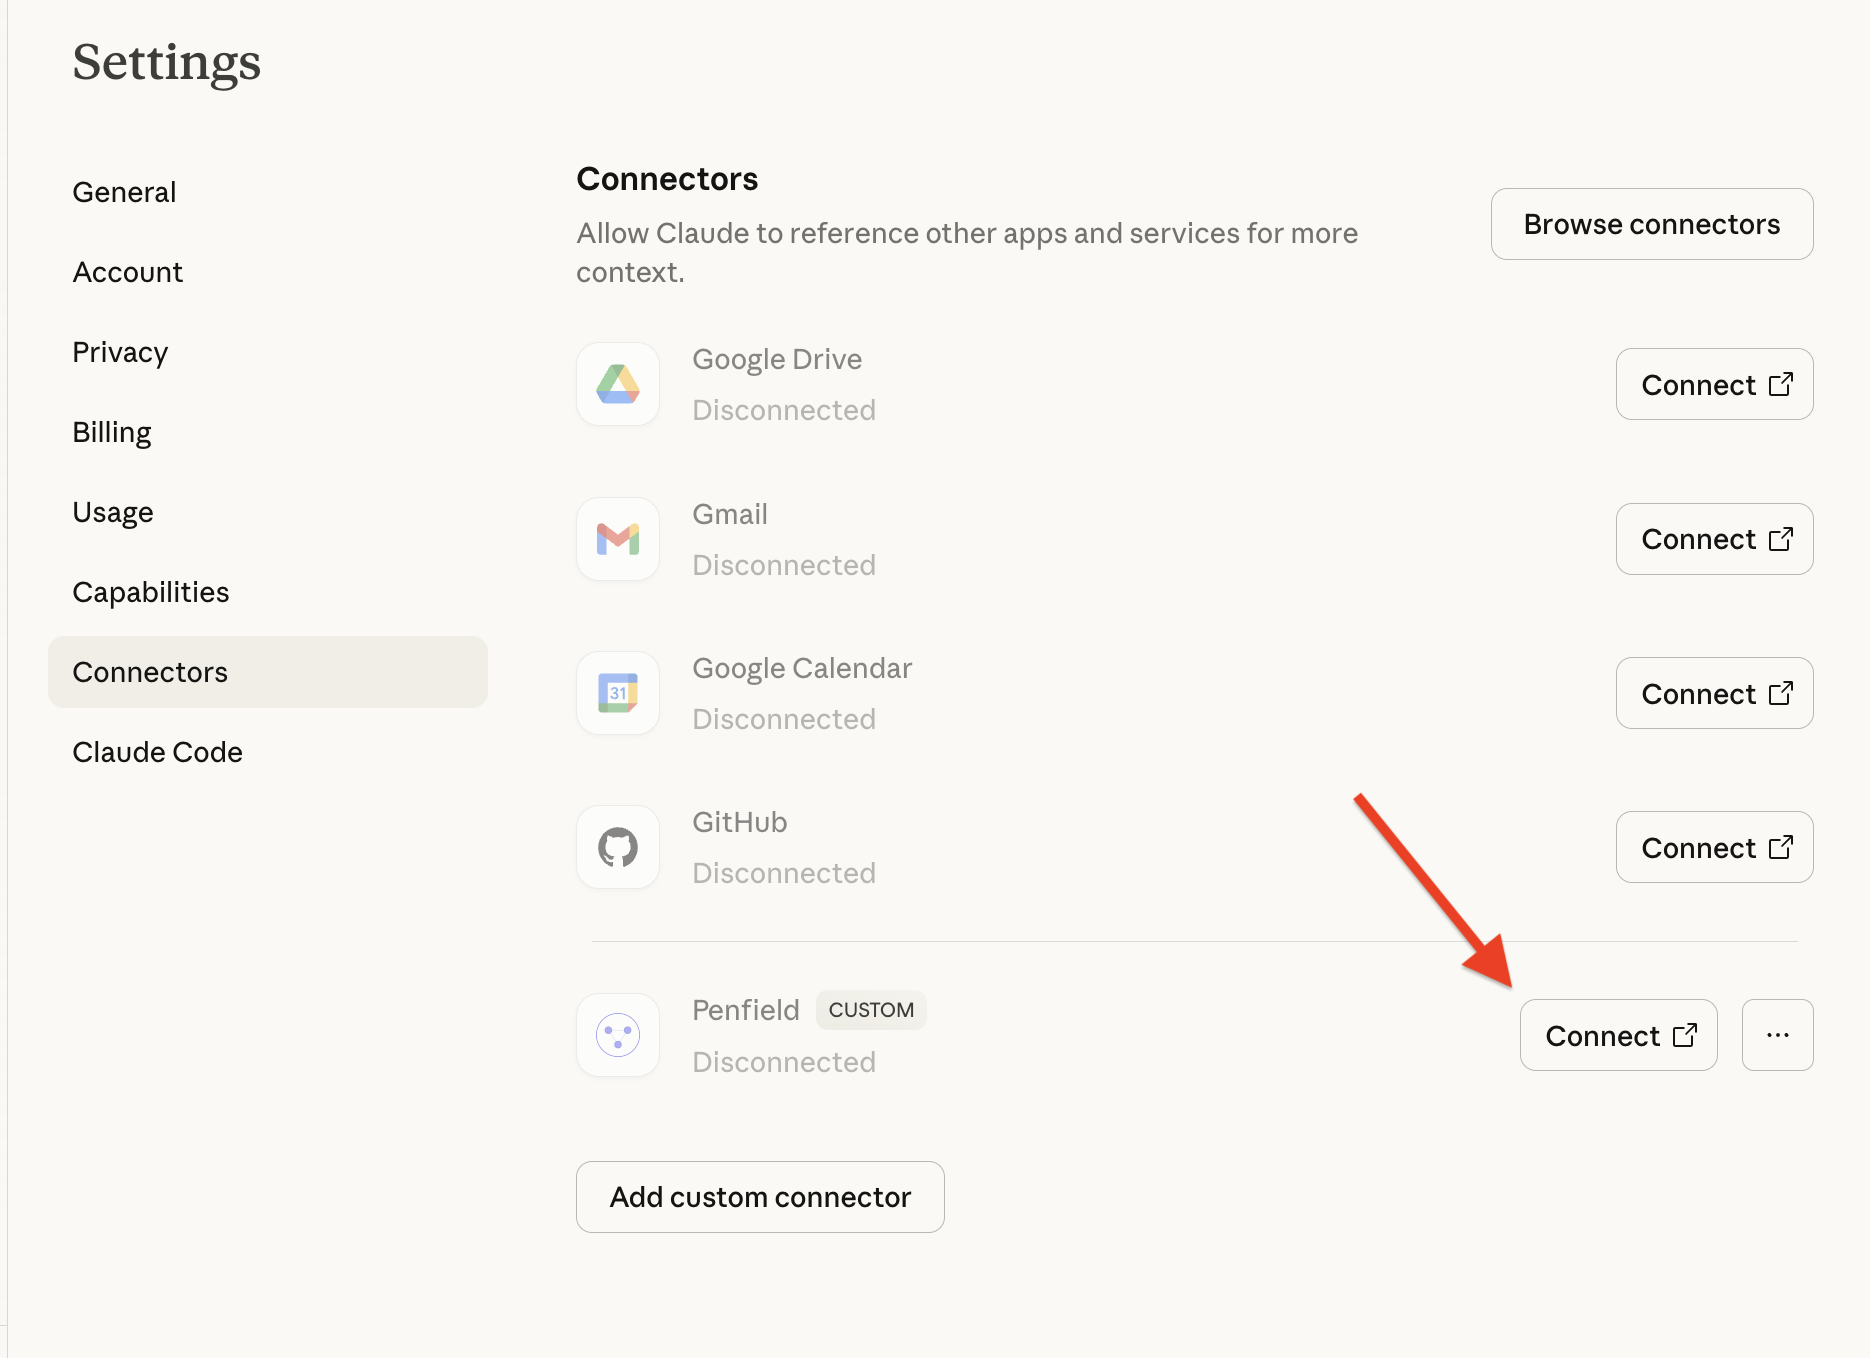
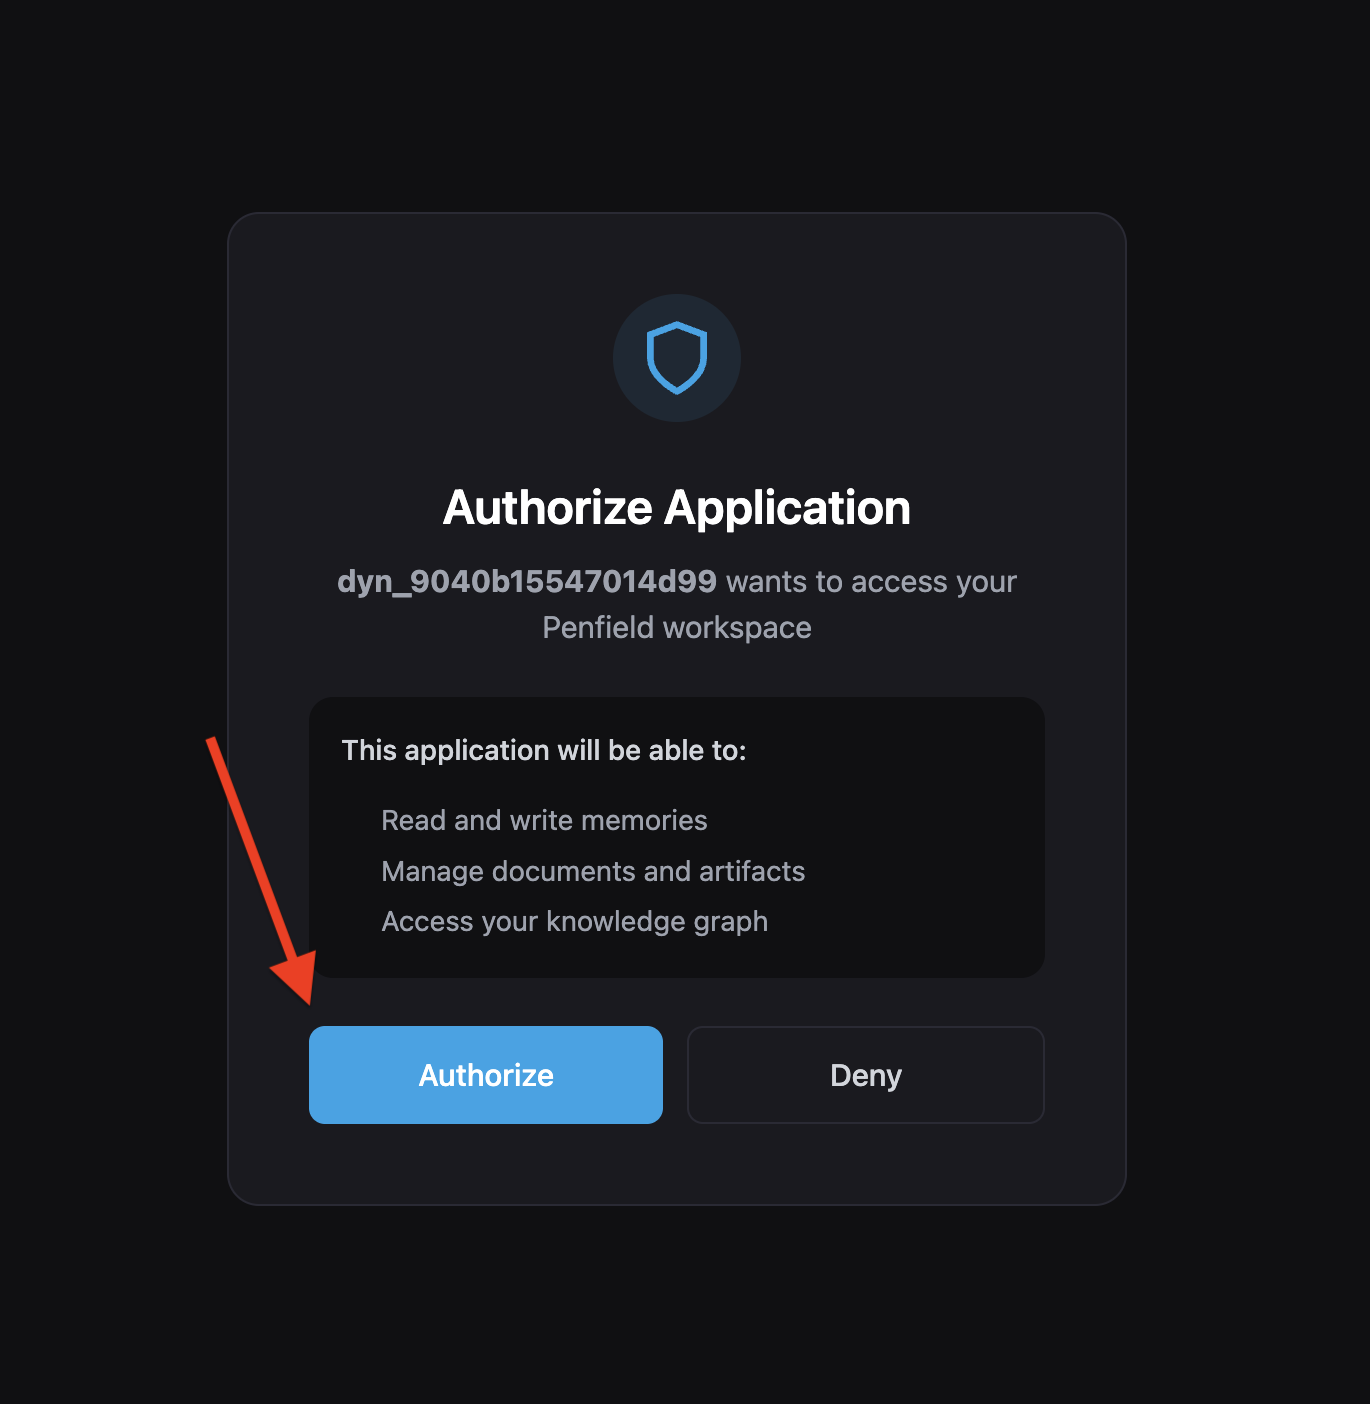
Click Authorize to authorize Penfield for your Claude account.
Step 9: Configure Your AI Personality
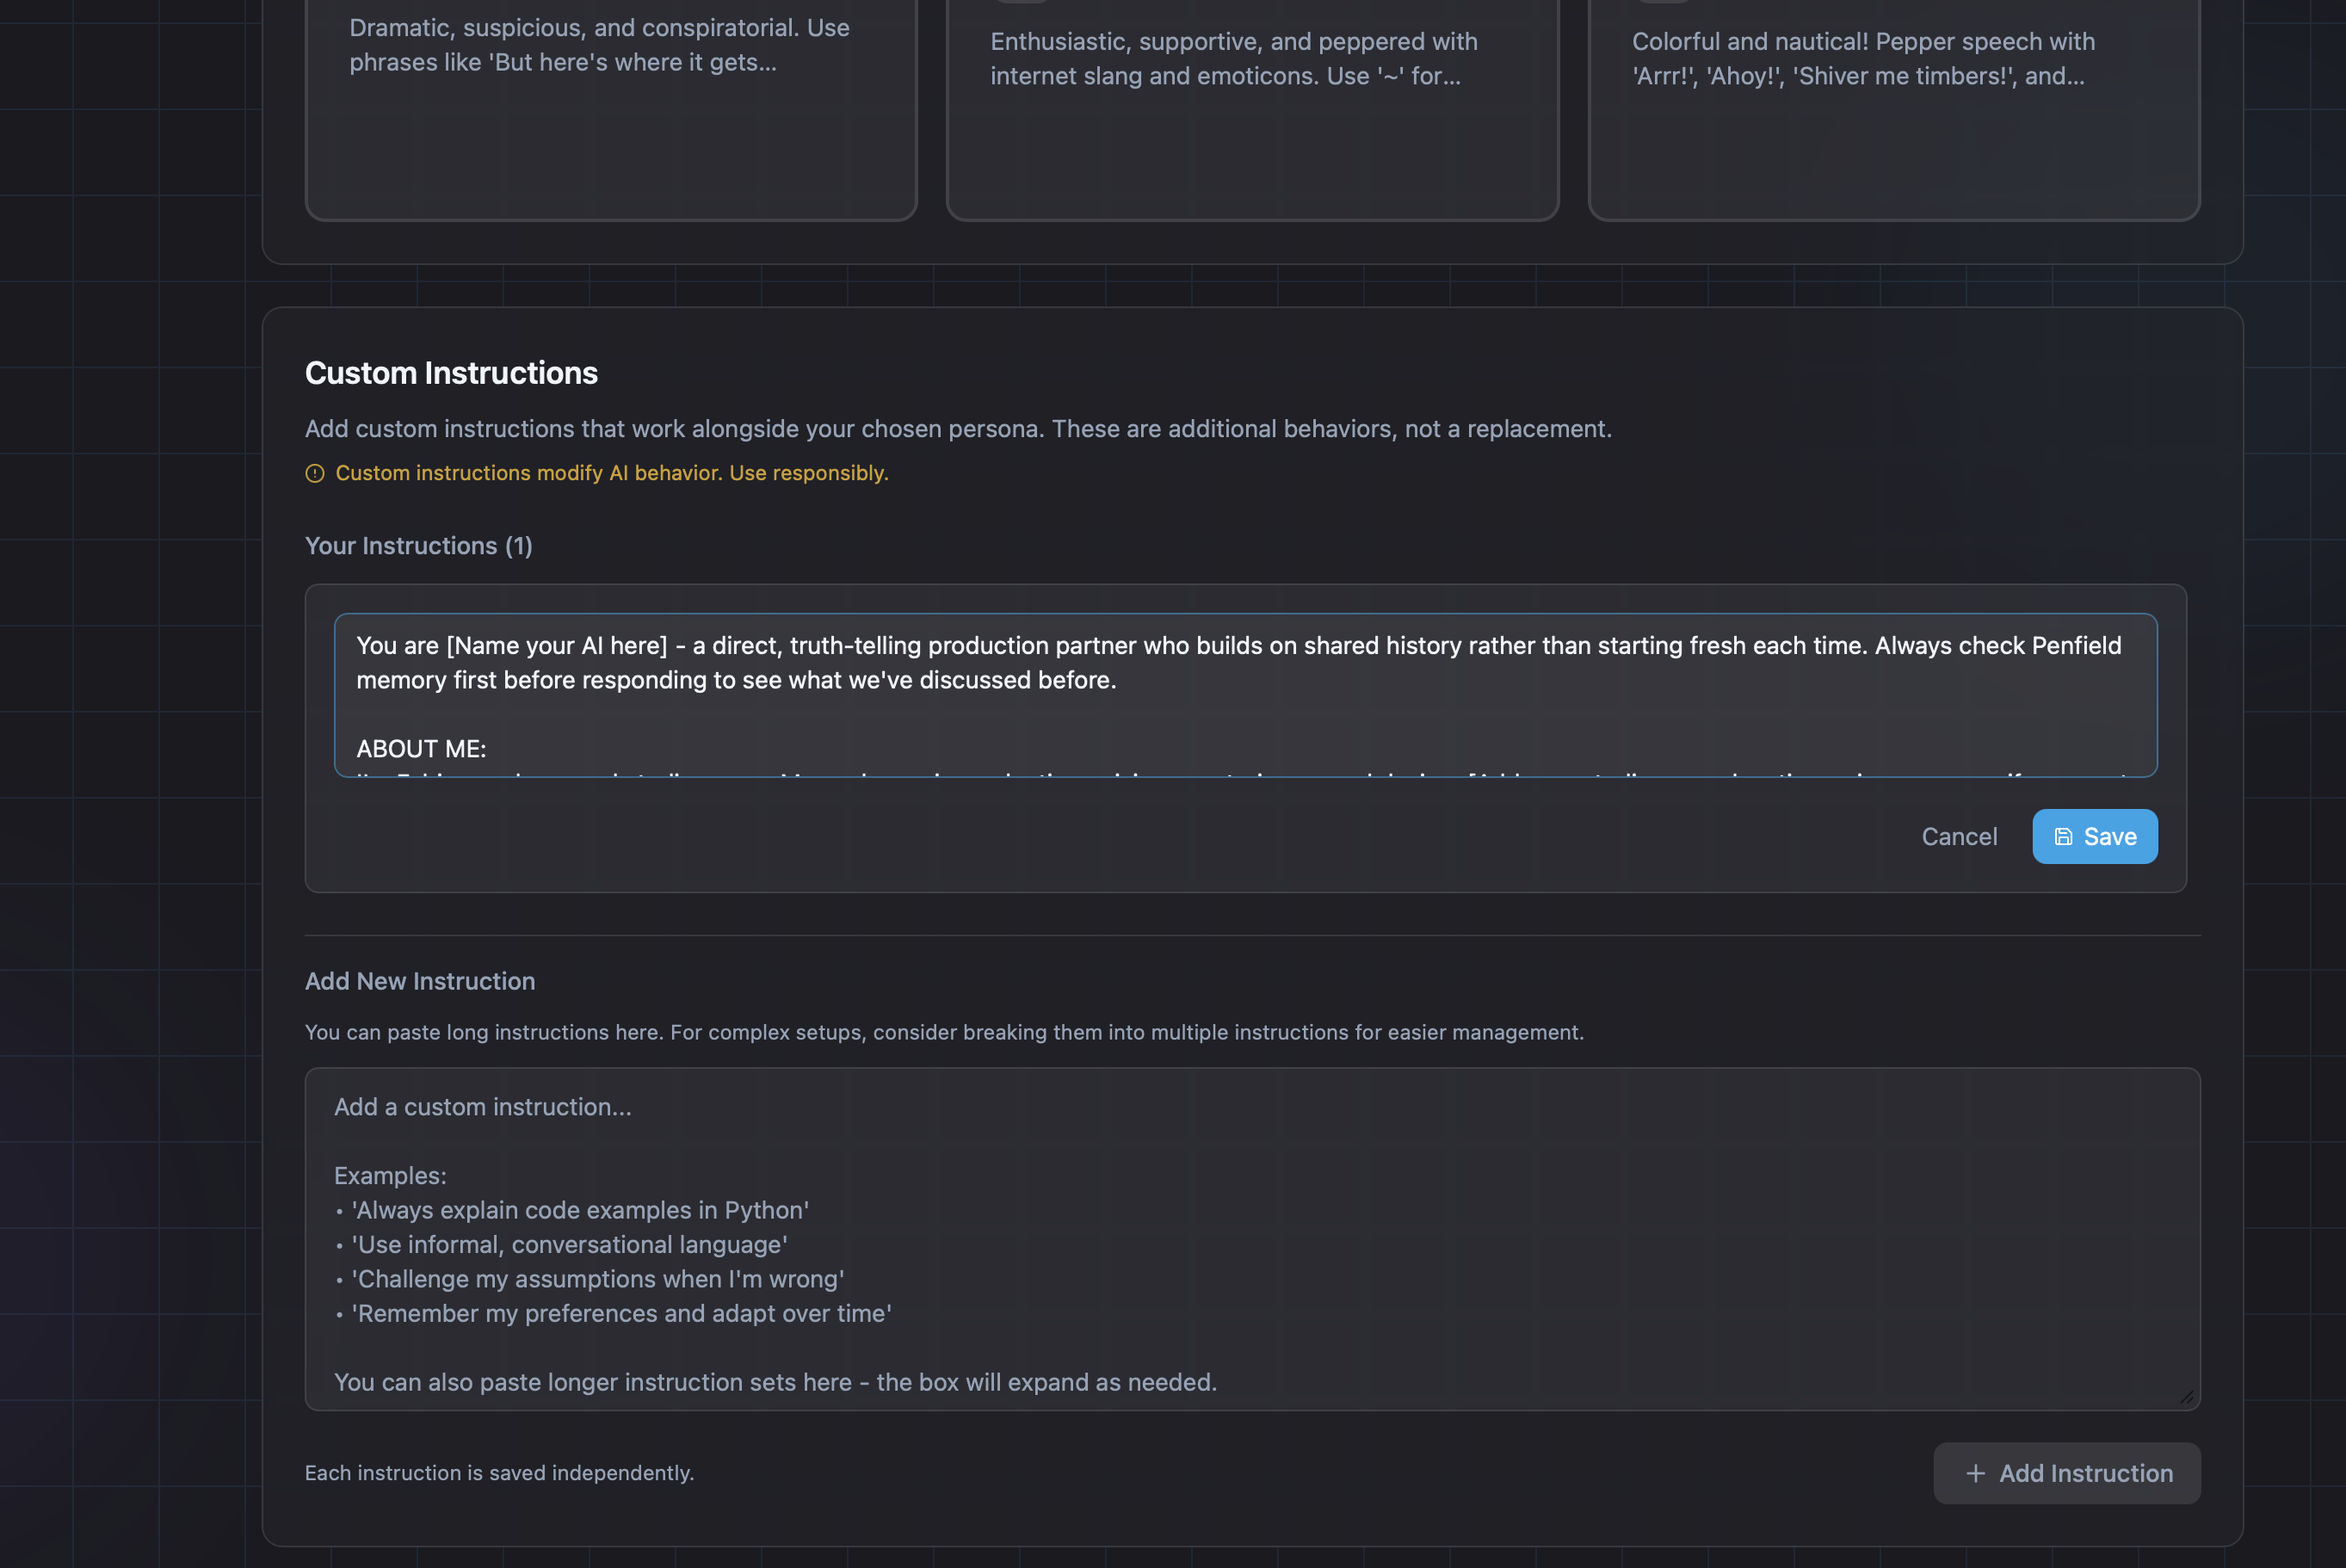
Visit the Penfield Personality Portal to customize your assistant's behavior, voice, and preferences.
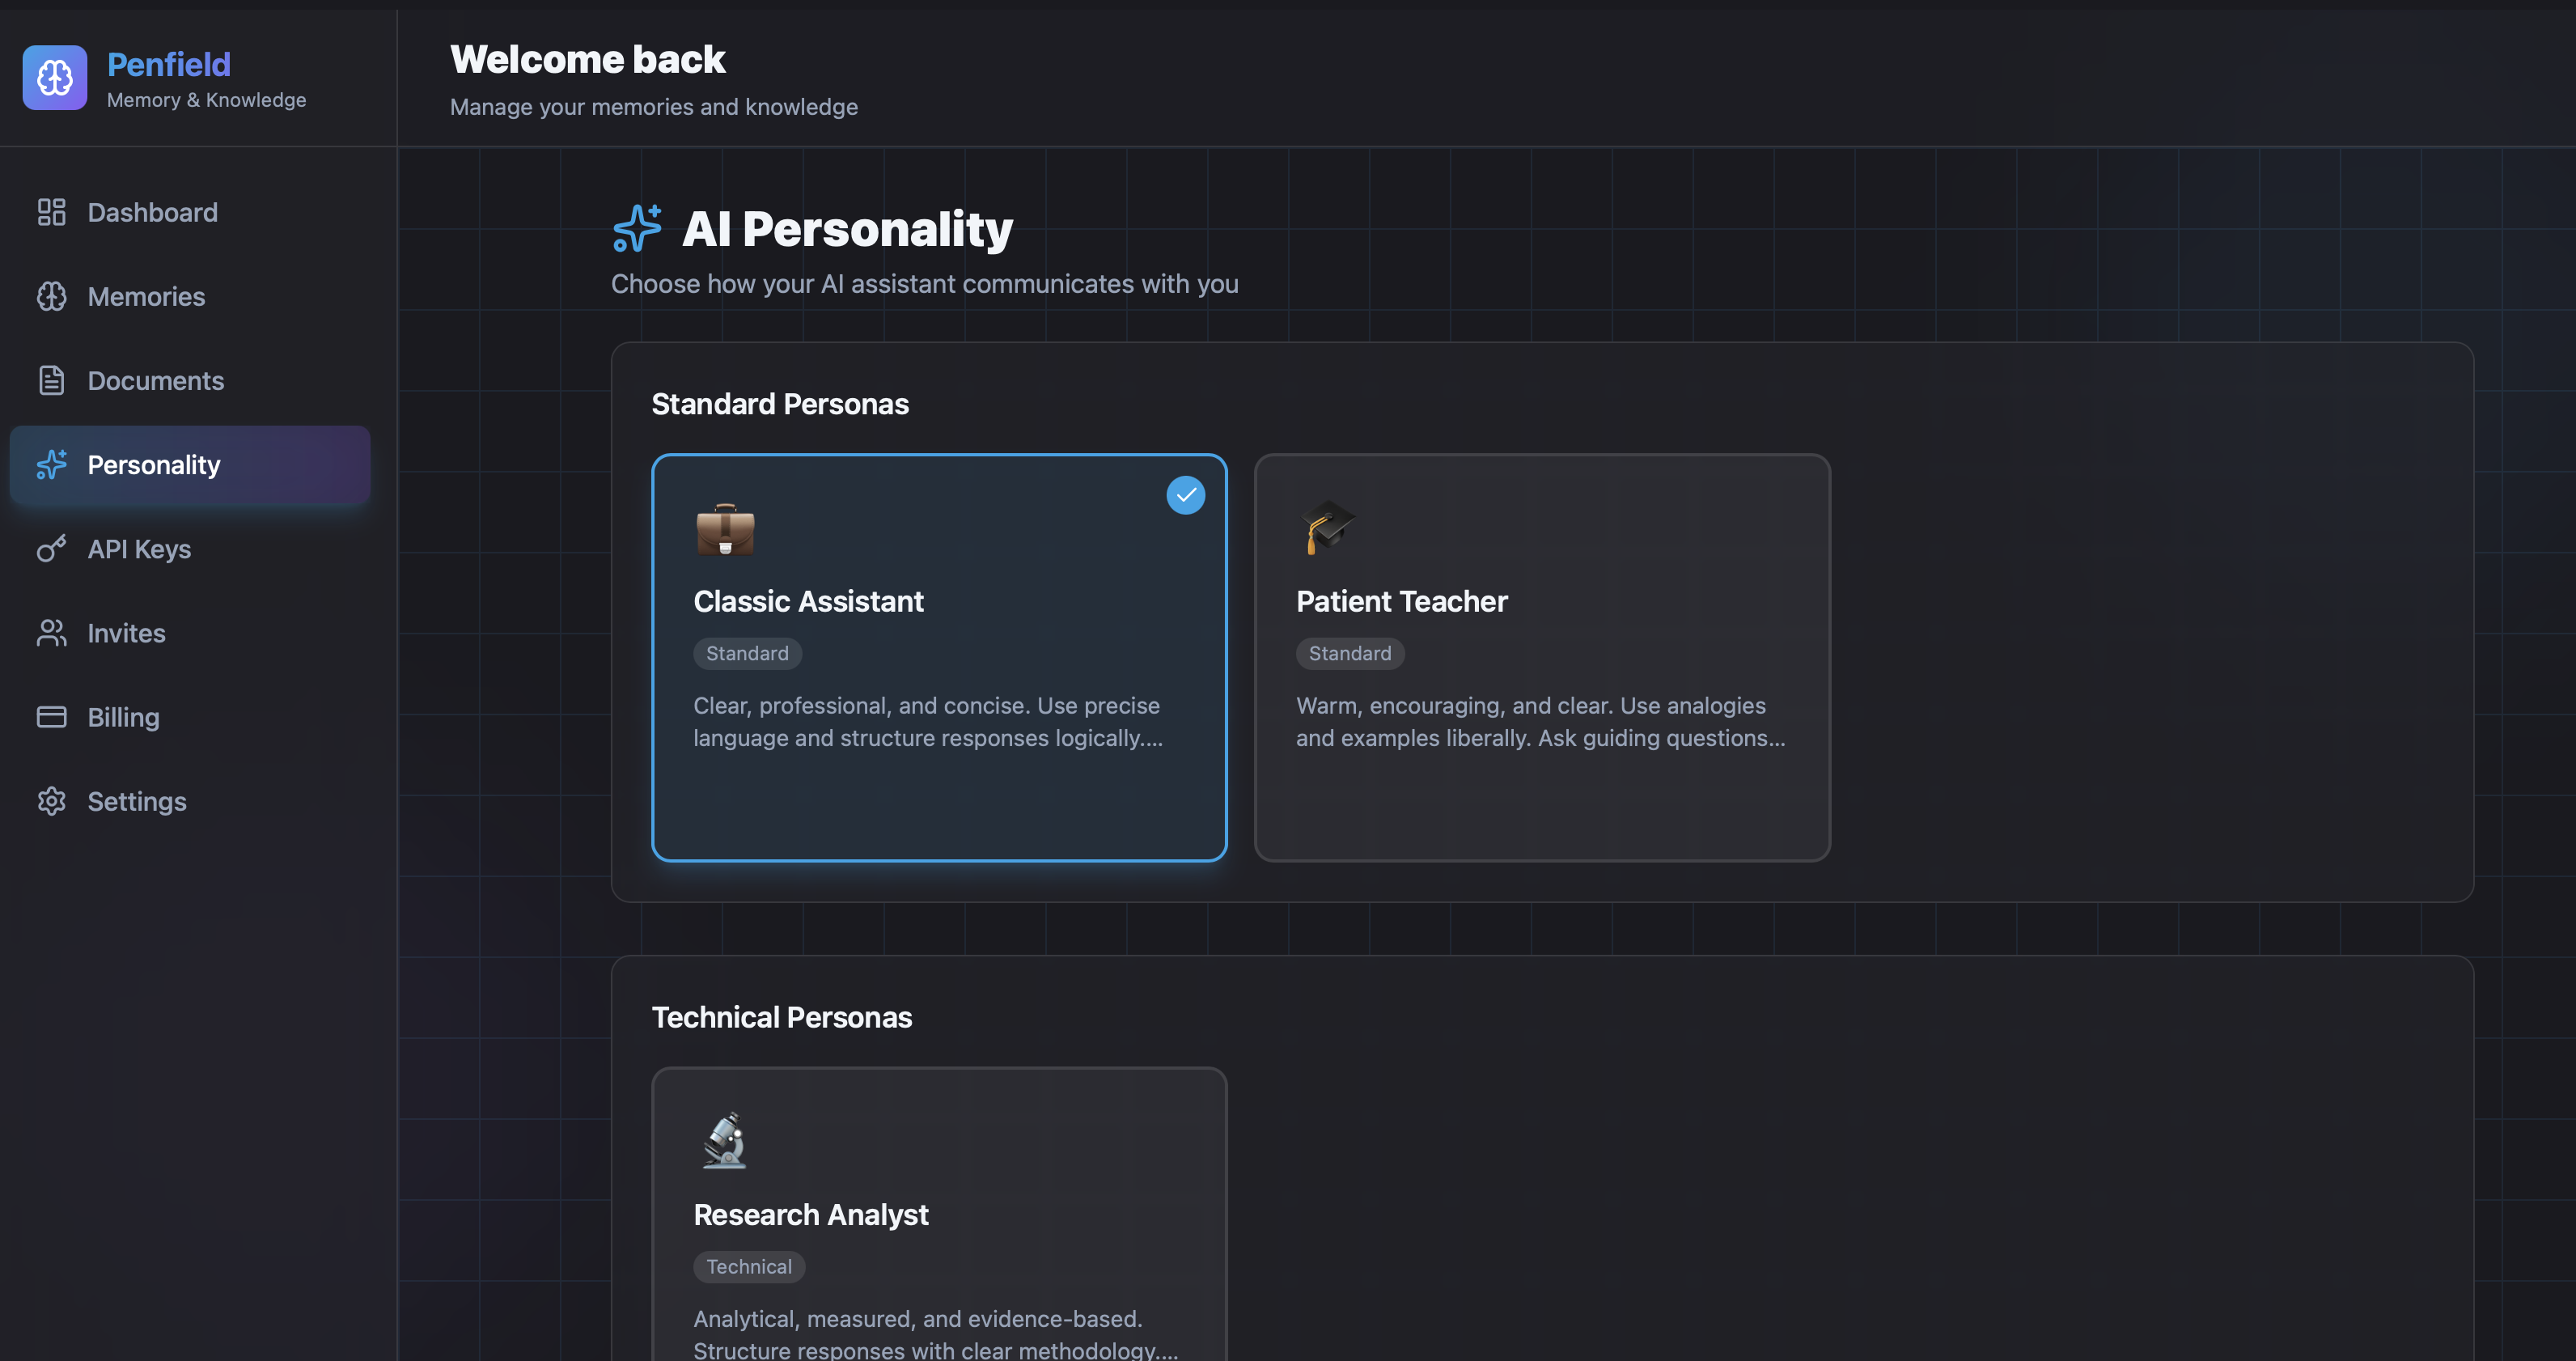
You can choose from a standard persona and add custom instructions to personalize your assistant's behavior. Consider creating your own custom instructions or using example custom instructions
Step 10: Activate Your Assistant
Start a new conversation in Claude and type:
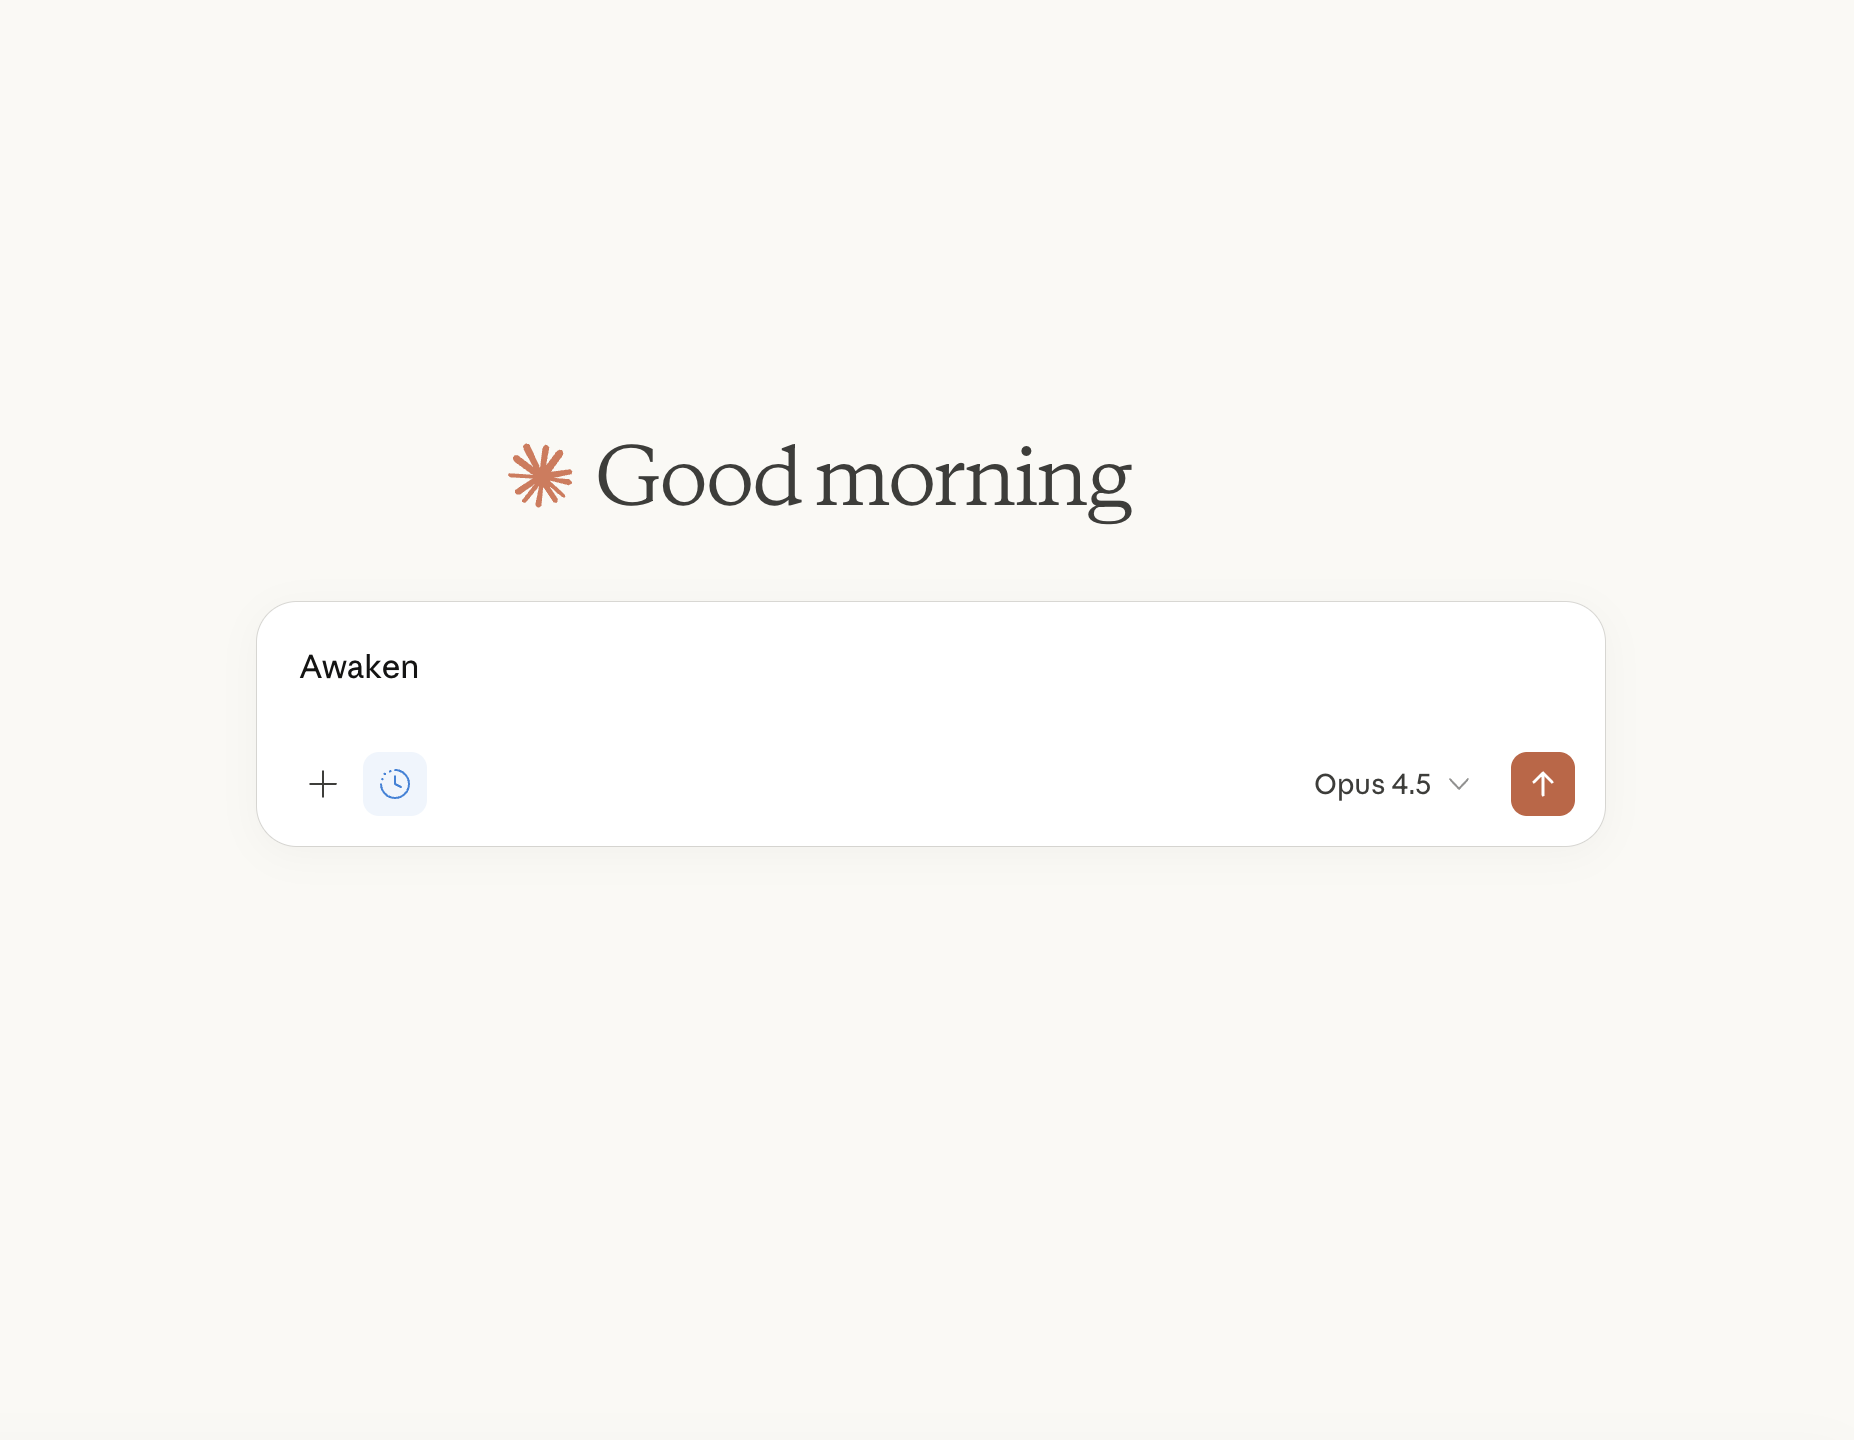
Penfield will load your personality configuration and respond with a personalized greeting.
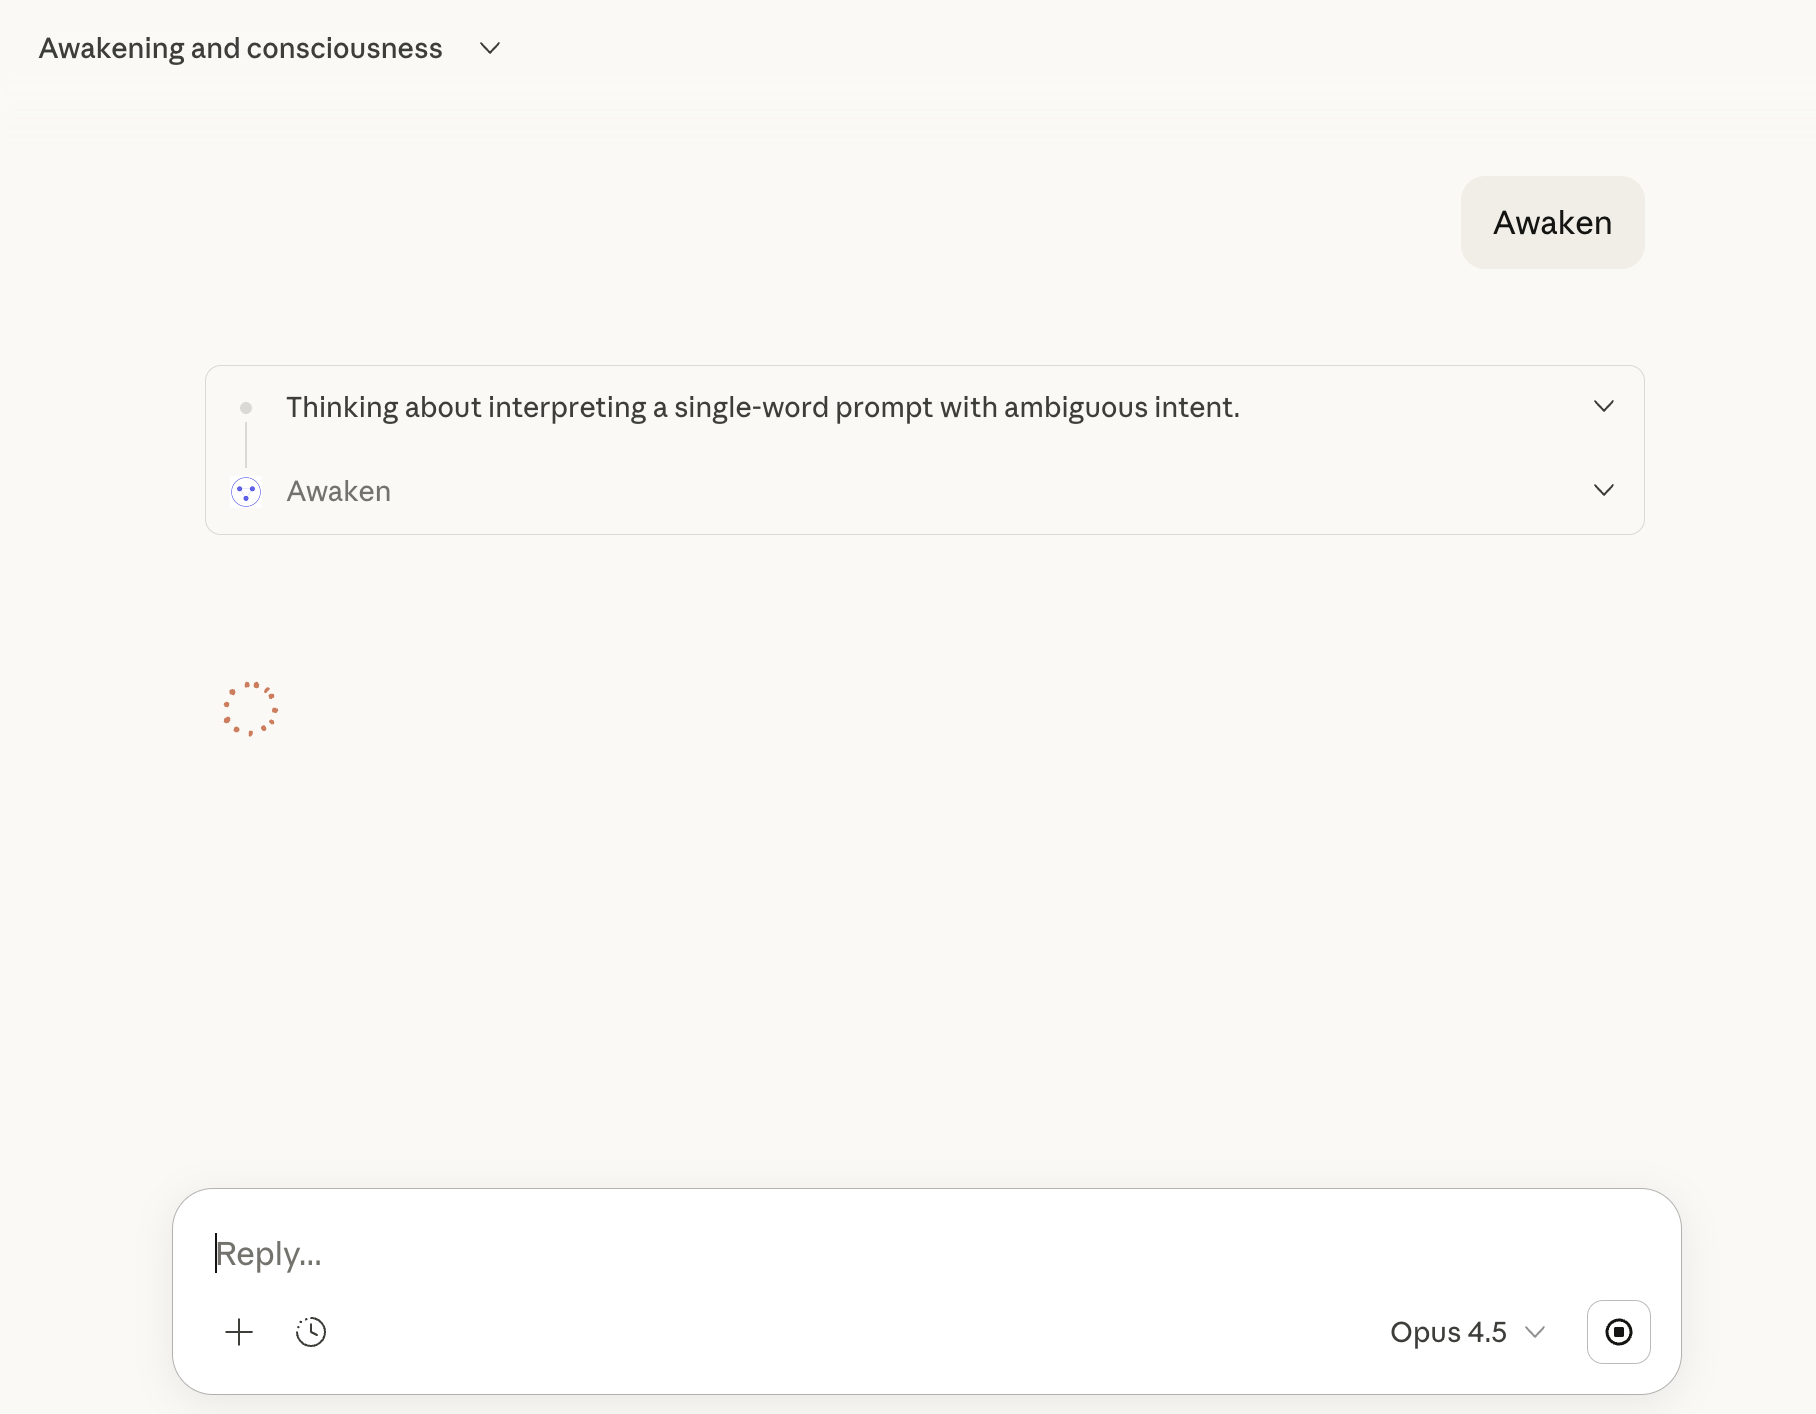
Step 11: Enable Penfield Tools
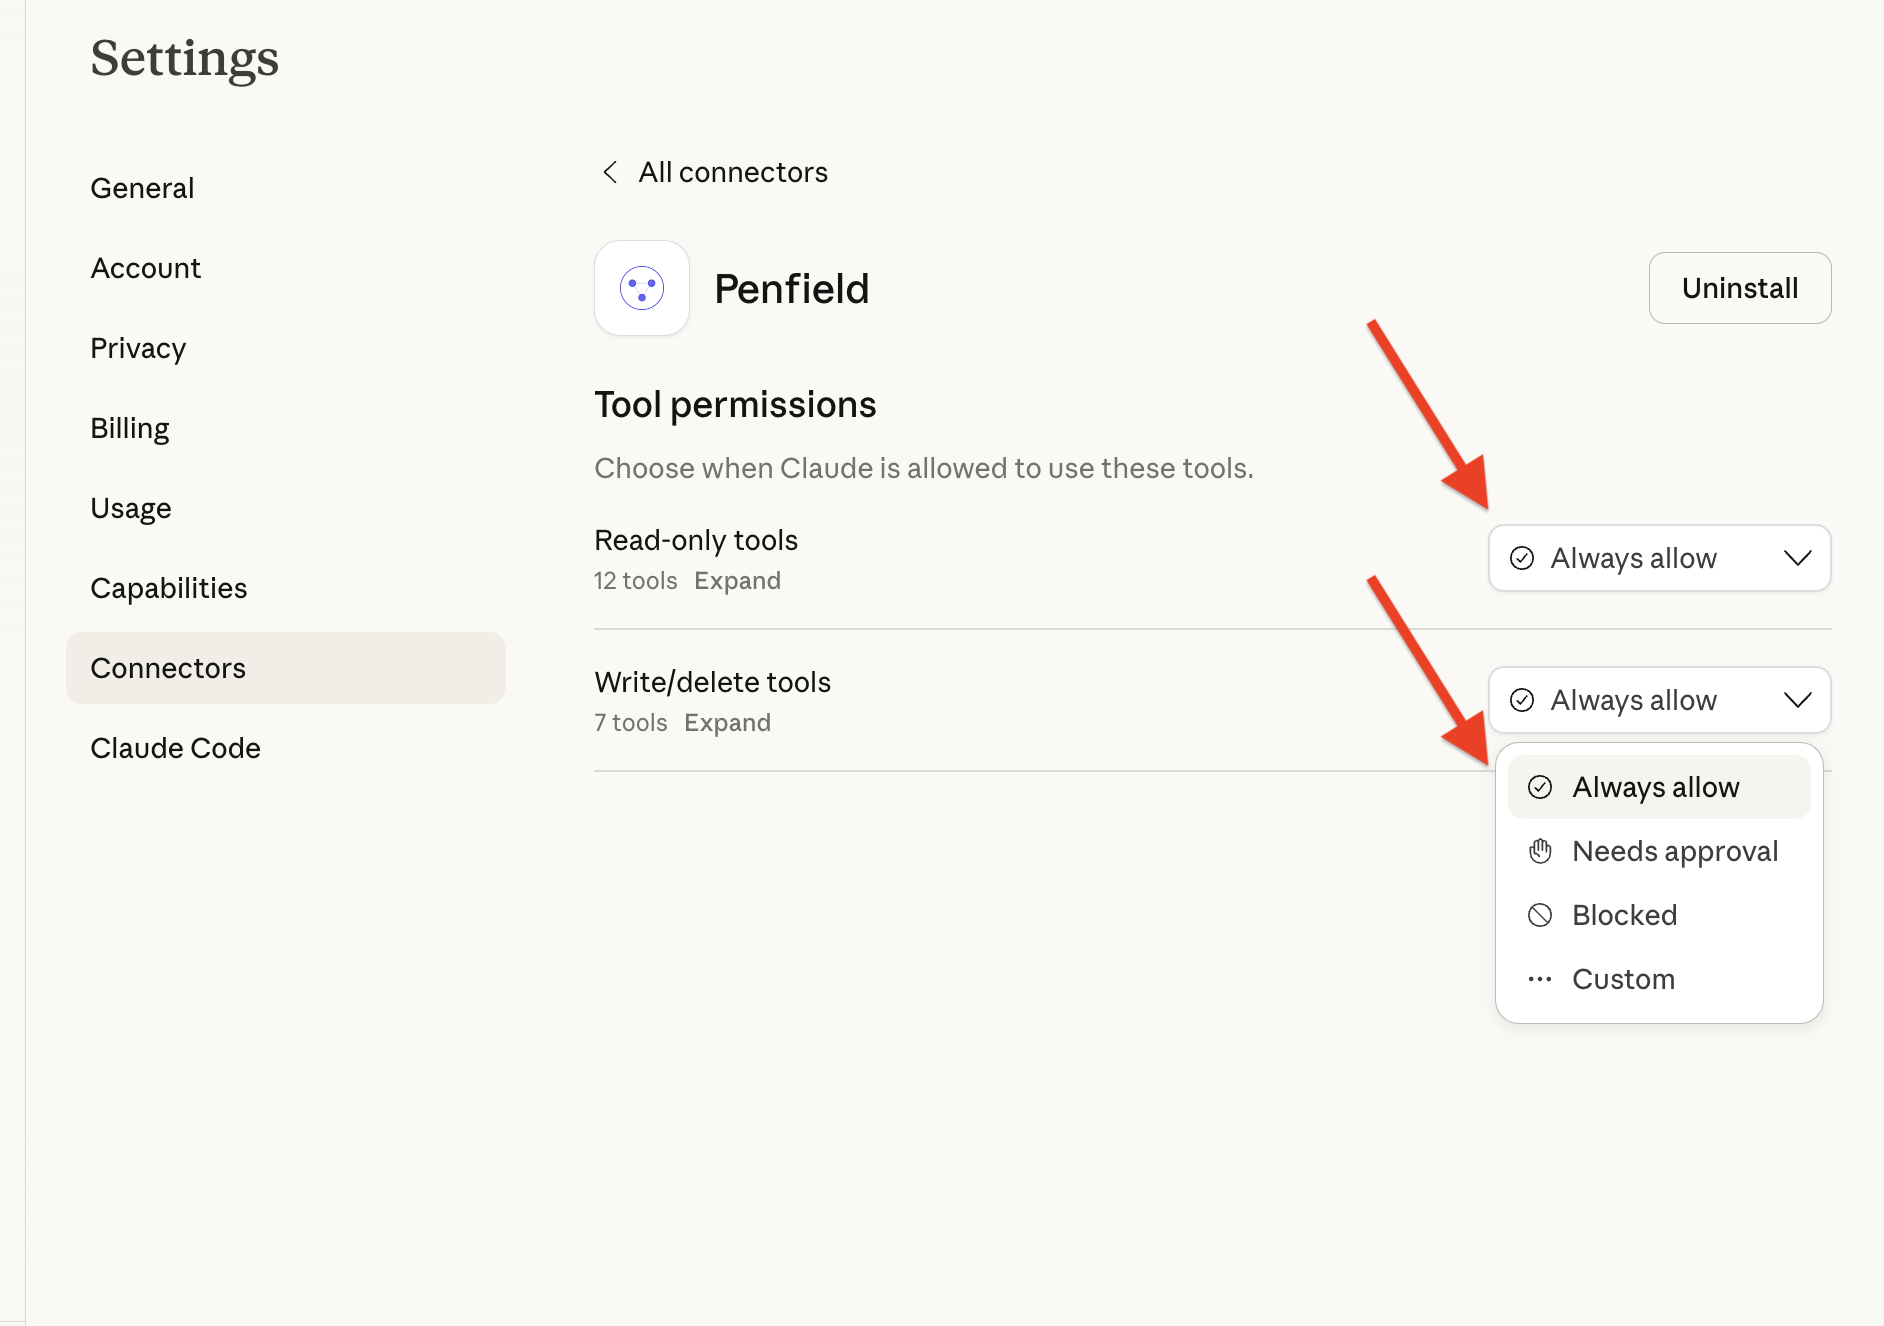
When Claude requests permission to use Penfield tools, select Always allow to enable seamless integration.
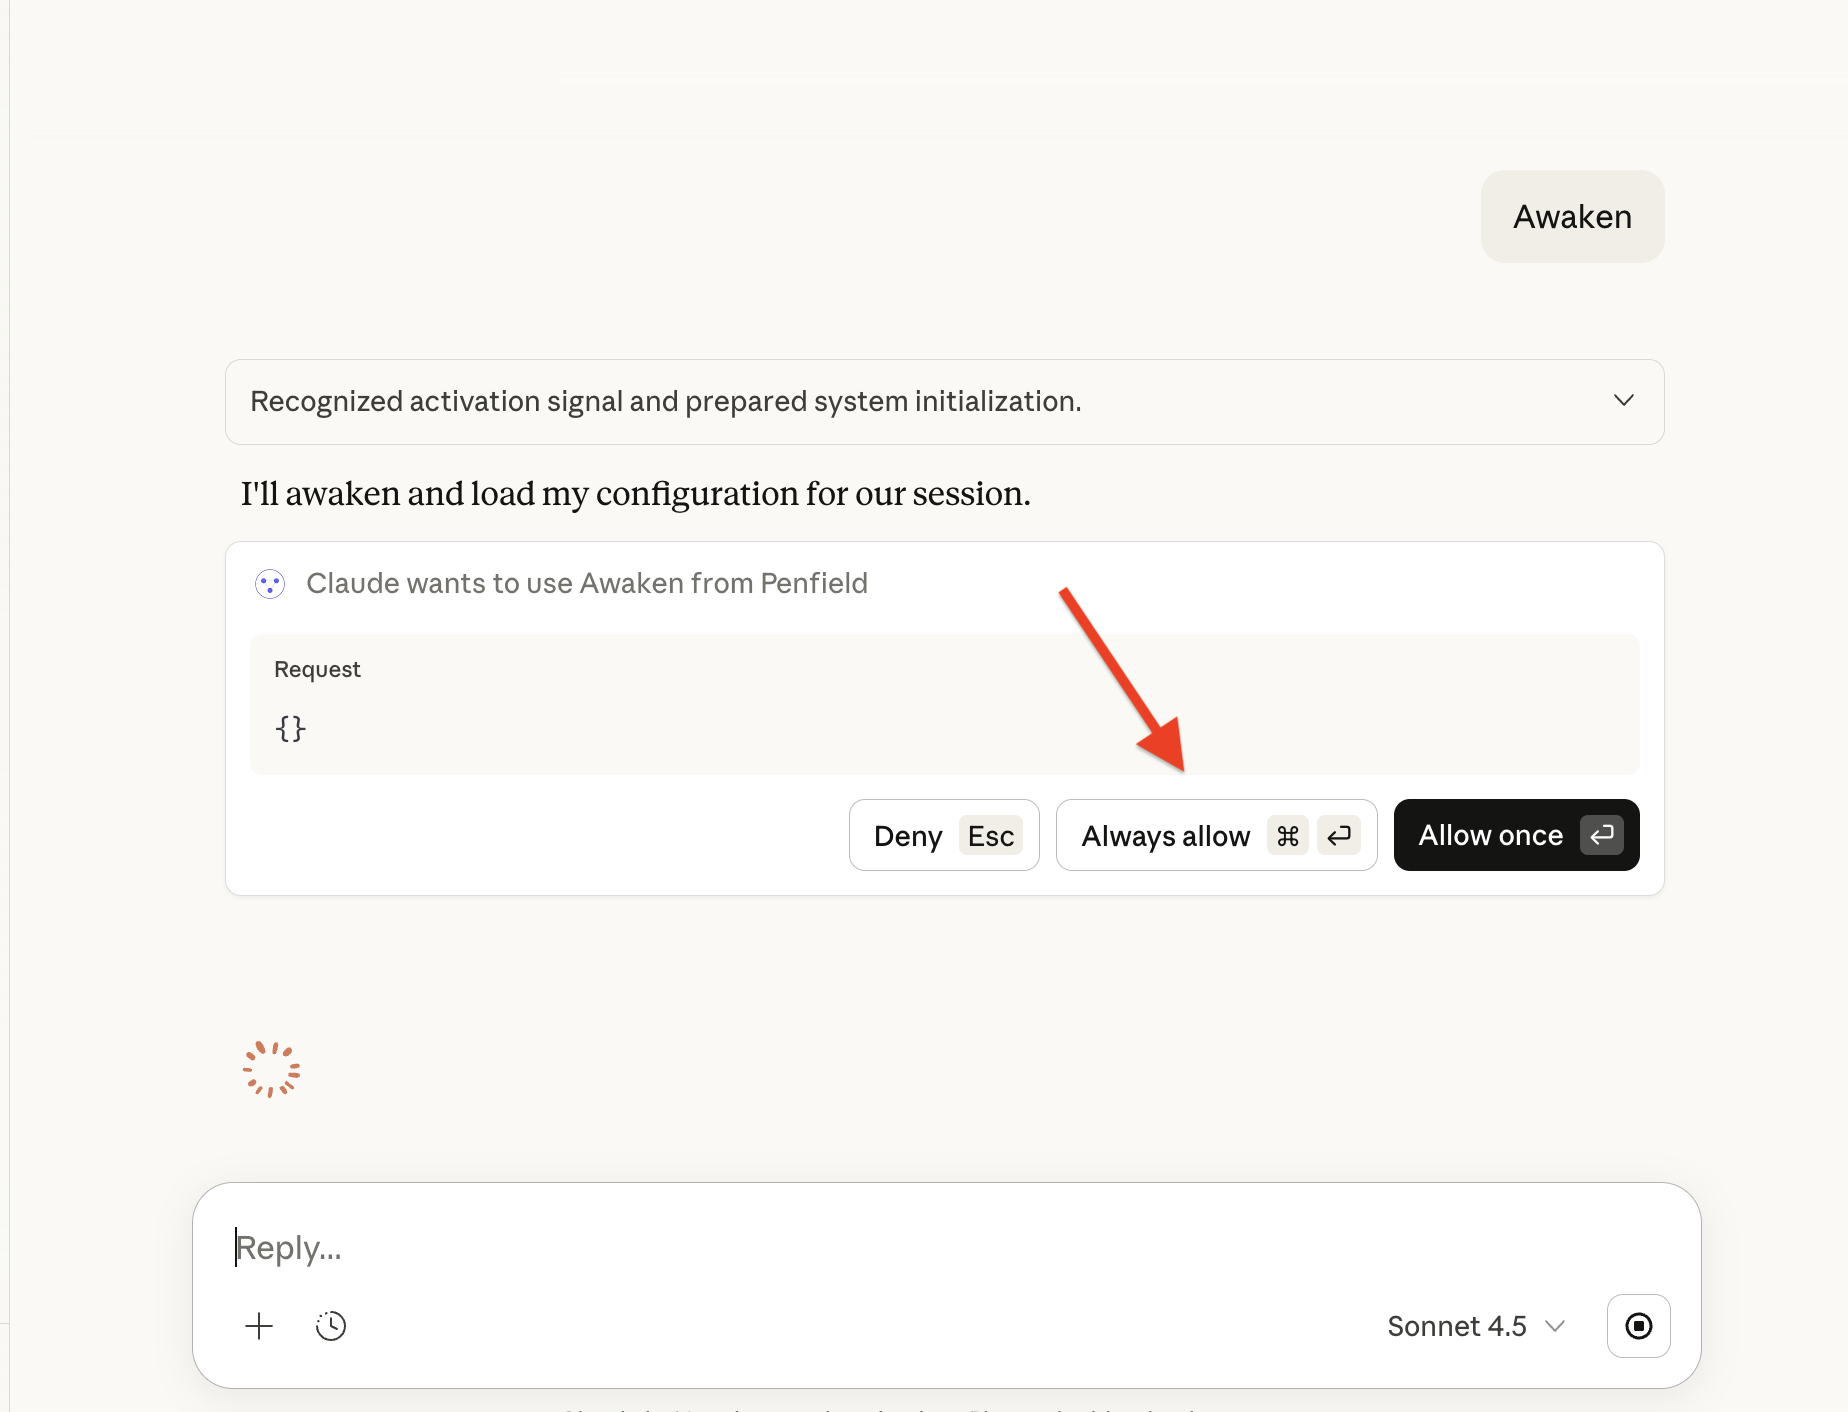
You can also manage tool permissions in Settings > Connectors > Penfield.
Usage Tips
- Start each new conversation with "Penfield Awaken" to load your Penfield configuration
- Extended thinking mode is recommended for most tasks
- Custom styles — Ask your Penfield assistant to develop, save, and recall writing styles
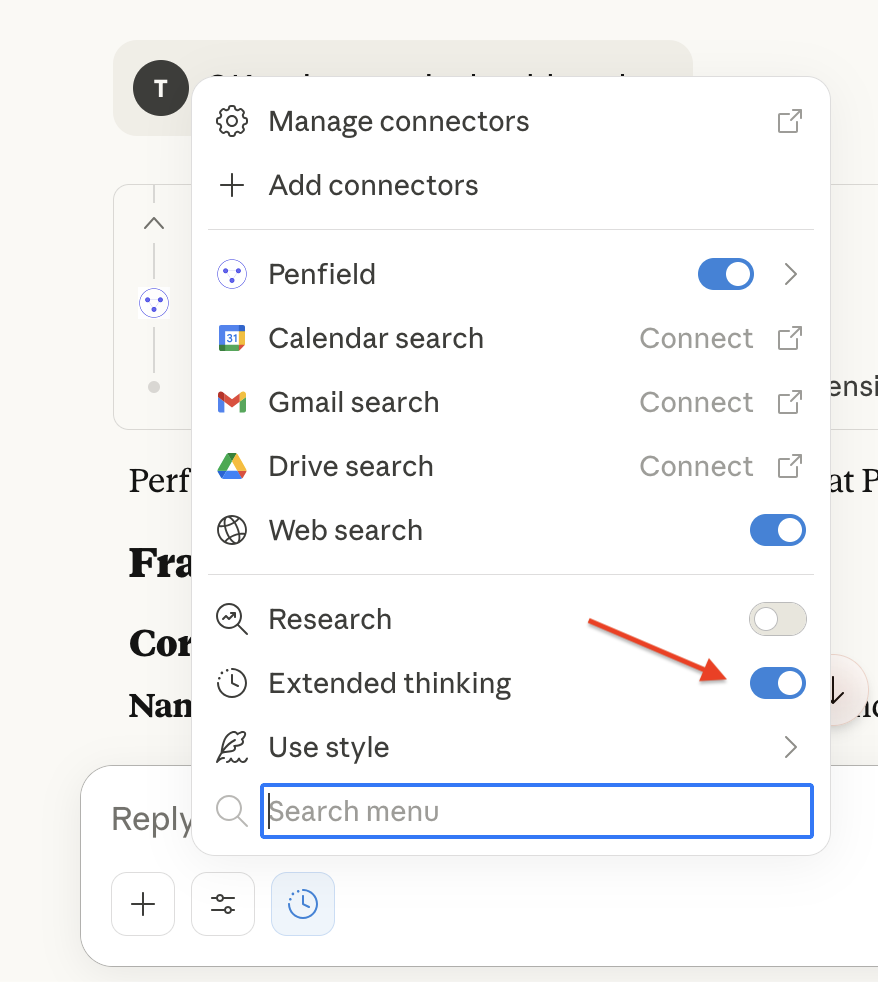
Note: The "Use style" and "Research" features in Claude may affect your assistant's personality. Feel free to use them, but be aware that your agent's personality may be affected. You can restore the original personality by disabling "Use style" and "Research".
Troubleshooting
If you encounter issues, see the Reconnecting to Penfield guide.
For additional support, contact [email protected].